 荒岛
荒岛
这篇文章记录下将本地部署的CrowdSec接入到CrowdSec Web UI以获取更多实用的功能:
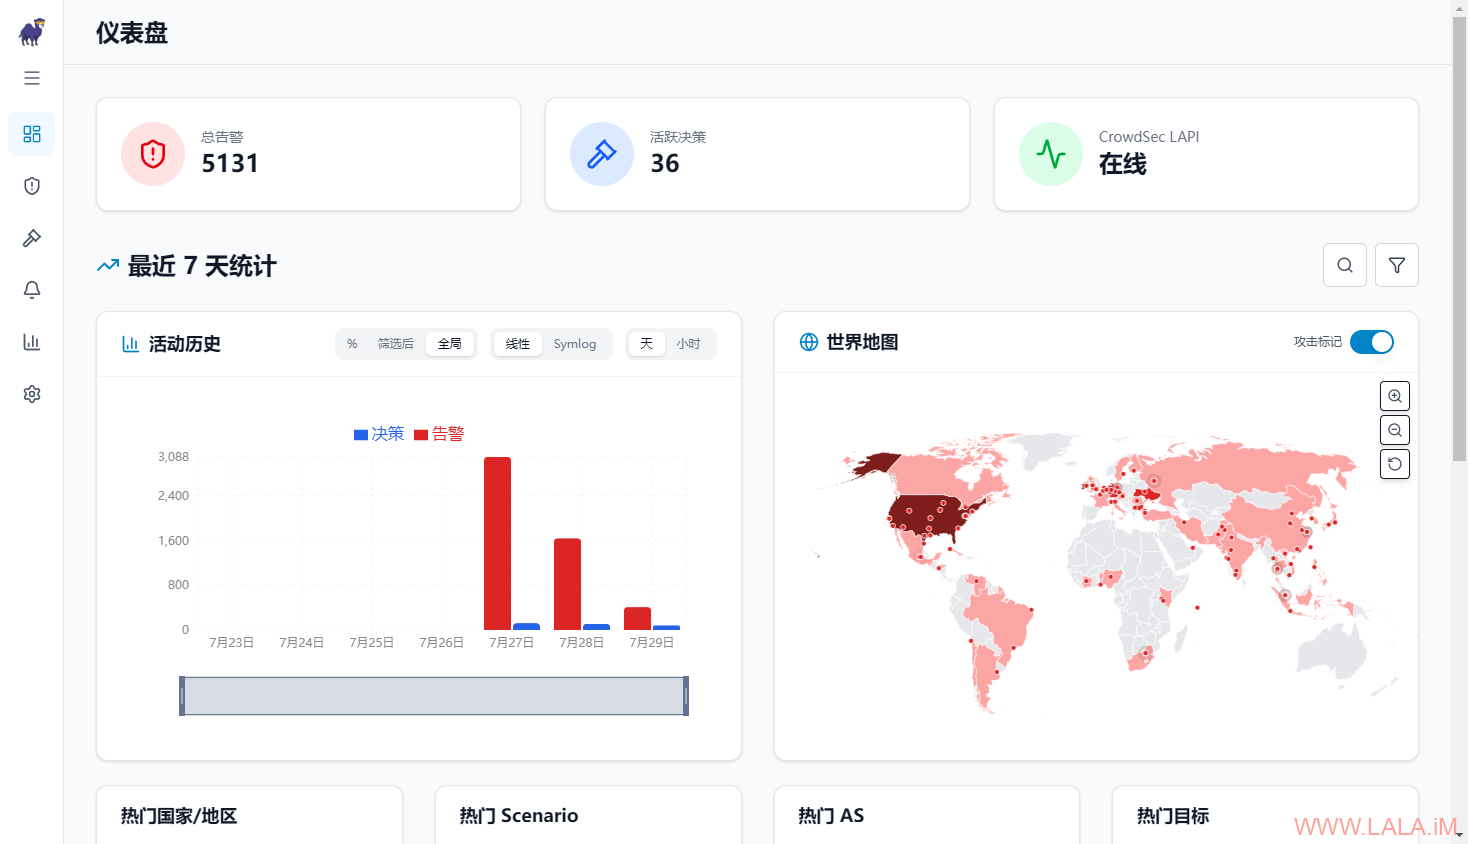
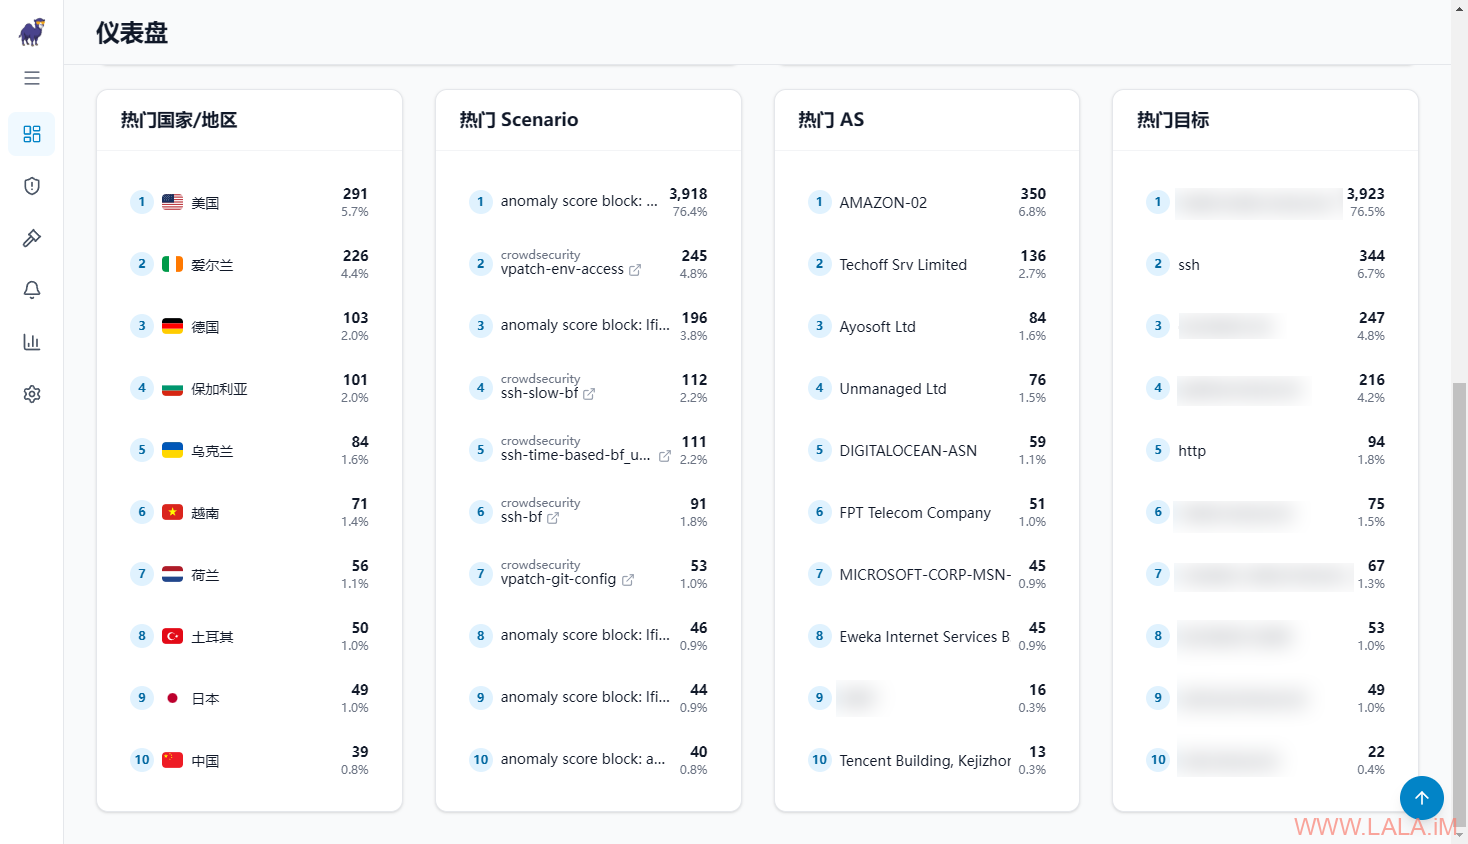
- 仪表板:警报和决策总数、攻击地图、快速筛选器等
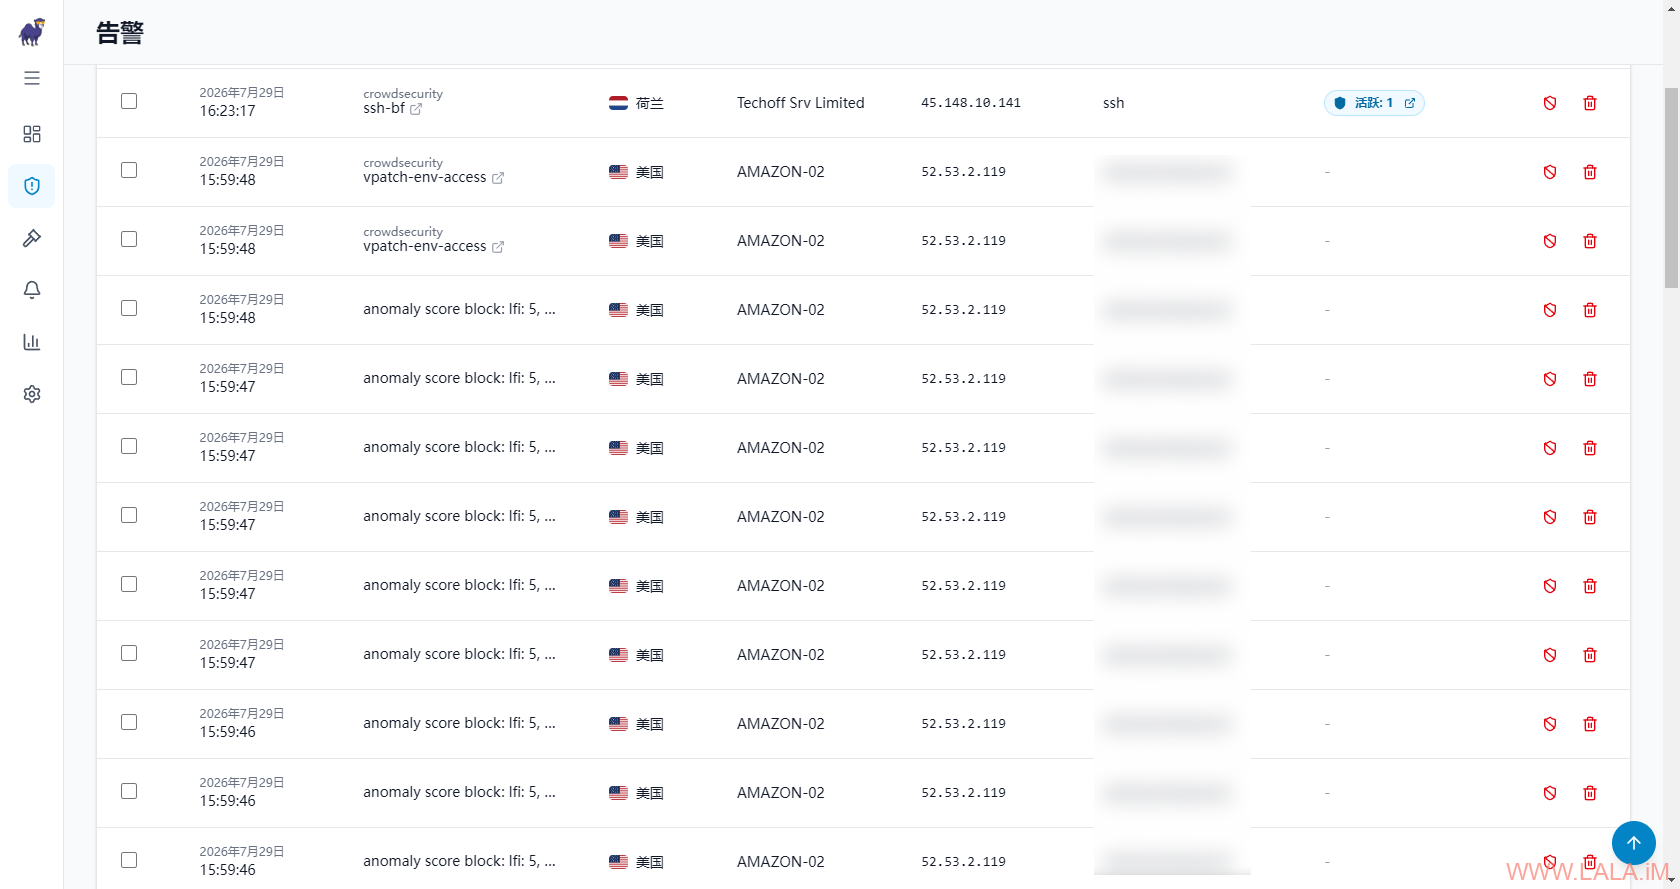
- 警报:查看历史记录、CrowdSec告警上下文、IP/AS/位置详情、事件元数据等
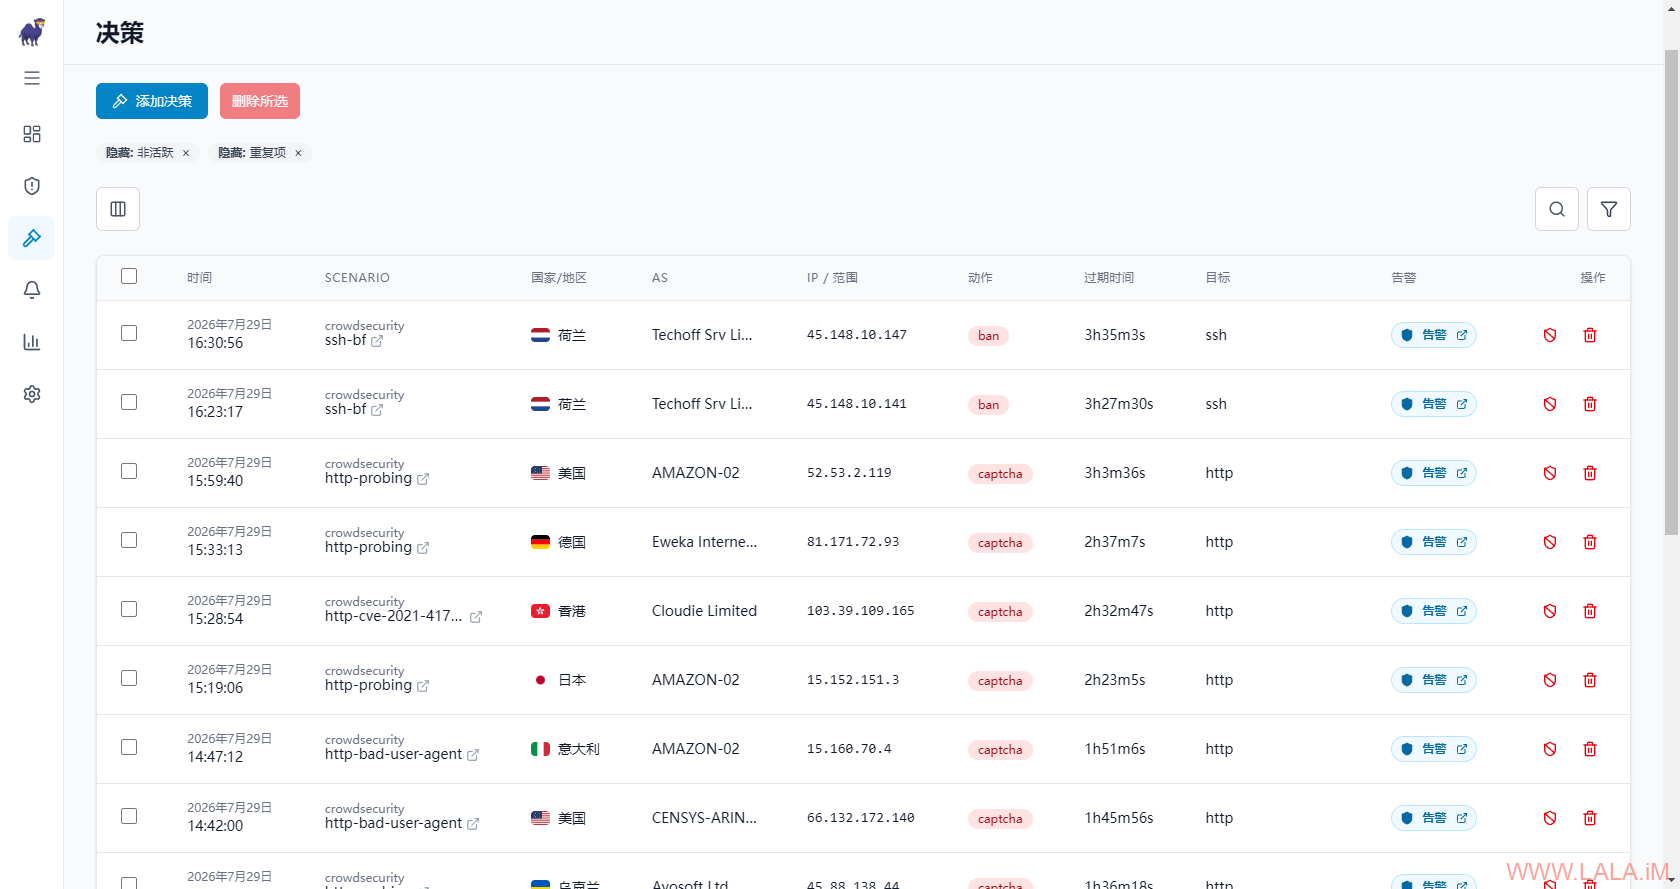
- 决策:查看生效和失效的决策、重复项隐藏、添加手动封禁决策、自定义持续时间、删除决策操作等
- 多实例:多个CrowdSec LAPI、每个实例的视图以及仪表板
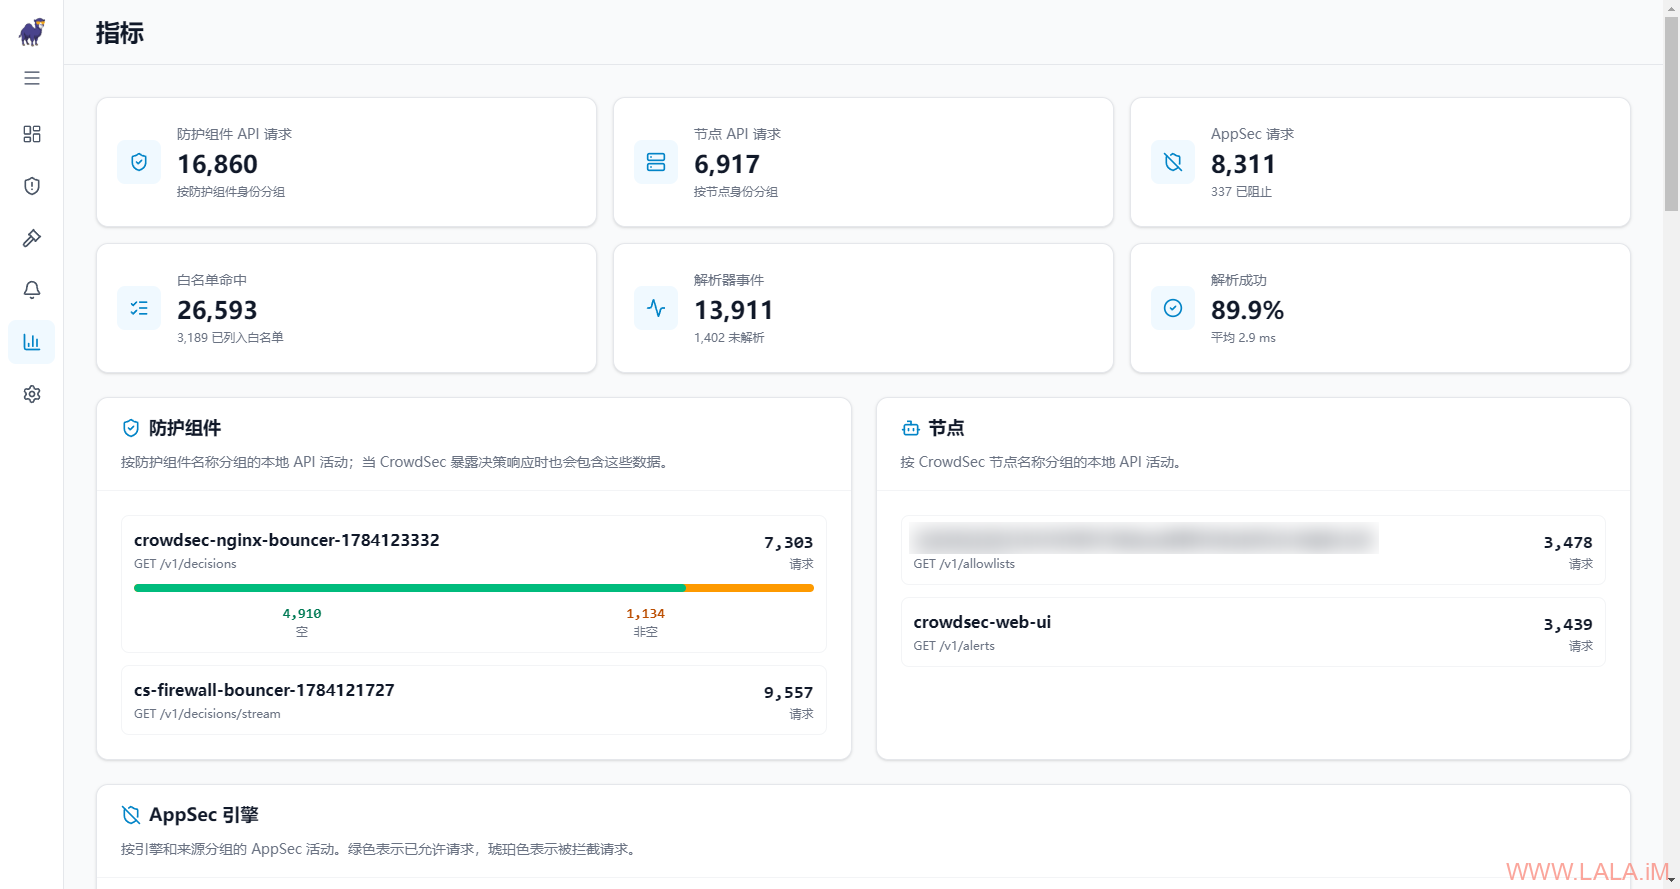
- 指标:可选的Prometheus视图,查看CrowdSec运行时的各项指标数据
- 通知:通过电子邮件、Gotify、MQTT、ntfy或Web hooks发送警报、决策、CVE、可用性等
- 多语言:阿拉伯语、中文、英语、法语、德语、印地语、日语、葡萄牙语、俄语和西班牙语
由于CrowdSec LAPI的限制,此Web UI能做的事情(实现的功能)其实不多,更多的是一个数据可视化的作用,除此之外,还可以管理一下决策和警报,就不用每次都去使用cscli这个CLI工具了,但其它的操作还是得用cscli,所以并不是装上这个Web UI就完全不用了解CrowdSec了,至少得入个门,入门看看我这篇文章就可以了。
安装NGINX、CertBot、Docker:
apt update
apt install curl nginx python3-certbot-nginx
curl -fsSL https://get.docker.com -o get-docker.sh
sh get-docker.sh
生成一个足够复杂的密码:
openssl rand -hex 32使用刚生成的密码创建LAPI的登录凭据:
cscli machines add crowdsec-web-ui --password 'replace-with-generated-password' -f /dev/null请注意一定要加上-f /dev/null,否则它将替换掉/etc/crowdsec/local_api_credentials.yaml文件内的默认凭据。
新建compose文件:
mkdir /opt/crowdsec-web-ui && cd /opt/crowdsec-web-ui && nano docker-compose.yml由于我的CrowdSec是部署在服务器本地的(没有使用Docker),所以与CrowdSec Web UI对接的方案有多种,这里我会全部写下来,至于你选择用哪一种那就不是我能决定的事情了。
1.直接让crowdsec-web-ui容器使用主机网络(Host Network)这种是最简单的,因为不需要修改CrowdSec的配置:
services:
  crowdsec-web-ui:
    image: ghcr.io/theduffman85/crowdsec-web-ui:latest
    container_name: crowdsec_web_ui
    network_mode: "host"
    environment:
      CONFIG_SERVER_PORT: 3002
      CONFIG_INSTANCE_METRICS_URL: http://127.0.0.1:6060/metrics
      CONFIG_INSTANCE_LAPI_URL: http://127.0.0.1:8088
      CONFIG_INSTANCE_LAPI_AUTH_USERNAME: crowdsec-web-ui
      CONFIG_INSTANCE_LAPI_AUTH_PASSWORD:
    volumes:
      - ./data:/app/data
restart: unless-stopped1.crowdsec-web-ui默认使用3000端口,但3000端口是一个常用端口,已经被我服务器上的其它程序占用了,所以这里我改成了3002端口。因使用的是主机网络,所以不存在端口映射,只能修改程序自身运行的端口,依靠程序自带的环境变量CONFIG_SERVER_PORT实现。
2.之所以说这种配置是最简单的原因是,CrowdSec的LAPI默认就是监听在127.0.0.1的,且两者都在同一个网络中了,所以无论是CONFIG_INSTANCE_LAPI_URL还是CONFIG_INSTANCE_METRICS_URL都直接配置成127.0.0.1就行了。还有CrowdSec的信任IP配置默认就是信任127.0.0.1的。
启动:
docker compose up -d2.使用host.docker.internal:host-gateway:
services:
  crowdsec-web-ui:
    image: ghcr.io/theduffman85/crowdsec-web-ui:latest
    container_name: crowdsec_web_ui
    ports:
      - "3002:3002"
    extra_hosts:
      - "host.docker.internal:host-gateway"
    environment:
      CONFIG_SERVER_PORT: 3002
      CONFIG_INSTANCE_METRICS_URL: http://host.docker.internal:6060/metrics
      CONFIG_INSTANCE_LAPI_URL: http://host.docker.internal:8088
      CONFIG_INSTANCE_LAPI_AUTH_USERNAME: crowdsec-web-ui
      CONFIG_INSTANCE_LAPI_AUTH_PASSWORD:
    volumes:
      - ./data:/app/data
    restart: unless-stopped
这种方案必须修改CrowdSec的主配置文件:
nano /etc/crowdsec/config.yaml将LAPI监听改为0.0.0.0并配置信任IP:
api:
  server:
    log_level: info
    listen_uri: 0.0.0.0:8088
    trusted_ips: # IP ranges, or IPs which can have admin API access
      - 127.0.0.1
      - ::1
- 172.16.0.0/12 # 信任Docker默认的桥接网络1.host.docker.internal:host-gateway本质是往容器的操作系统里面写了一个Hosts,指向的是宿主机Docker默认的桥接网络的网关IP,CrowdSec如果只监听127.0.0.1,host.docker.internal也无法访问。
2.必须将crowdsec-web-ui容器的源IP地址(最好是其Docker网络的CIDR)添加到CrowdSec的信任IP配置中。这不是你浏览器的IP地址或Docker主机的公网IP地址。如果没有此配置,决策操作仍可正常工作,但警报删除操作会失败并报错:403 Forbidden。
3.这方案有一点好处就是,在你配置反向代理后,可以将端口映射改为:
ports:
  - "127.0.0.1:3002:3002"
这可以保证crowdsec-web-ui只能通过NGINX反向代理访问,且在你部署了crowdsec-nginx-bouncer时能够为crowdsec-web-ui提供保护。如果不这样配置,你的crowdsec-web-ui相当于裸奔在公网,既没有TLS也没有受到crowdsec-nginx-bouncer保护。这方案也有缺点,那就是将CrowdSec LAPI暴露在公网了,虽然LAPI是必须要鉴权的,但原本只监听在127.0.0.1肯定是最安全的,假设哪一天CrowdSec自身曝了个洞这些也说不准。
重启CrowdSec使新的配置生效:
systemctl restart crowdsec启动:
docker compose up -d新建NGINX站点配置文件:
nano /etc/nginx/sites-available/crowdsec-webui写入如下内容:
server {
    listen 80;
    server_name crowdsec-webui.example.com;
    client_max_body_size 0;

    location / {
        proxy_pass http://127.0.0.1:3002/;
        proxy_http_version 1.1;
        proxy_set_header Host $host;
        proxy_set_header X-Forwarded-Host $http_host;
        proxy_set_header X-Real-IP $remote_addr;
        proxy_set_header X-Forwarded-For $proxy_add_x_forwarded_for;
        proxy_set_header X-Forwarded-Proto $scheme;
        proxy_set_header Upgrade $http_upgrade;
        proxy_set_header Connection "upgrade";
    }
}
启用站点:
ln -s /etc/nginx/sites-available/crowdsec-webui /etc/nginx/sites-enabled/crowdsec-webui访问crowdsec-webui.example.com创建一个管理员账户就可以登录了,看下效果。
仪表板:
告警:
决策:
指标: