
理论上这个安装方法适用于任何独立服务器,vps。只要原系统是使用grub2引导的即可。这里我在kimsufi独服上进行演示。
实际上这篇文章介绍的方法和我之前写过的几篇用preseed文件自动安装debian的方法大同小异,只不过之前是配置一份完整的preseed文件,所有安装过程中的配置都由preseed来操作。而通过网络控制台的话,大部分安装过程中的配置都是由我们手动来完成了,比如硬盘分区,配置lvm,组raid这类。
为啥不写一份完整的preseed文件来全自动操作呢?因为太麻烦啊,比如组raid这种设置就非常不好在preseed里面配置,稍微哪个地方出了点问题就得重来一遍,还不如直接用ssh连接上去手动配置来的快。。
这里我演示一下dhcp和配置静态地址两种安装方法,个人建议优先使用静态地址。
如果使用静态地址来配置,使用下面的命令找到机器的各项网络信息:
ip a // 查看本机公网ipv4
ip route list // 查看ipv4网关
ip -6 a // 查看本机ipv6
ip -6 route list // 查看ipv6网关
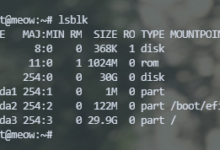
如果是dhcp就不用管这些了。接下来查看机器的挂载信息和uuid:
lsblk // 查看挂载信息
blkid // 查看块设备的uuid
这里需要的uuid是指挂载到根目录的设备,比如你有一个/dev/md0的raid阵列挂载到/那么就是需要这个/dev/md0的uuid。
如果还是不明白,可以看下这篇文章里面的截图:
接下来下载debian的initrd:
cd /boot
wget http://deb.debian.org/debian/dists/bullseye/main/installer-amd64/current/images/netboot/debian-installer/amd64/initrd.gz
wget http://deb.debian.org/debian/dists/bullseye/main/installer-amd64/current/images/netboot/debian-installer/amd64/linux
解压initrd.gz:
gunzip initrd.gz
新建preseed配置文件:
nano preseed.cfg
对于使用静态地址,写入如下配置,注意修改ip/子网掩码/网关:
d-i debian-installer/locale string en_US

d-i keyboard-configuration/xkb-keymap select us

d-i netcfg/choose_interface select auto
d-i netcfg/disable_autoconfig boolean true
d-i netcfg/dhcp_failed note
d-i netcfg/dhcp_options select Configure network manually
d-i netcfg/get_ipaddress string xx.xx.xx.xx // 机器的ipv4
d-i netcfg/get_netmask string xx.xx.xx.xx // 子网掩码
d-i netcfg/get_gateway string xx.xx.xx.xx // 网关地址
d-i netcfg/get_nameservers string 8.8.8.8 // dns服务器
d-i netcfg/confirm_static boolean true

d-i netcfg/get_hostname string unassigned-hostname
d-i netcfg/get_domain string unassigned-domain
d-i netcfg/hostname string imlala

d-i mirror/country string manual
d-i mirror/http/hostname string deb.debian.org
d-i mirror/http/directory string /debian
d-i mirror/http/proxy string

d-i anna/choose_modules string network-console
d-i network-console/password password password // 控制台密码
d-i network-console/password-again password password // 再设置一遍控制台密码
对于使用dhcp,写入如下配置:
d-i debian-installer/locale string en_US

d-i keyboard-configuration/xkb-keymap select us

d-i netcfg/choose_interface select auto

d-i netcfg/get_hostname string unassigned-hostname
d-i netcfg/get_domain string unassigned-domain
d-i netcfg/hostname string imlala

d-i mirror/country string manual
d-i mirror/http/hostname string deb.debian.org
d-i mirror/http/directory string /debian
d-i mirror/http/proxy string

d-i anna/choose_modules string network-console
d-i network-console/password password password // 控制台密码
d-i network-console/password-again password password // 再设置一遍控制台密码
建议在配置的时候去掉上面写的注释,以免遇到一些奇怪的问题。
把preseed文件内嵌到initrd:
echo preseed.cfg | cpio -H newc -o -A -F initrd
重新压缩initrd:
gzip initrd
新建grub2菜单:
nano /etc/grub.d/40_custom
写入如下配置,注意替换设备的uuid:
menuentry 'debian install' {
    insmod gzio
    insmod diskfilter
    insmod part_gpt
    insmod mdraid1x
    search --no-floppy --fs-uuid --set=root 485d9537-2cf8-45c5-b4eb-9bee1b92f1e4
    linux /boot/linux
    initrd /boot/initrd.gz
}
更新grub2并配置下一次重启使用刚才新建的菜单来引导:
update-grub
grub-reboot "debian install"
如果是rh系的系统,centos/rockylinux等等,使用下面的命令来配置grub2:
grub2-mkconfig -o /boot/grub2/grub.cfg
grub2-reboot "debian install"
重启机器:
systemctl reboot
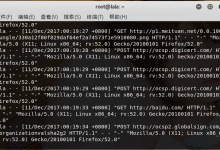
等待片刻,使用xshell登录,登录的用户名是:installer,密码是之前在preseed文件里面设置的。
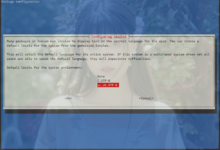
如果能够登录成功,并且看到这个界面说明一切正常:

选择start installer即可开始安装系统,正常情况下会直接来到设置root密码的界面,因为之前的配置都由pressed帮我们做了。
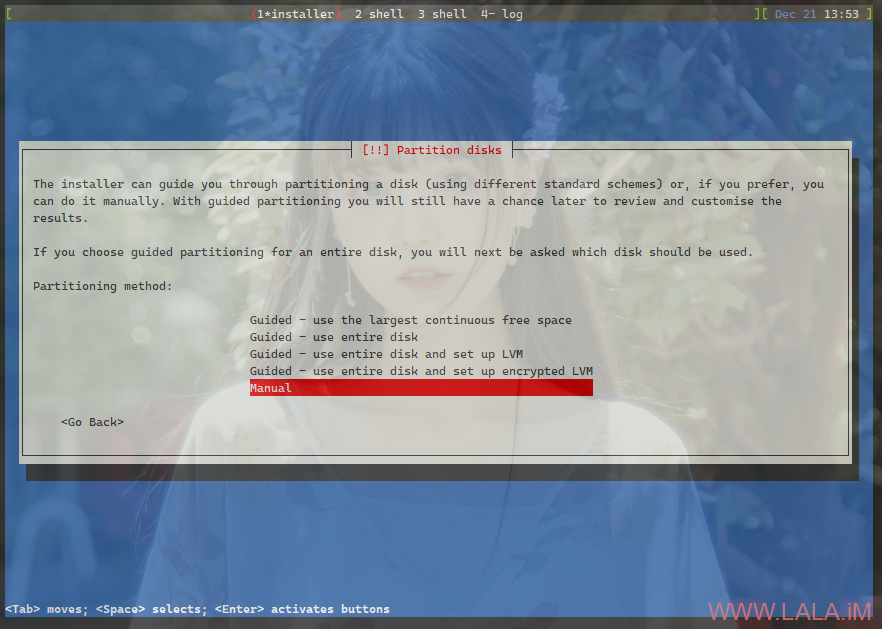
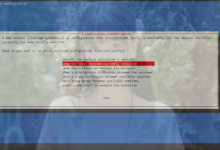
这里我也省略一大坨安装过程中的设置,直接来到比较关键的硬盘分区和组raid界面。在这里选择手动:
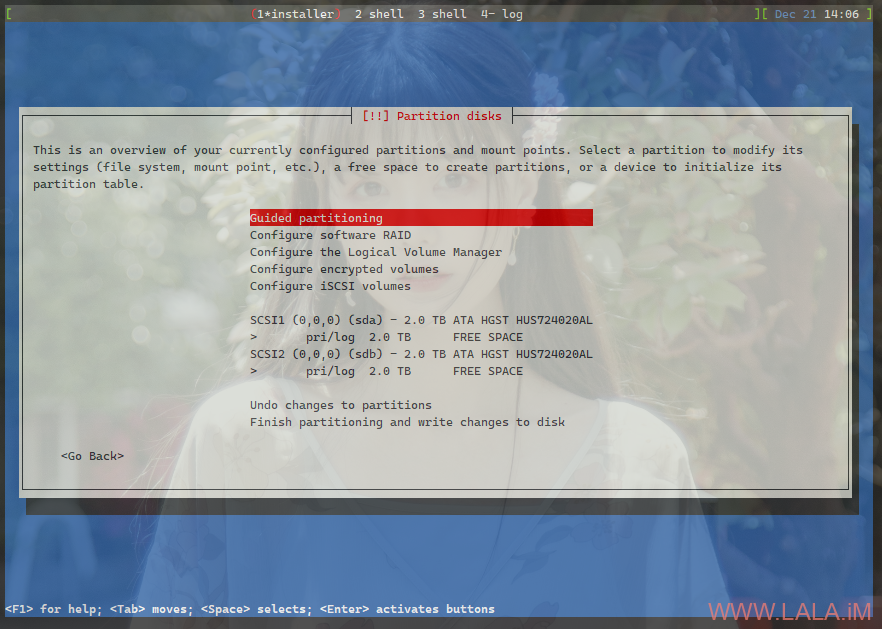
在这里删除原本系统上所有的分区和raid,删除的方法或者说顺序是,有raid阵列先删raid阵列,有lvm就先删lvm,删完这些东西后再删硬盘上面的分区,比如下面这张图:

有一个raid1的阵列,那就先选中这个raid1阵列删除。删完这个raid1阵列后你才能删除/dev/sda以及/dev/sdb上面的其他分区,要删除这些分区就选择那一块硬盘按提示来操作即可。
最终2块干净的硬盘如图所示:
接下来你可以选择是组raid还是直接分区或者是配置lvm,这些按你自己的需求来即可,这里我组了一个raid0,最终的配置如下:

这里提醒一下:
这个debian的分区和opensuse的分区有点区别,默认情况下opensuse的安装程序是直接用gpt来分区,而debian的安装程序会检测你的机器信息,如果是bios引导且硬盘小于等于2tb那么就用dos分区,如果是uefi或者硬盘大于2tb才会用gpt。
所以这里由于我这台kimsufi的服务器是bios引导再加上2块硬盘都是2tb,那么debian在这里就用的是dos分区,也就不需要创建bios boot partition分区。
如果你的机器是bios引导且硬盘大于2tb,那么这里就一定要创建bios boot partition分区,否则grub将无法正常安装。
省略一大坨安装过程中的设置步骤,安装到这里的时候,对于服务器而言,记得取消安装桌面环境,只安装一个ssh服务即可:

下面是系统装好后的一些基本配置。
debian安装的ssh服务,默认是不允许直接用root用户登录的。你只能先用安装时创建的普通用户登录。
登录到普通用户后,通过下面的命令来提升权限:
su - root
接下来你可以安装sudo:
apt -y update
apt -y install sudo
把普通用户加入到sudo组:
adduser imlala sudo
退出终端重新登录使其生效,验证你的sudo配置,直接切换到root用户:
sudo -i
或者通过sudo来执行特权命令:
sudo apt -y update
也可以修改ssh配置文件允许root登录:
nano /etc/ssh/sshd_config
将这一行的配置:
#PermitRootLogin prohibit-password
修改为:
PermitRootLogin yes
重启sshd服务:
systemctl restart sshd
配置ipv6,编辑网卡配置文件:
nano /etc/network/interfaces
一个示例配置,用你之前查看到的网络信息替换eno1 inet6的内容:
# This file describes the network interfaces available on your system
# and how to activate them. For more information, see interfaces(5).

source /etc/network/interfaces.d/*

# The loopback network interface
auto lo
iface lo inet loopback

# The primary network interface
allow-hotplug eno1
iface eno1 inet static
        address xx.xx.xx.xx/24
        gateway xx.xx.xx.xx
        # dns-* options are implemented by the resolvconf package, if installed
        dns-nameservers 8.8.8.8
        dns-search unassigned-domain

iface eno1 inet6 static
        address 2001:41d0:x:xxxx::1/56
        gateway 2001:41d0:x:xxff:ff:ff:ff:ff
重启网络服务:
systemctl restart networking
在ssh内重启debian的网络服务大概率机器会失联,没关系这是debian的问题,如果你的配置是没问题的,重启一下机器就好了。在这一点上suse的yast2就比较好用。。
最后就只当是吐槽一下配置中遇到的坑了,debian这个网络控制台的配置。。这个控制台必须是在preseed内配置了软件源之后才会启用,我也是在虚拟机内测试后才发现的,如果不配置软件源的话,开机会卡在配置软件源的界面就无法继续下一步了,机器这个时候的ssh也是连不上的。另外就是ssh登录的用户名,我在google搜了半天才知道是installer。。
非常感谢这篇文章最后的部分让我知道了用户名是什么:https://sleeplessbeastie.eu/2015/10/12/how-to-install-debian-remotely/


能不能 安装 centos 7 系统呢?