debian11的默认内核不支持ktls,得自己先编译个内核。
这里我就编译www.kernel.org上面的stable版本了,目前的stable版本是6.3.3。
安装编译所需的依赖:
apt -y update
apt -y install build-essential libncurses-dev libssl-dev libelf-dev bison bc flex
下载源代码解压:
cd /usr/local/src
wget https://cdn.kernel.org/pub/linux/kernel/v6.x/linux-6.3.3.tar.xz
tar -xvf linux-6.3.3.tar.xz
cd linux-6.3.3/
复制默认内核的配置:
cp /boot/config-$(uname -r) .config
新的内核可能有一些新的配置选项,执行下面的命令把所有的选项全部设置成默认值:
make olddefconfig
然后再打开配置菜单,根据自己的需要来详细修改:
make menuconfig
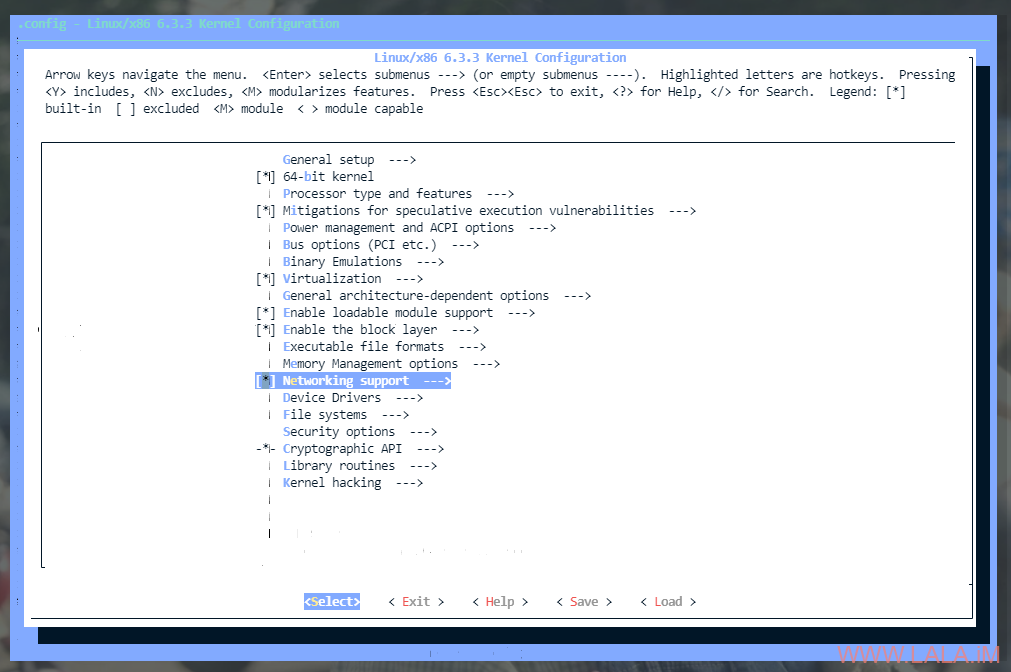
这里我们需要启用ktls的话,先找到Networking support:
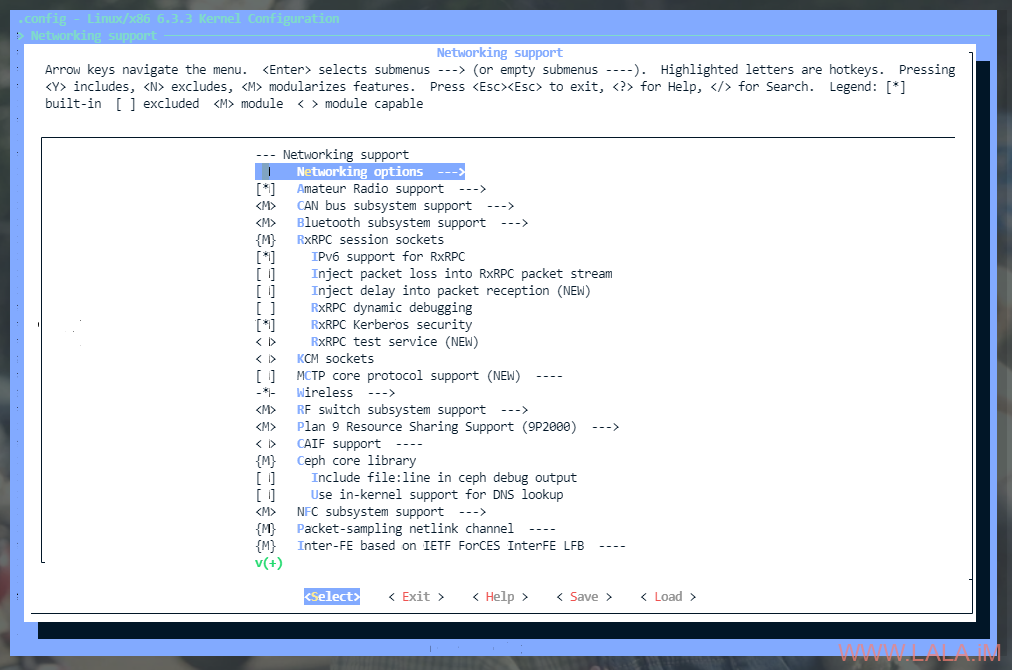
选择Networking options:
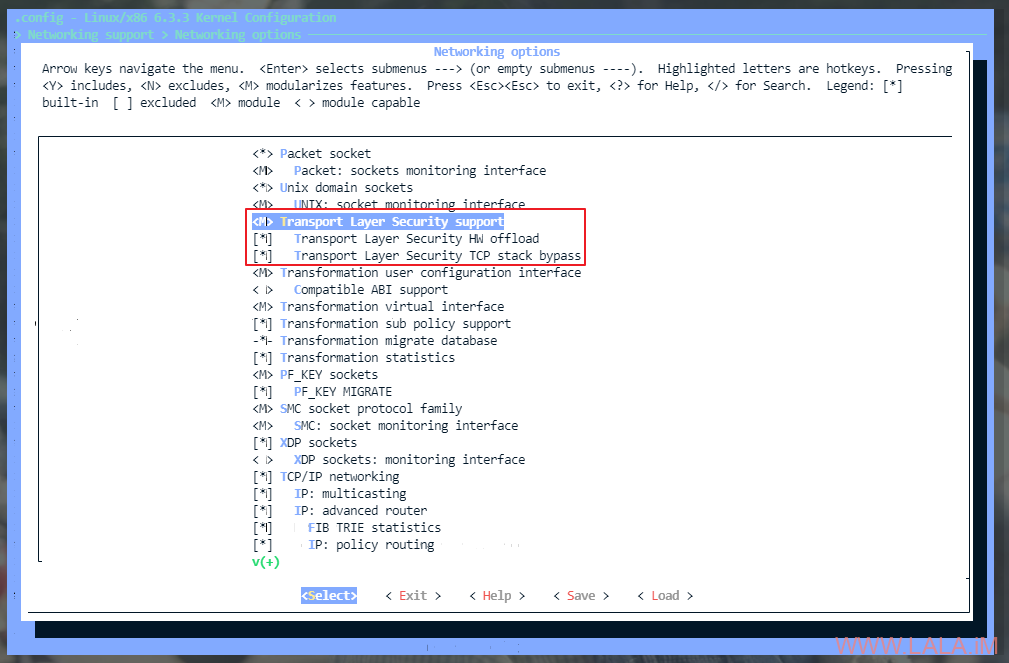
这里就可以看到ktls的配置选项了,*是直接构建到内核,M是构建成模块,我这里就构建成模块了:
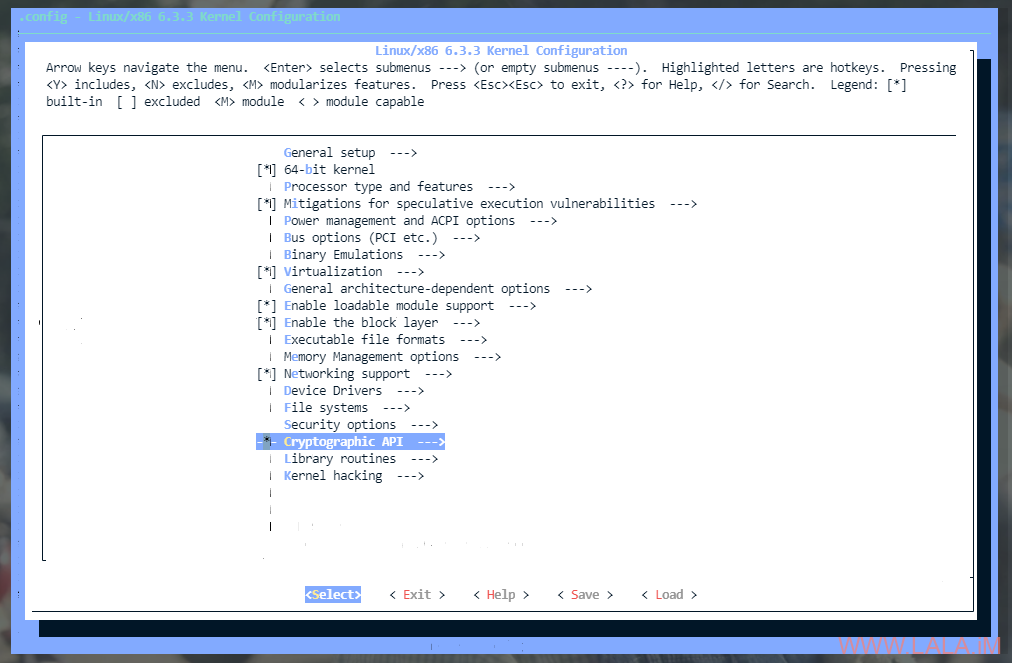
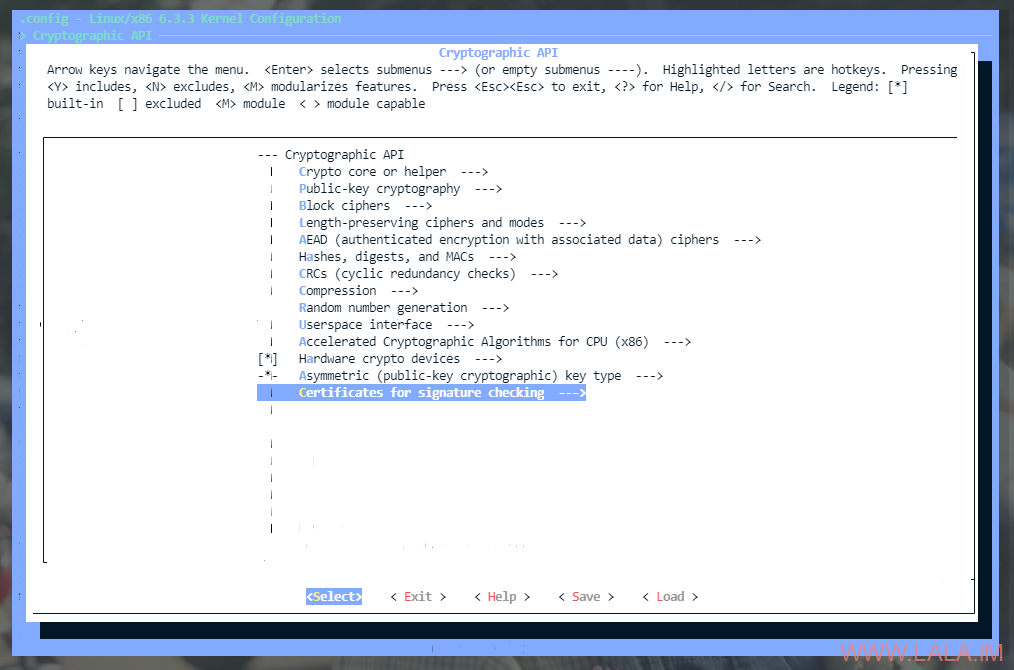
为了后续编译能顺利完成,还需要修改一下配置,找到Cryptographic API:
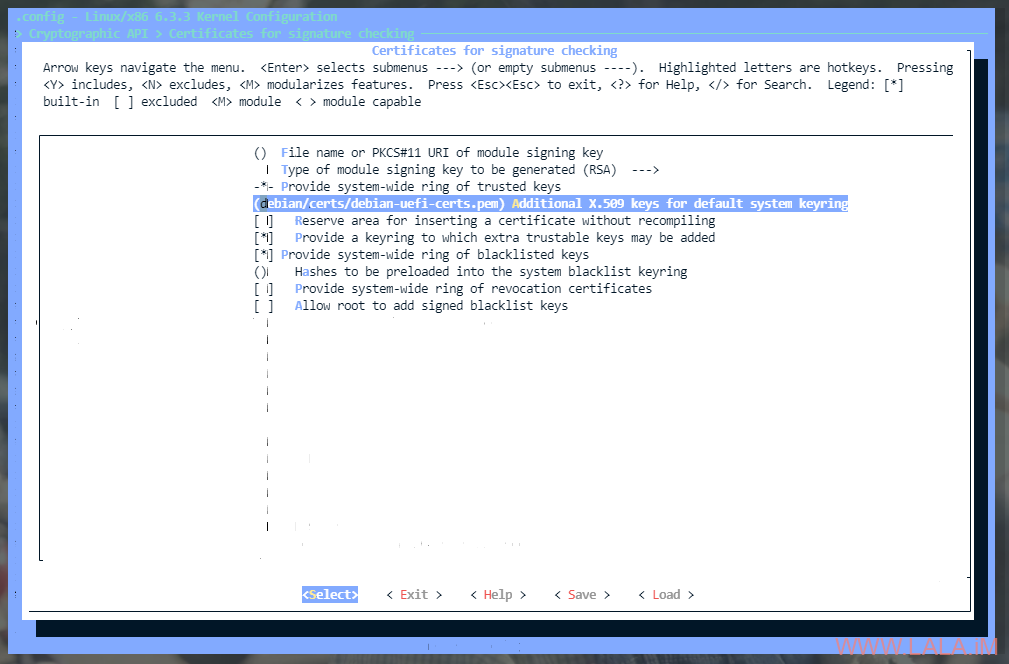
找到Certificates for signature checking:
找到debian/certs/debian-uefi-certs.pem:
删掉这个配置,里面留空就行了:
做完这些修改后记得保存配置。接下来就可以构建deb包了:
make bindeb-pkg
完成后在上级目录安装新的内核并重启:
cd ..
apt install ./linux-image-6.3.3_6.3.3-2_amd64.deb
apt install ./linux-headers-6.3.3_6.3.3-2_amd64.deb
systemctl reboot
检查机器的内核是否已经更换成功:
root@meow:~# uname -a
Linux meow 6.3.3 #2 SMP PREEMPT_DYNAMIC Mon May 22 21:08:37 CST 2023 x86_64 GNU/Linux
加载tls模块:
modprobe tls
如果要在系统启动的时候自动加载:
echo 'tls' | tee /etc/modules-load.d/tls.conf
查看模块是否加载成功,如有类似回显说明正常:
root@meow:~# lsmod | grep tls
tls    155648    0
现在先在系统内装上debian官方repo里面的nginx:
apt -y install nginx
然后停止运行:
systemctl stop nginx
我个人用习惯了debian官方repo里面的nginx,比如sites-available、sites-enabled这种vhost配置风格,以及自带的snippets配置文件。所以接下来我只会将编译好的nginx二进制文件做一个简单的替换。
现在来编译nginx,这里我选择nginx-quic分支里面的nginx。需要注意的是要让nginx使用上ktls不仅仅要内核支持,openssl库也得支持才行。
这里我选择quictls的库,因为nginx-quic支持http3,如果你用原版的openssl的话就不支持http3这个特性了,既要满足ktls的需求又要满足http3的需求,那目前用quictls的库是最佳选择。
克隆quictls项目代码:
cd /usr/local/src
git clone -b openssl-3.0.8-quic1 https://github.com/quictls/openssl.git
只需要克隆下来就行了,不用手动编译。
现在安装编译nginx所需的依赖:
apt build-dep nginx
克隆nginx项目代码:
apt -y install mercurial
cd /usr/local/src
hg clone -b quic https://hg.nginx.org/nginx-quic
cd nginx-quic/
配置:
./auto/configure \
`nginx -V 2>&1 | sed "s/ \-\-/ \\\ \n\t--/g" | grep "\-\-" | grep -ve opt= -e param= -e build=` \
--with-http_v3_module \
--with-stream \
--with-stream_ssl_module \
--with-stream_realip_module \
--with-stream_ssl_preread_module \
--with-openssl=../openssl \
--with-openssl-opt=enable-ktls \
--with-ld-opt="-static"
编译:
make
编译完成后会在objs目录下存放nginx的二进制文件,可以先尝试运行看看是否正常:
cd objs/
./nginx -V
用我们自己编译的nginx替换掉系统安装的nginx:
cp nginx /usr/sbin/nginx
重新启动nginx:
systemctl start nginx
为防止替换掉二进制文件后系统升级nginx,可以设置禁止系统升级nginx:
apt-mark hold nginx
配置站点支持ktls,编辑nginx的主配置文件:
nano /etc/nginx/nginx.conf
在http字段内加入如下配置,即可为所有的vhost默认启用ktls,如果你只想要单个vhost使用ktls,把下面的配置加到server字段内即可:
http {
...
    ...
    sendfile on;
    ssl_conf_command Options KTLS;
    ...
...
}
对于使用certbot来管理证书的情况,还需要修改密码套件以支持ktls:
nano /etc/letsencrypt/options-ssl-nginx.conf
支持ktls的密码套件如下:
ssl_ciphers "ECDHE-RSA-AES128-GCM-SHA256:ECDHE-RSA-AES256-GCM-SHA384:TLS_AES_128_GCM_SHA256:TLS_AES_256_GCM_SHA384";
重载nginx:
systemctl reload nginx
[可选]验证ktls是否生效,编辑nginx的主配置文件:
nano /etc/nginx/nginx.conf
打开错误日志的debug:
error_log /var/log/nginx/error.log debug;
重载nginx:
systemctl reload nginx
访问你的站点,之后执行如下命令:
grep -a BIO /var/log/nginx/error.log
有类似回显说明正常:
执行如下命令:
grep -a SSL_sendfile /var/log/nginx/error.log
有类似回显说明正常:
 荒岛
荒岛
