Outline介绍(摘自项目官方页面)
The fastest knowledge base for growing teams. Beautiful, realtime collaborative, feature packed, and markdown compatible.
安装好Docker和需要用到的软件包:
apt -y update
apt -y install curl nginx python3-certbot-nginx
curl -fsSL https://get.docker.com -o get-docker.sh
sh get-docker.sh
创建目录和compose文件:
mkdir -p /opt/outline && cd /opt/outline && nano docker-compose.yml
写入如下内容:
name: Outline
services:
  outline:
    image: docker.getoutline.com/outlinewiki/outline:latest
    container_name: outline
    restart: unless-stopped
    depends_on:
      redis:
        condition: service_healthy
      postgres:
        condition: service_healthy
    env_file: ./docker.env
    ports:
      - "127.0.0.1:3000:3000"
    volumes:
      - ./outline-data:/var/lib/outline/data

  postgres:
    image: postgres:16-alpine
    container_name: outline-postgres
    restart: unless-stopped
    environment:
      POSTGRES_USER: 'imlala'
      POSTGRES_PASSWORD: 'pgpassword'
      POSTGRES_DB: 'outline'
    volumes:
      - ./db-data:/var/lib/postgresql/data
    healthcheck:
      test: ["CMD", "pg_isready", "-d", "outline", "-U", "imlala"]
      interval: 30s
      timeout: 20s
      retries: 3

  redis:
    image: redis
    container_name: outline-redis
    restart: unless-stopped
    healthcheck:
      test: ['CMD', 'redis-cli', '--raw', 'incr', 'ping']
      interval: 10s
      timeout: 5s
      retries: 5
新建环境变量配置文件:
nano docker.env
写入如下内容:
NODE_ENV=production
SECRET_KEY=hidden
UTILS_SECRET=hidden
DATABASE_URL=postgres://imlala:pgpassword@postgres:5432/outline # 注意修改数据库用户名和密码
DATABASE_CONNECTION_POOL_MIN= #留空
DATABASE_CONNECTION_POOL_MAX= #留空
PGSSLMODE=disable
REDIS_URL=redis://redis:6379
URL=https://outline.example.com # 注意修改域名
PORT=3000
COLLABORATION_URL= # 留空
FILE_STORAGE=local
FILE_STORAGE_LOCAL_ROOT_DIR=/var/lib/outline/data
FILE_STORAGE_UPLOAD_MAX_SIZE=262144000
FILE_STORAGE_IMPORT_MAX_SIZE= # 留空
FILE_STORAGE_WORKSPACE_IMPORT_MAX_SIZE= # 留空
FORCE_HTTPS=true
ENABLE_UPDATES=false
WEB_CONCURRENCY=2
DEFAULT_LANGUAGE=zh_CN
SECRET_KEY、UTILS_SECRET使用如下命令生成:
openssl rand -hex 32
创建outline存储数据的目录:
mkdir outline-data
修改目录的权限解决头像、附件等文件无法上传的问题:
chown 1001 outline-data
接下来需要配置一个外部身份验证,这里我用的是Logto。Logto的部署与配置可以参考我的这篇文章:
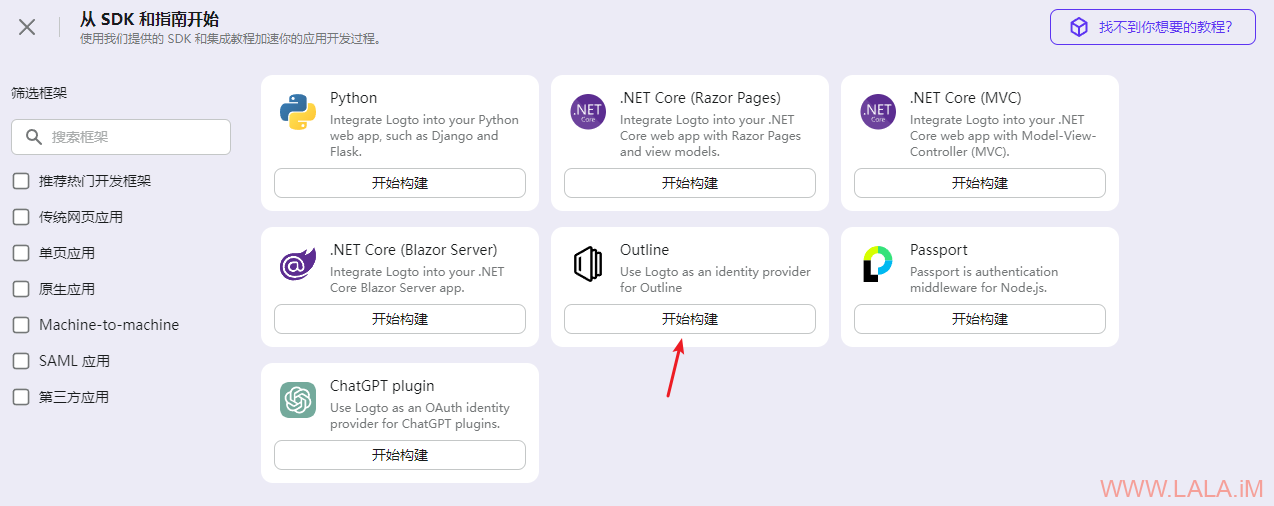
登录到Logto的管理后台,创建Outline应用:
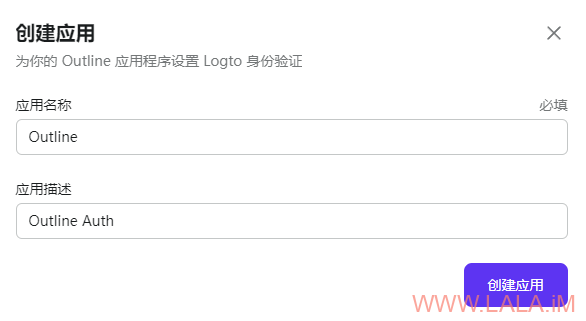
填写应用名称和描述:
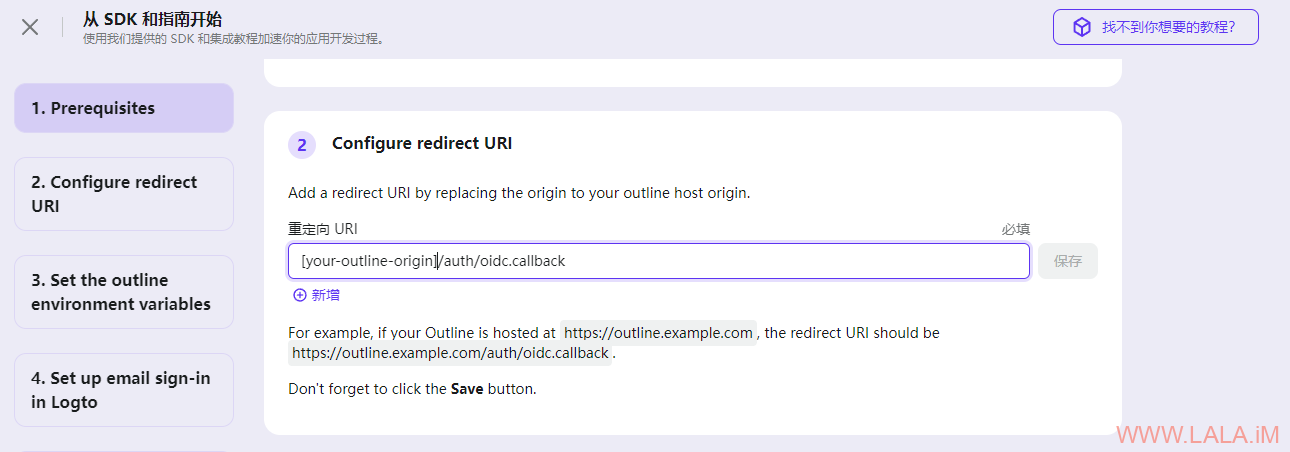
填写重定向URI,假设你的Outline域名是:https://outline.example.com。
这里就填写为:https://outline.example.com/auth/oidc.callback
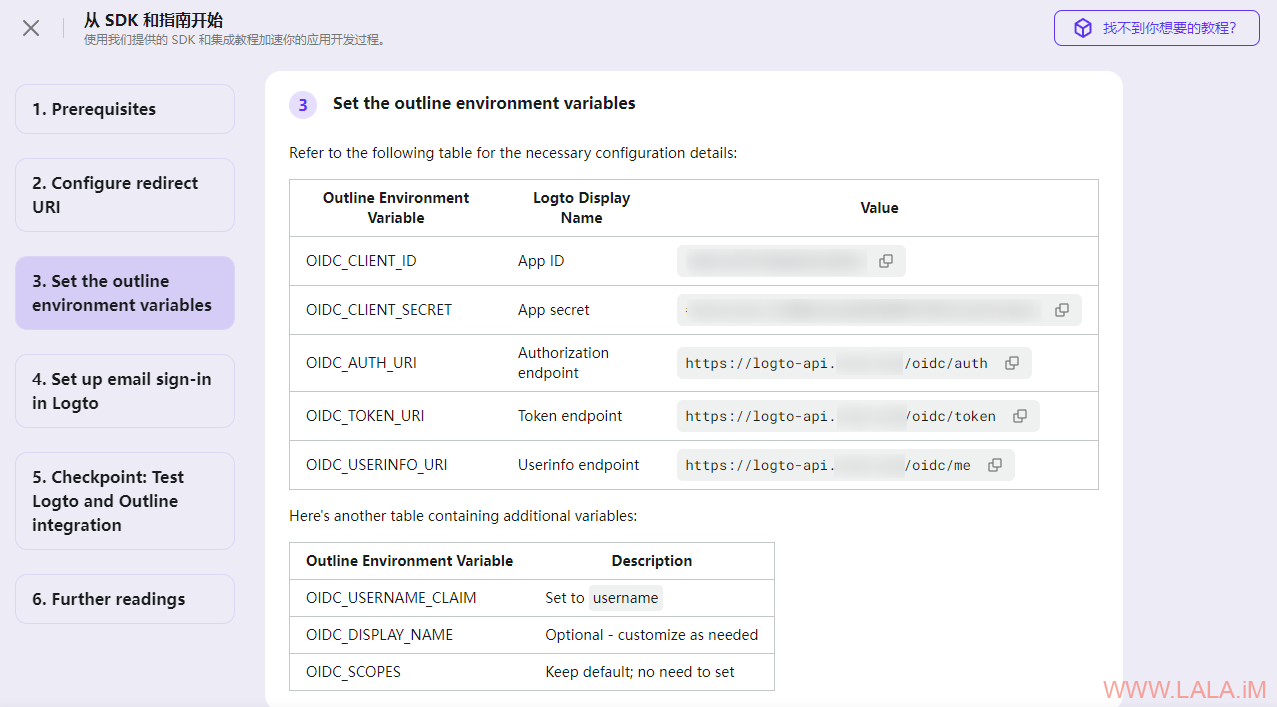
然后根据提示需要我们配置相关的环境变量:
所以再次编辑Outline环境变量配置文件:
nano docker.env
添加以下配置:
OIDC_CLIENT_ID=hidden
OIDC_CLIENT_SECRET=hidden
OIDC_AUTH_URI=https://logto-api.example.com/oidc/auth
OIDC_TOKEN_URI=https://logto-api.example.com/oidc/token
OIDC_USERINFO_URI=https://logto-api.example.com/oidc/me

OIDC_USERNAME_CLAIM=username
OIDC_DISPLAY_NAME=Logto
OIDC_SCOPES=openid profile email
只按照Logto的提示配置的话,我发现后续使用的过程中用户无法退出登录,还需要添加以下配置:
OIDC_DISABLE_REDIRECT=true
OIDC_LOGOUT_URI=https://logto-api.example.com/oidc/session/end
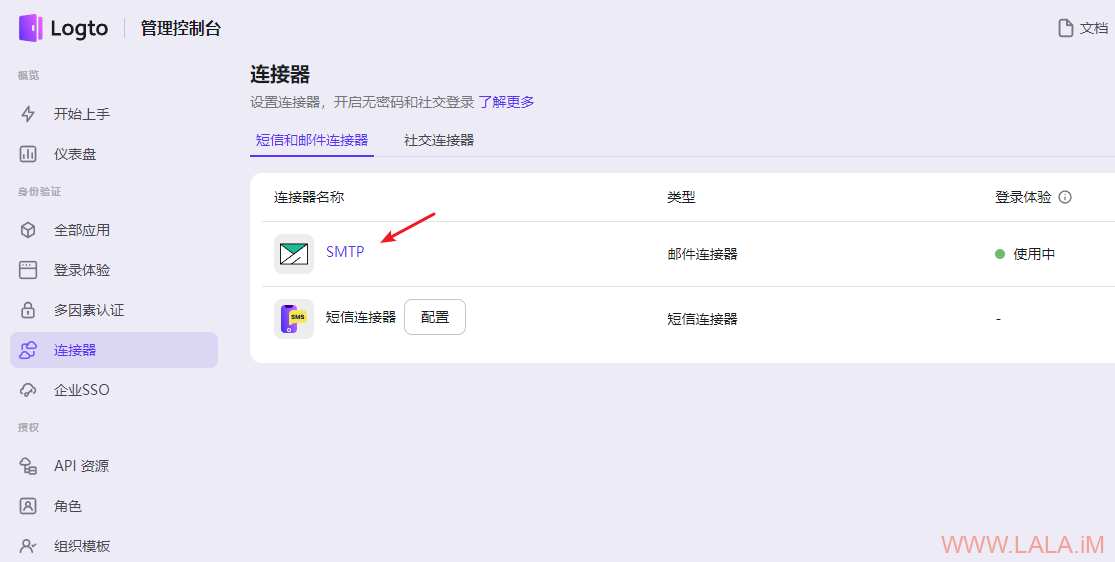
接下来还需要在Logto配置SMTP连接器:
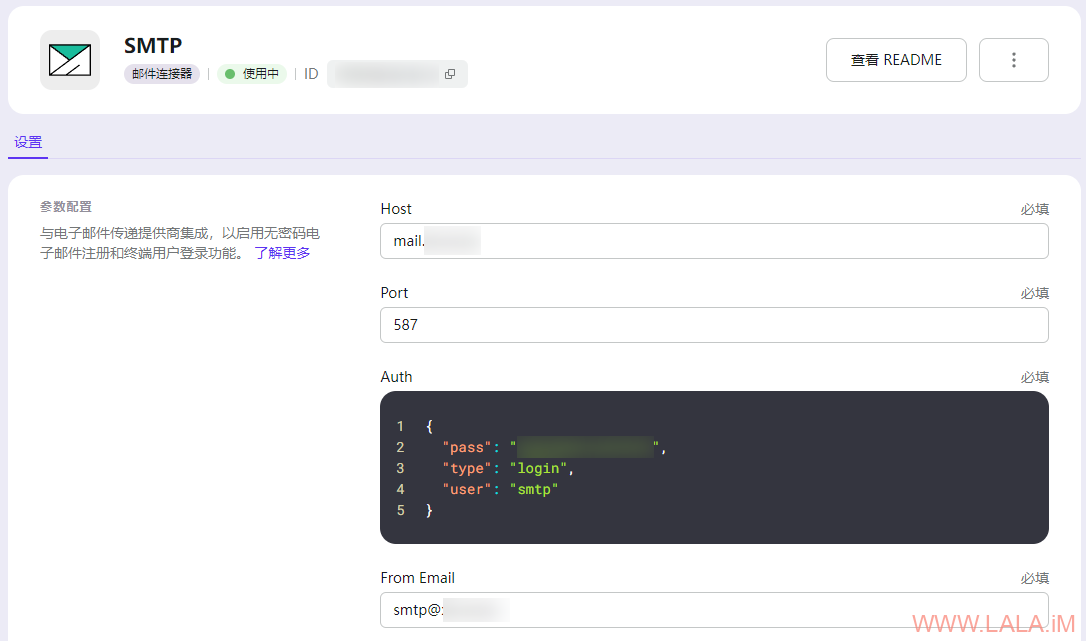
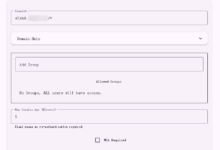
按下图配置SMTP服务器相关信息,使用587端口发信只需要配置这4个必填项即可,其他的设置不用管:
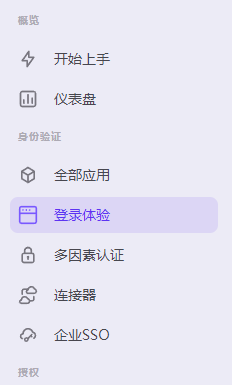
之后找到登录体验:
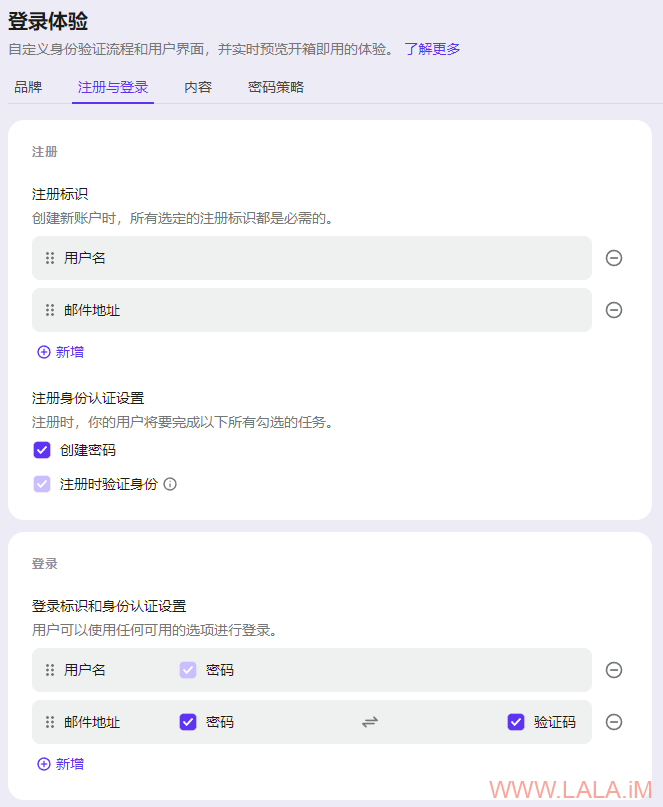
按照下图进行设置:
至此Logto的配置就全部完成了。现在我们启动Outline:
docker compose up -d
配置NGINX反向代理,新建NGINX站点配置文件:
nano /etc/nginx/sites-available/outline
写入如下内容:
server {
    listen 80;
    server_name outline.example.com;
    client_max_body_size 0;

    location / {
        proxy_pass http://127.0.0.1:3000/;
        proxy_redirect off;
        proxy_set_header Host $host;
        proxy_set_header X-Real-IP $remote_addr;
        proxy_set_header X-Forwarded-For $proxy_add_x_forwarded_for;
        proxy_set_header X-Scheme $scheme;
        proxy_set_header X-Forwarded-Proto $scheme;
        # WebSocket support
        proxy_http_version 1.1;
        proxy_set_header Upgrade $http_upgrade;
        proxy_set_header Connection "upgrade";
    }
}
启用站点:
ln -s /etc/nginx/sites-available/outline /etc/nginx/sites-enabled/outline
签发SSL证书:
certbot --nginx
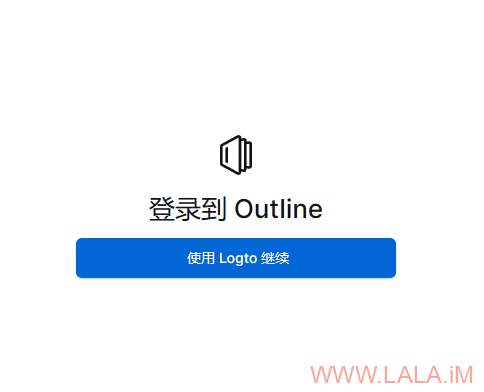
访问Outline注册账号,如果正常的话会跳转到Logto:
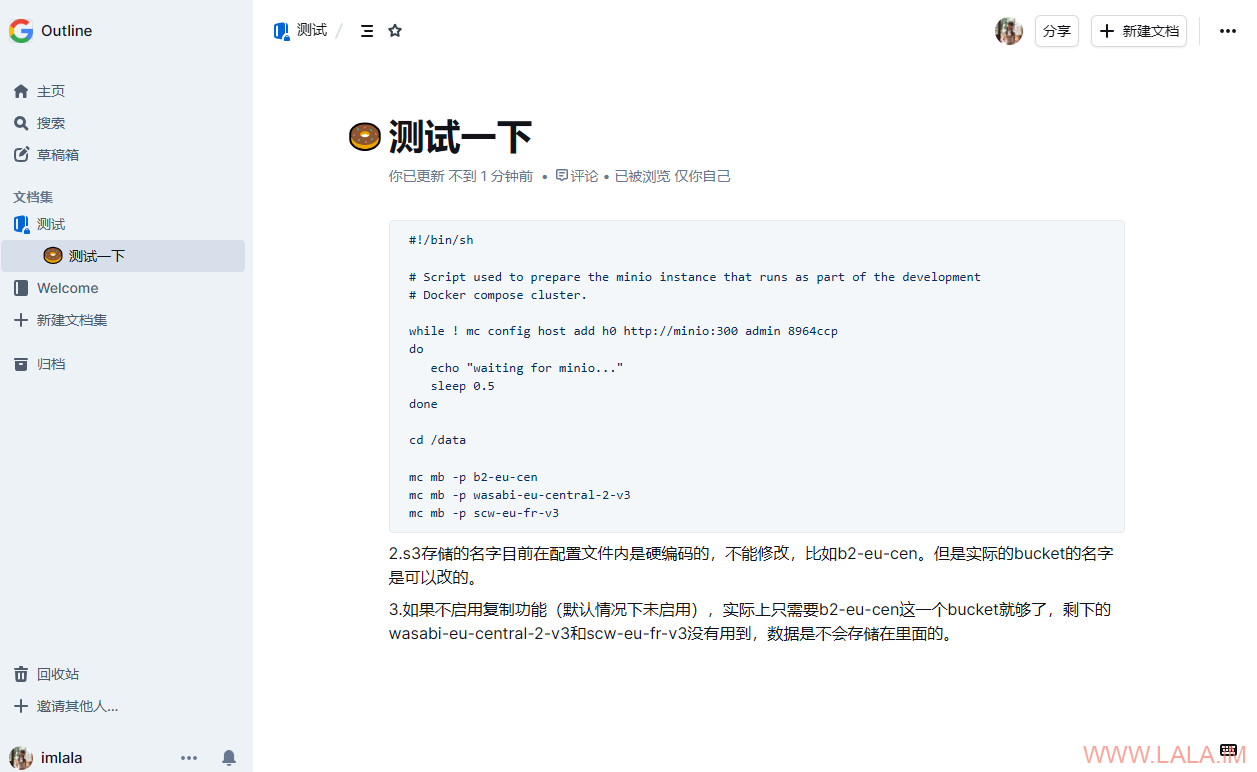
如果一切正常的话,就能登录到Outline了:
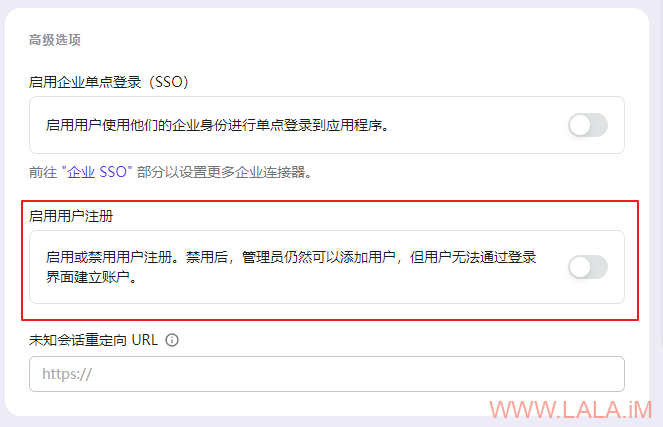
自己的账号注册完成后,可以在Logto->登录体验->高级选项,关闭注册:
参考:
https://docs.getoutline.com/s/hosting/doc/oidc-8CPBm6uC0I
https://docs.logto.io/end-user-flows/sign-out#clear-sign-in-session-at-logto
https://docs.getoutline.com/s/hosting/doc/nginx-6htaRboR57
https://docs.getoutline.com/s/hosting/doc/file-storage-N4M0T6Ypu7#h-file-system-folder
https://docs.getoutline.com/s/hosting/doc/docker-7pfeLP5a8t
 荒岛
荒岛






大佬怎么联系上你呢?付费请教一下问题