Blocky是Go写的程序,安装和部署都很简单,配合supervisor食用更佳。
下面在一台Debian10服务器上部署Blocky,安装需要用到的工具:
apt -y update
apt -y install wget supervisor
新建目录/下载二进制文件/给执行权限:
mkdir -p /opt/blocky && cd /opt/blocky
wget https://github.com/0xERR0R/blocky/releases/download/v0.4/blocky_v0.4_amd64 -O blocky
chmod +x blocky
新建配置文件:
nano config.yml
粘贴下面的内容保存即可:
upstream:
    # these external DNS resolvers will be used. Blocky picks 2 random resolvers from the list for each query
    # format for resolver: net:host:[port][/path]. net could be tcp, udp, tcp-tls or https (DoH). If port is empty, default port will be used (53 for udp and tcp, 853 for tcp-tls, 443 for https (Doh))
    externalResolvers:
      - udp:8.8.8.8
      - udp:1.1.1.1
      - tcp-tls:1.0.0.1:853
      - https://cloudflare-dns.com/dns-query

# optional: use black and white lists to block queries (for example ads, trackers, adult pages etc.)
blocking:
    # definition of blacklist groups. Can be external link (http/https) or local file
    blackLists:
      ads:
        - https://s3.amazonaws.com/lists.disconnect.me/simple_ad.txt
        - https://raw.githubusercontent.com/StevenBlack/hosts/master/hosts
        - https://mirror1.malwaredomains.com/files/justdomains
        - http://sysctl.org/cameleon/hosts
        - https://zeustracker.abuse.ch/blocklist.php?download=domainblocklist
        - https://s3.amazonaws.com/lists.disconnect.me/simple_tracking.txt
      special:
        - https://hosts-file.net/ad_servers.txt
    # definition: which groups should be applied for which client
    clientGroupsBlock:
      # default will be used, if no special definition for a client name exists
      default:
        - ads
        - special
    # which response will be sent, if query is blocked:
    # zeroIp: 0.0.0.0 will be returned (default)
    # nxDomain: return NXDOMAIN as return code
    blockType: zeroIp
    # optional: automatically list refresh period in minutes. Default: 4h.
    # Negative value -> deactivate automatically refresh.
    # 0 value -> use default
    refreshPeriod: 1

# optional: configuration for caching of DNS responses
caching:
  # amount in minutes, how long a response must be cached (min value).
  # If <=0, use response's TTL, if >0 use this value, if TTL is smaller
  # Default: 0
  minTime: 40
  # amount in minutes, how long a response must be cached (max value).
  # If <0, do not cache responses
  # If 0, use TTL
  # If > 0, use this value, if TTL is greater
   # Default: 0
  maxTime: -1

# optional: write query information (question, answer, client, duration etc) to daily csv file
queryLog:
    # directory (should be mounted as volume in docker)
    dir: /opt/blocky
    # if true, write one file per client. Writes all queries to single file otherwise
    perClient: true
    # if > 0, deletes log files which are older than ... days
    logRetentionDays: 7

# Port, should be 53 (UDP and TCP)
port: 53
# Log level (one from debug, info, warn, error)
logLevel: info
新建supervisor配置文件:
nano /etc/supervisor/conf.d/blocky.conf
粘贴下面的内容保存:
[program:blocky]
priority=1
directory=/opt/blocky
command=/opt/blocky/blocky
autostart=true
autorestart=true
redirect_stderr=true
stdout_logfile=/var/log/supervisor/blocky.log
更新supervisor即可完成部署:
supervisorctl update
修改服务器的DNS为blocky:
nano /etc/resolv.conf
写入下面的内容保存即可:
nameserver 你的服务器公网IP
如果你的服务器上还跑了ss/v2ray这类软件,重启一下即可让此类软件使用到blocky的dns服务了。
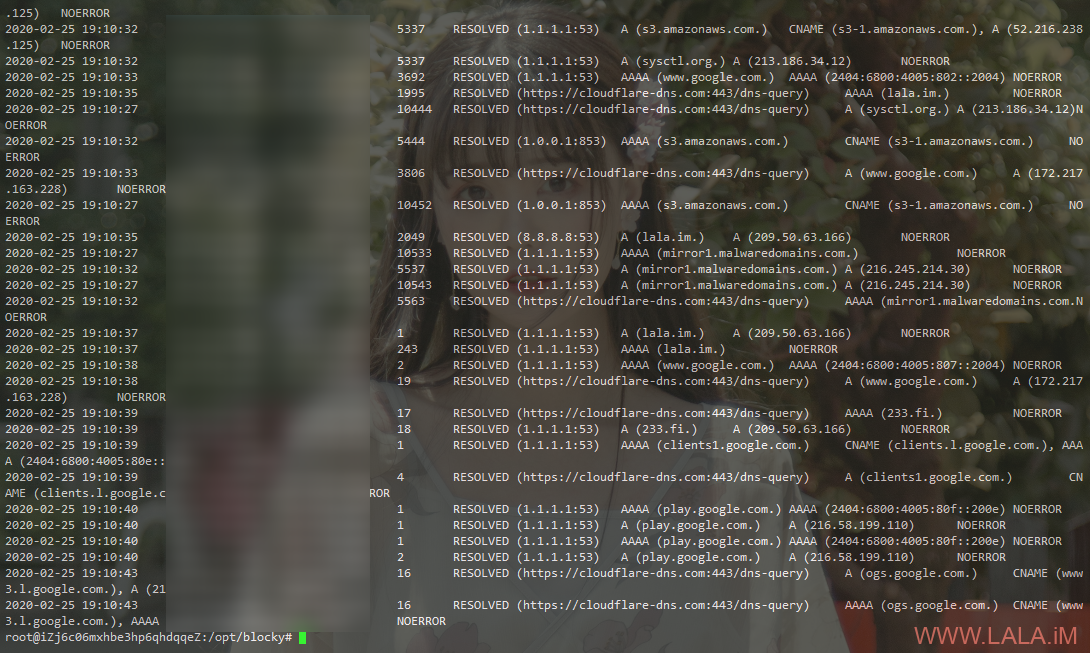
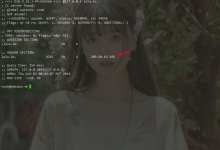
如何得知blocky是否在正常工作?之前的配置文件内配置了记录解析记录的功能,如果ss/v2ray使用到blocky了,那么在blocky的当前目录下会生成一个log文件。
查看log文件,应该可以看到你的解析记录,类似这样:
 荒岛
荒岛




用了一下还阔以,不过我还想做国内分流啊
那就overture
我测试debain10中将/etc/supervisor/conf.d/blocky.conf配置的stdout_logfile=/var/log/supervisor/blocky.log
更改为stdout_logfile=/opt/blocky/logs
才能在/opt/blocky目录下看见
类似这种的2020-03-14_107_150_4_128.log日志文件
不如直接Adguard Home