
破博客被墙后的第一篇文章,话不多说开水!!!
我第一眼看到这个项目的时候,就感觉这玩意有点模仿CloudTorrent的味道,因为UI实在是太像了,然后看了下这个项目作者自己也Fork了CloudTorrent,可以说eMbetaCloud目前是CloudTorrent的一个加强版,增加了把文件上传到GDrive和Mega网盘的功能。
在开始之前,你需要先做一些准备工作。
1.一个顶级域名,解析到你的VPSIP,因为该项目需要用到Google的API服务,Google的API只能使用顶级域名申请。
2.一台内存大于1GB的VPS,因为项目是node.js的,安装依赖的时候需要用到的内存较多。
3.在这里登录你的Google云账号,创建一个OAuth2的凭据:https://console.cloud.google.com/apis/credentials
注:这个凭据的回调地址应该按填写如下图红框的格式来填写。

4.在这里启用GoogleDrive的API服务:https://console.cloud.google.com/apis/library/drive.googleapis.com
下面我使用CentOS7X64来部署一下这个项目,首先更新一下系统:
yum -y update
安装EPEL源:
yum -y install epel-release
安装Nginx:
yum -y install nginx
安装screen:
yum -y install screen
安装Git:
yum -y install git
安装Node.js:
curl --silent --location https://rpm.nodesource.com/setup_8.x | sudo bash -
yum -y install nodejs
现在拉取项目文件并进入到项目根目录:
cd ~
git clone https://github.com/Mrigank11/embetacloud.git
cd embetacloud
安装依赖:
npm install
现在编辑账户配置文件:
vi ~/.bash_profile
设置环境变量:
export GOOGLE_CLIENT_ID=xxxxx-xxxxx.apps.googleusercontent.com
export GOOGLE_CLIENT_SECRET=xxxxx
export GOOGLE_REDIRECT_URL=http://koko.cat/oauthCallback
注:GOOGLE_CLIENT_ID/GOOGLE_CLIENT_SECRET这些值都是你在第3步申请凭据时得到的,GOOGLE_REDIRECT_URL改成自己的URL。
完成之后使其生效:
source ~/.bash_profile
接着我们配置Nginx的反向代理,首先新建一个站点配置文件:
vi /etc/nginx/conf.d/embetacloud.conf
写入:
server {
    listen       80;
    server_name  你的站点域名;

location / {
    proxy_pass       http://你的VPS公网IP:3000;
    proxy_set_header Host      $host;
    proxy_set_header X-Real-IP $remote_addr;
    proxy_set_header Upgrade   $http_upgrade;
    proxy_set_header Connection "upgrade";
    proxy_http_version         1.1;
    proxy_redirect             off;
    proxy_set_header X-Forwarded-For $proxy_add_x_forwarded_for;
    }
}
完成之后启动并设置Nginx的开机自启:
systemctl start nginx
systemctl enable nginx
现在使用screen创建一个持久化的终端:
screen -S embetacloud
在新终端内运行项目:
npm start
然后键盘组合键Ctrl+A+D切回当前终端,关闭系统防火墙:
systemctl stop firewalld.service
systemctl disable firewalld.service
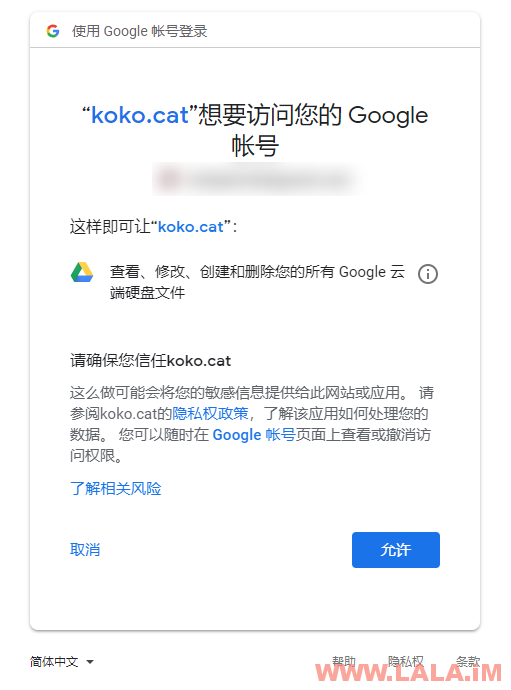
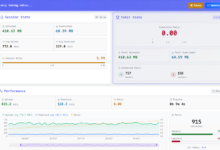
现在打开你的站点域名,应该可以看到这个程序的首页了,点击左上角的用户按钮尝试登录一下自己的Google账号,如果能够正常显示Google的登录页面那么就说明我们的配置正常:
首次登录可能会出现这样的错误:Error: socketIO sesssion not initialized.
没什么大碍,重新登录一次就好了,以后登录都不再会出现这种问题。
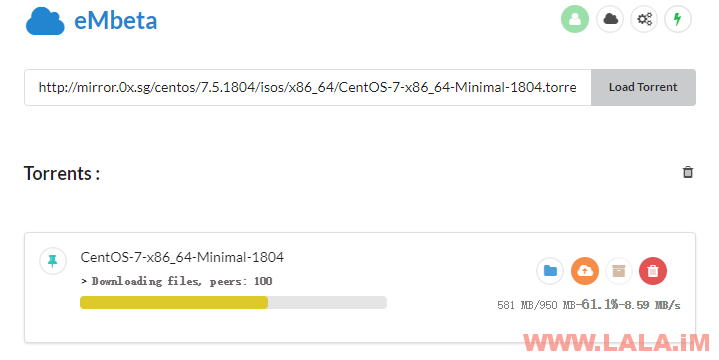
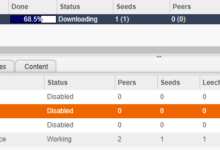
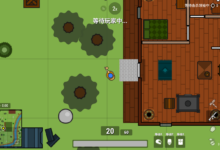
现在我们可以测试下载一个种子试试:
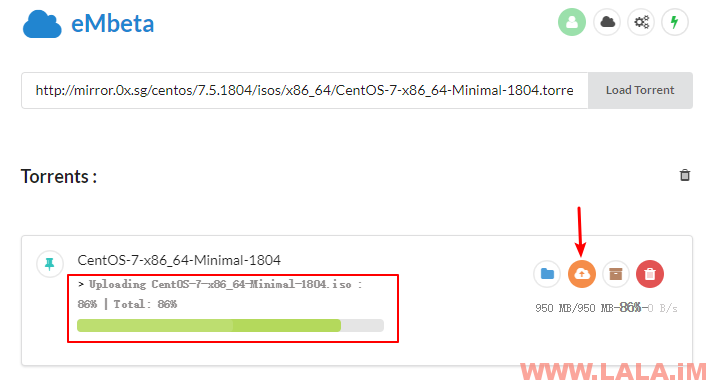
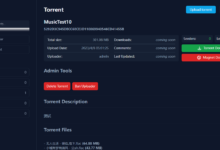
当种子下载完成之后,我们点击这个按钮就可以把文件上传到自己的Google网盘内了:
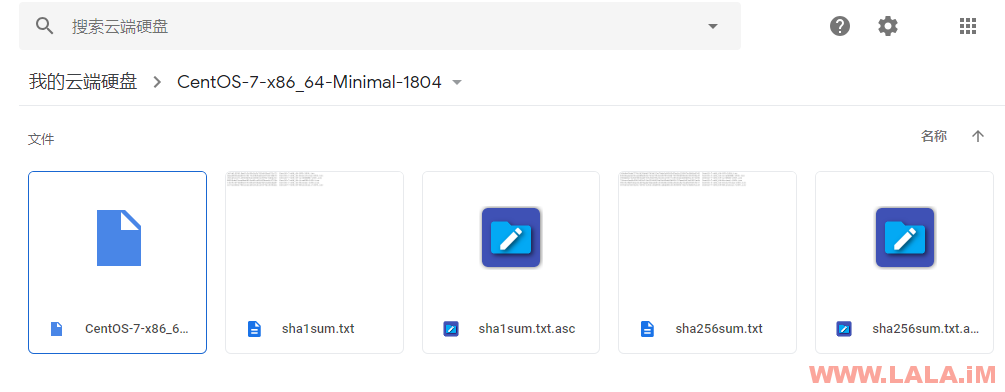
进入自己的Google网盘确认文件是否上传成功,可以看到完全没问题:
很抱歉就做了一点微小的工作,有句老话说的好:小撸怡情,大撸伤身,强撸灰飞烟灭,各位有了今天这个姿势要保重身体啊~


撸什么撸,走大保健去
502报错,如何解决?
能否添加个云转码插件功能呢?不需要切片,只需要添加水印下就足够了。
https://i.loli.net/2019/09/04/rSAtFae1MUdGnDX.png
最后一步出错了拉拉