
避免文章过于枯燥无味,先分享一首音乐,想听可以戳一下播放按钮:
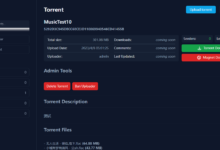
对于这个项目或者说这个程序,我就一句话概况一下:技术用的很前卫也很新颖,但是性能稀烂,前端更稀烂。。。不过依旧很有潜力,毕竟是PT程序,要知道现在市面上没有什么像样的PT程序。。。
这里记录一下我的折腾过程。以下操作请使用CentOS7X64,并且机器内存大于2GB。
为了更方便,这里我们使用宝塔,首先安装一下宝塔:
yum install -y wget && wget -O install.sh http://download.bt.cn/install/install_6.0.sh && bash install.sh
然后在宝塔内安装LNMP环境,注意PHP版本要7.2,MySQL必须5.7,这也就是为什么我说内存要大于2G的原因,MySQL5.7必要要内存大于1.5G才能正常工作,再加上其他的一些东西2G可能都还少了。
除此之外,你还需要在宝塔后台的“软件管理”安装Redis。
完事之后回到终端,安装Node.js:
curl --silent --location https://rpm.nodesource.com/setup_8.x | sudo bash -
yum -y install nodejs
安装supervisord,这个待会用来管理程序的各种进程:
yum -y install supervisor
先启动并设置开机启动:
systemctl start supervisord
systemctl enable supervisord
回到宝塔面板内新建一个站点,并添加Nginx伪静态规则:
location / {
    try_files $uri $uri/ /index.php$is_args$args;
}
接着你需要把站点的运行目录修改为public,这个很重要Laravel框架的特性。
然后打开phpMyAdmin新建一个数据库,命名为:pt。
现在回到终端内CD到你的站点目录:
cd /www/wwwroot/你的站点目录
拉取项目文件并把配置文件重命名:
git clone https://github.com/HDInnovations/UNIT3D.git tmp && mv tmp/.git . && rm -rf tmp && git reset --hard
cp .env.example .env
安装作曲家:
curl -sS https://getcomposer.org/installer | php
安装laravel-echo-server:
npm install -g laravel-echo-server
然后执行如下命令开始配置:
laravel-echo-server init
在这个向导内,我们先暂时按下面的操作来,待会再来修改,这个配置文件随时都可以改的:
? Do you want to run this server in development mode? (y/N)

A:N

? Which port would you like to serve from? (6001)

A:回车

? Which database would you like to use to store presence channel members? (Use arrow keys)

A:选择Redis

? Enter the host of your Laravel authentication server. (http://localhost)

A:输入你的站点域名,需要加上http://

? Will you be serving on http or https?

A:暂时选择http

? Do you want to generate a client ID/Key for HTTP API? (y/N)

A:Yes

? Do you want to setup cross domain access to the API? (y/N)

A:No
走完这个向导后,就会在你的站点目录生成出一个appid和key,复制这些内容待会需要用到。
现在回到面板中,找到“软件管理”-“PHP7.2设置”-“禁用函数”,把下面的这几个函数删除了:
popen
proc_open
接着点击安装扩展,安装:fileinfo
现在回到终端内,使用作曲家安装项目所需依赖:
composer install
composer require predis/predis
然后再安装node.js依赖:
npm install
npm install --save-dev socket.io-client
npm run prod
全部完成之后,你需要编辑这个程序的配置文件:
vi .env
vi config/api-keys.php
vi config/app.php
vi config/other.php
1.env这个配置文件内,你需要填写之前生成出来的key/你的站点域名/MySQL数据库信息/SMTP发信设置/管理员账号密码。
2.api-keys.php,如果你没有申请这些key的话,就不用配置这个文件了,这是用来自动显示电影的IMDB等信息的。
3.app.php,在这个配置文件内,你需要填写你的站点名/站点域名,其他都不需要改动。
4.other.php,在这个配置文件内,你可以根据自己的需要修改站点标题/站点主题/以及一些其他设置。
接着我们配置计划任务:
crontab -e
写入:
* * * * * php /www/wwwroot/你的站点目录/artisan schedule:run >> /dev/null 2>&1
然后回到你的站点根目录的上级目录:
cd ..
把你的站点根目录下的所有文件所有者进行一次修改,修改为宝塔面板所需的www用户:
chown -R www:www 你的站点目录
接着再回到你的站点根目录:
cd /www/wwwroot/你的站点目录
导入程序的数据库信息:
php artisan key:generate
php artisan migrate --seed
成功之后现在就可以配置supervisord了:
vi /etc/supervisord.conf
在文件的尾部写入:
[program:unit3d-queue]
process_name=%(program_name)s_%(process_num)02d
command=php /www/wwwroot/你的站点目录/artisan queue:work --sleep=3 --tries=3
autostart=true
autorestart=true
user=www
numprocs=2

[program:unit3d-socket-io]
process_name=%(program_name)s_%(process_num)02d
command=/usr/bin/node /usr/bin/laravel-echo-server start --dir=/www/wwwroot/你的站点目录
autostart=true
autorestart=true
user=root
numprocs=1
重启supervisord并更新配置:
systemctl restart supervisord
supervisorctl update
使用如下命令查看进程运行清空,如果一切正常,你应该可以看到三个进程在RUNNING:
supervisorctl
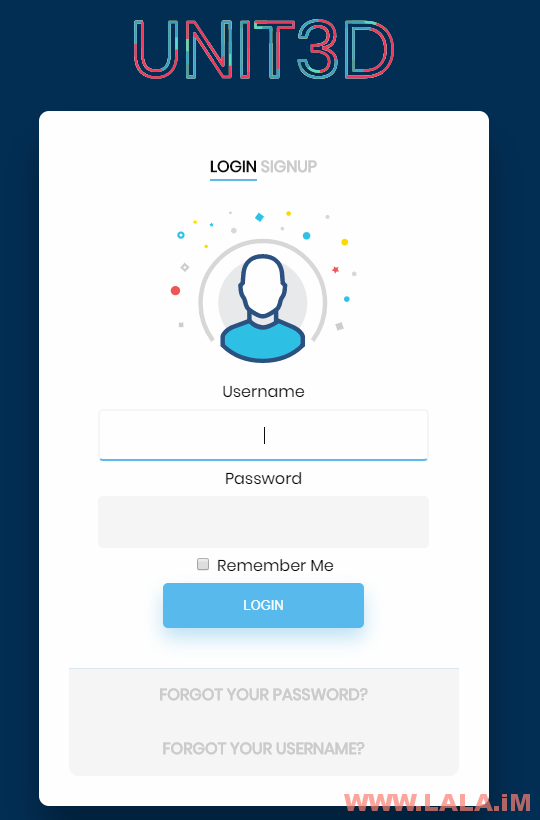
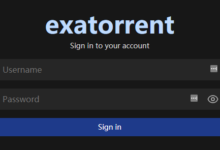
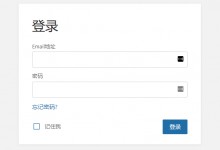
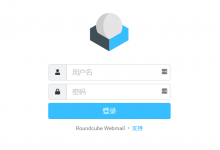
打开你的站点域名应该可以看到这个程序的登录界面了:
如果无法正常访问,排查是否把防火墙关闭了(宝塔会默认启动防火墙):
systemctl stop firewalld.service
systemctl disable firewalld.service
现在我们这个站点是通过HTTP访问的,如果我们要把UNIT3D放到HTTPS中运行呢?该如何配置?
之前我们通过laravel-echo-server在站点根目录下生成了一个名为laravel-echo-server.json的配置文件,现在你应该首先利用宝塔的SSL证书申请功能为你的站点域名申请一个Let’s Encrypt的SSL证书,并开启强制SSL。然后你申请的这个证书路径,应该如下:
/etc/letsencrypt/live/你的域名/cert.pem
/etc/letsencrypt/live/你的域名/privkey.pem
现在编辑laravel-echo-server.json:
1.”authHost”修改你的域名为https,例如:https://233.fi
2.”sslCertPath”填写你的证书路径
3.”sslKeyPath”填写你的私钥路径
回到终端重启UNIT3D:
supervisorctl reload
另外该程序使用socket.io来实现实时消息推送等功能,比如在线聊天什么的,这个会占用6001端口,众所周知PT站容易被DDCC,一般搞PT都把站放到CloudFlare下面,但是CloudFlare对WebSocket的端口支持没有6001,会导致这个程序的某些功能失效,所以我们需要修改这个程序的WebSocket端口号,下面我们把这个程序的端口修改成CloudFlare支持的8443(前提是你按照上面的要求配置了SSL)
首先你还是需要编辑laravel-echo-server.json这个配置文件,把里面的:
"port": "6001"
改为
"port": "8443"
接着你需要编辑这个文件的第60行:
vi resources/assets/js/bootstrap.js
把里面的:
host: window.location.hostname + ':6001'
改为:
host: window.location.hostname + ':8443'
重载supervisord配置
supervisorctl reread
supervisorctl update
supervisorctl reload
重新构建程序:
npm run prod
清理缓存:
php artisan clear:all
别急,你还应该按照要求配置Nginx的伪静态规则,让程序能够获取到用户的真实IP,否则Tracker服务器都是连接的CDNIP,那用户还下个J8的种子。所以你现在应该在宝塔的伪静态设置加入:
set_real_ip_from 103.21.244.0/22;
set_real_ip_from 103.22.200.0/22;
set_real_ip_from 103.31.4.0/22;
set_real_ip_from 104.16.0.0/12;
set_real_ip_from 108.162.192.0/18;
set_real_ip_from 131.0.72.0/22;
set_real_ip_from 141.101.64.0/18;
set_real_ip_from 162.158.0.0/15;
set_real_ip_from 172.64.0.0/13;
set_real_ip_from 173.245.48.0/20;
set_real_ip_from 188.114.96.0/20;
set_real_ip_from 190.93.240.0/20;
set_real_ip_from 197.234.240.0/22;
set_real_ip_from 198.41.128.0/17;
set_real_ip_from 2400:cb00::/32;
set_real_ip_from 2606:4700::/32;
set_real_ip_from 2803:f800::/32;
set_real_ip_from 2405:b500::/32;
set_real_ip_from 2405:8100::/32;
set_real_ip_from 2c0f:f248::/32;
set_real_ip_from 2a06:98c0::/29;
real_ip_header CF-Connecting-IP;
以上配置你应该加到location下面。现在这个UNIT3D应该就算是配置的完完全全了,不过由于作者自己都说了其实UNIT3D是不支持CloudFlare的,所以很有可能会出现一些七七八八的小问题,比如我用Deluge一开始可以连接上Tracker,但是过几秒钟后就会出现连接超时。不过这并不影响其他Peer,因为实际上是连接成功了的。
另外,此项目目前正处于急速更新状态,如果想更新自己的版本,可以使用下面的命令:
php artisan git:update
php artisan up
注意:更新前,你应该仔细浏览项目主页的修订记录,避免更新后会出现一些不必要的麻烦。
我非常期待有哪位dalao能够使用这款程序开一个小姐姐PT站,顺带送给我一个炒鸡VIP会员~


搞一搞
只要有你搞过的程序,估计都要debug。。
看见老外用这个PT挺多的。
这个程序现在Bug挺多的,开发者之前开发的程序开发一半就丢下来搞新的程序开发了
原来乳此,我玩了两天BUG没发现,就是前端太丑了。。
老大好:
1. UNIT3D推出了一键安装:
https://github.com/poppabear8883/UNIT3D-INSTALLER
2. Laravel要改成Swoole运行,会快不少:
这个是Swoole + Laravel整合版:HTTPS://github.com/hhxsv5/laravel-s
可以,好多命令学习一下
如果要用这个程序来建一个pt站至少需要多大配置的机器?
内存大于2G。
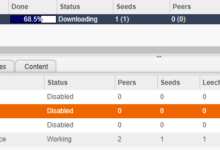
查看运行情况变这样了
unit3d-queue:unit3d-queue_00 FATAL Exited too quickly (process log may have details)
unit3d-queue:unit3d-queue_01 FATAL Exited too quickly (process log may have details)
unit3d-socket-io:unit3d-socket-io_00 FATAL Exited too quickly (process log may have details)
你可以在作者的项目页面提issue,这个作者很热心的。。。
最后一段吸引了我,我和几位同好正在进行修改和匹配,同时也在进行其他几个方案的选择。希望得到您的一些建议和意见。
TG:@superstaraug
时间/钱/技术,有这三样,想怎么玩都行。。
跪求荒岛大佬来指导
本来以为这会是一个很完善的希望,看了一下评论区发现也是bug一堆啊!谁来拯救PT框架?meattorrent目前还是很心仪的,但是………………
最后一句话说出了我的心声
“别急,你还应该按照要求配置Nginx的伪静态规则,让程序能够获取到用户的真实IP,否则Tracker服务器都是连接的CDNIP,那用户还下个J8的种子。所以你现在应该在宝塔的伪静态设置加入:”(引用)
大大,这一部分的代码全部复制粘贴到伪静态设置中吗?这是什么原理啊,这样就可以获取真实ip
拉拉,u3d最新版本搭建和修改可以做一套吗?网上都没有相关信息,求