
前言
今天规规矩矩的水一篇关于ssh安全设置的文章,主要用于防范ssh暴力破解。
如果你的机器只能通过ssh这一种方式访问到,在没有vnc/kvm等其他工具的情况下,以下步骤建议你先在一台测试机器内熟悉下操作,以免操作失误导致机器失联。。。
更改SSH端口
防范暴力破解ssh密码,一种最简单最偷懒的办法,更改默认的ssh端口号:
nano /etc/ssh/sshd_config
取消注释修改成你需要的端口号:
Port 52020
重启sshd:
systemctl restart sshd
一般扫弱口令的都是扫22/2222这两个端口,把SSH的端口换成高位端口,只要不是别人特意针对你的机器,你的机器基本就清静了。
公钥验证
下面介绍一个复杂一点的办法,关闭密码登录改用公钥验证的方式登录。用公钥验证,首先我们要生成密匙对。
Debian10下生成密匙对,可以用自带的ssh-keygen工具:
ssh-keygen -b 4096 -f imlala
一路回车,完成之后在当前目录会生成出来两个文件:
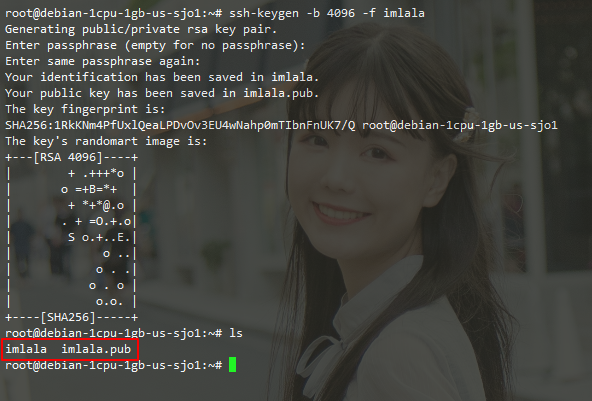
其中imlala是私钥,imlala.pub是公钥,现在你可以将刚生成的公钥添加到本机的authorized_keys:
mkdir -p ~/.ssh && touch ~/.ssh/authorized_keys
chmod 700 ~/.ssh && chmod 600 ~/.ssh/authorized_keys
cat ~/imlala.pub >> ~/.ssh/authorized_keys
你还可以将公钥拷贝到需要免密登录的其他远程Linux机器内:
ssh-copy-id -i imlala.pub root@serverip
在本机和需要免密登录的机器内编辑sshd配置文件:
nano /etc/ssh/sshd_config
开启公钥认证:
PubkeyAuthentication yes
如果要关闭密码登录:
PasswordAuthentication no
重启sshd:
systemctl restart sshd
测试登录即可无需密码:
ssh -i imlala root@serverip
如果需要两台Linux相互之间无密码访问,只需要在另一台机器上重复此步骤即可,这种需求多数情况下是用于集群部署才可能用到。
在Windows下我们可以使用Xshell来生成密匙对。
如果你已经用上面的方法通过ssh-keygen生成好密匙对了,Xshell6可以直接导入ssh-keygen生成的私钥进行登录:

Xshell5不行,所以这里还是介绍一下如何用Xshell生成密匙对,首先点击“工具-新建用户密钥生成向导”:
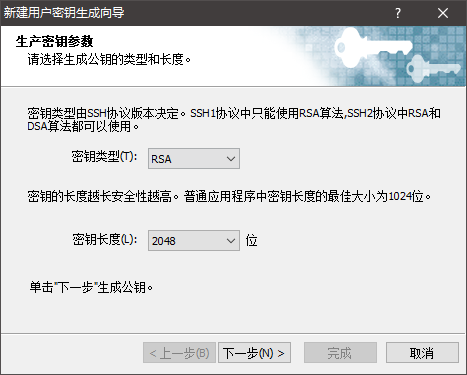
这里直接下一步:
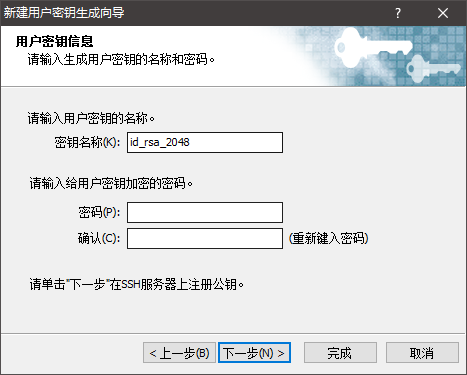
复制公钥,之后你也可以保存为文件:

编辑(如果没有这个文件,按照文章之前说的新建):
vi ~/.ssh/authorized_keys
将你之前复制的公钥粘贴到这里:
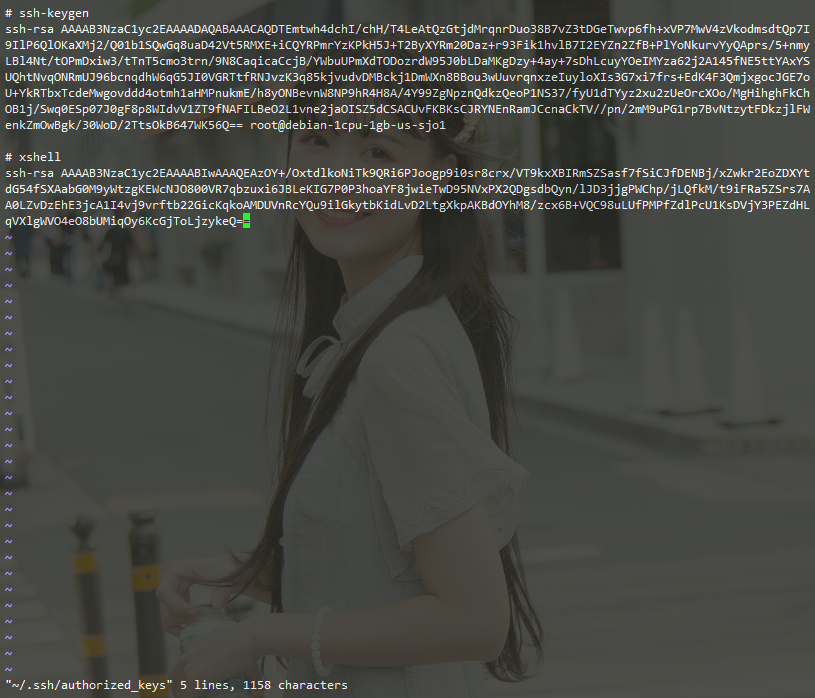
这样Xshell就能够使用刚生成的私钥登录了。
注意:一旦你决定使用公钥验证的方式登录SSH,切记私钥一定要保存好,而公钥是可以随意分享的。
两步验证
最骚的操作,使用两步验证(2FA),即便你的SSH密码被爆破成功了,别人也无法成功登录。我们可以借助Google-Authenticator来完成这件事。开始之前你需要给手机安装一个APP:
在CentOS7下安装google-authenticator:
yum -y install epel-release
yum -y install google-authenticator
Debian9/10安装:
apt -y install libpam-google-authenticator
执行:
google-authenticator
按照下面的流程操作:
Do you want authentication tokens to be time-based (y/n) y
Warning: pasting the following URL into your browser exposes the OTP secret to Google:

https://www.google.com/chart... # 打开这个网址会显示一个二维码,用手机APP扫一下即可

Your new secret key is: VXXX5VBS4VXXXCTUXXXVXXXB2M
Your verification code is 422717
Your emergency scratch codes are: # 应急登录码,一共5个,一次性的,用完就没了
95224337
52316127
48532364
62735389
82182374

Do you want me to update your "/root/.google_authenticator" file? (y/n) y

Do you want to disallow multiple uses of the same authentication
token? This restricts you to one login about every 30s, but it increases
your chances to notice or even prevent man-in-the-middle attacks (y/n) y

By default, a new token is generated every 30 seconds by the mobile app.
In order to compensate for possible time-skew between the client and the server,
we allow an extra token before and after the current time. This allows for a
time skew of up to 30 seconds between authentication server and client. If you
experience problems with poor time synchronization, you can increase the window
from its default size of 3 permitted codes (one previous code, the current
code, the next code) to 17 permitted codes (the 8 previous codes, the current
code, and the 8 next codes). This will permit for a time skew of up to 4 minutes
between client and server.
Do you want to do so? (y/n) y

If the computer that you are logging into isn't hardened against brute-force
login attempts, you can enable rate-limiting for the authentication module.
By default, this limits attackers to no more than 3 login attempts every 30s.
Do you want to enable rate-limiting? (y/n) y
配置ssh认证:
nano /etc/pam.d/sshd
文件末尾加入:
auth required pam_google_authenticator.so
编辑sshd配置文件:
nano /etc/ssh/sshd_config
更改:
ChallengeResponseAuthentication yes
重启sshd:
systemctl restart sshd
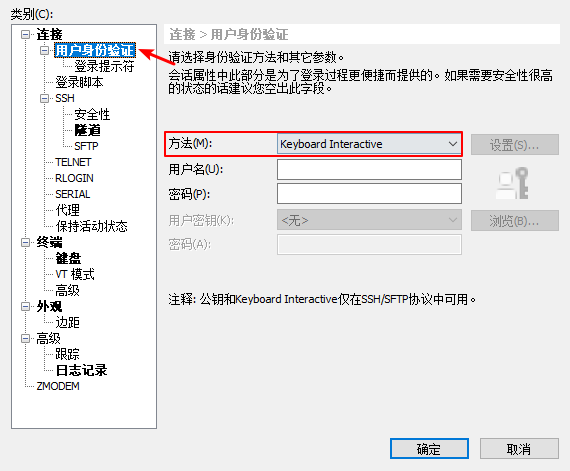
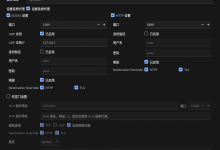
在使用Xshell登录的时候,更改“用户身份验证”的方法为下图所示:
这样登录的时候就会提示要输入两步验证码了:

注意:不要将公钥验证和两步验证混用,根据自己的喜好选择一种就好。
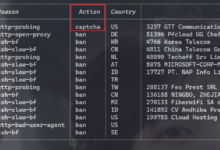
Fail2ban
如果你不想改端口,又不想设置公钥验证/两步验证,那么还可以使用Fail2ban将那些总是爆破你服务器的IP给BAN了!但我个人是不太建议使用Fail2ban的,这玩意要配合防火墙(Firewalld)才能起作用,如果你的机器本身就没开防火墙,然后还跑着一堆程序,这时候把防火墙一开那就有点要命了嗷。。
关于Fail2ban的配置,我只在CentOS7上写一下,首先安装:
yum -y install epel-release
yum -y install fail2ban
接着开启防火墙,如果你还跑着别的程序,记得放行端口:
systemctl start firewalld
systemctl enable firewalld
然后新建fail2ban规则:
nano /etc/fail2ban/jail.local
写入:
[DEFAULT]
ignoreip = 127.0.0.1
bantime  = 86400 # 可以先将这个值设小一点,看待会配置完成之后有没有效果,如果可以正常屏蔽IP,再将此值改大
maxretry = 3
banaction = firewallcmd-ipset

[sshd]
enabled = true
port    = ssh # 如果ssh端口不是22,则修改为对应的
logpath = /var/log/secure
启动:
systemctl start fail2ban
systemctl enable fail2ban
查看被封锁的IP:
fail2ban-client status sshd
误封了?可以使用下面的命令解除:
fail2ban-client set sshd unbanip 要解封的IP


来啦
推荐证书+密码+手机验证+验证码+人脸识别+交出你的种子
关键是最后一个+号的内容。
橘酱牛批
gcp改端口之前还要关了SELinux,别问我怎么知道的
然后还是证书比较安全,万一配置不当你就怎么也上不去了
配证书登录的常规操作不是先弄证书,密码和证书认证一起开,用证书登录上去,关密码认证的吗?
话说 lala 的 iPhone 状态栏和别人的不一样,挺好看的,有没有打算出美化教程呀?然后就是有国外手机卡推荐么?
这个得越狱了才能改,最主要的这些美化用的素材我也不知道丢哪里去了。。我不是很了解国外手机卡行情。。
大佬,有个好东西,https://github.com/guyueyingmu/avbook
大佬可不可以出个教程,网上有的教程很不全面,我照着搞了好几遍都不成功有问题,留下了没有技术的眼泪
这个得等作者更新他的爬虫啊,现在失效了。
原来如此啊,我说怎么爬不回来呢