几年前写过一篇部署Misskey的文章,时过境迁,我的那篇部署文章已经过时,因为Misskey发生了天翻地覆的变化,连数据库都从mongodb换成了postgresql。。今天在这里记录一下Misskey新版本的部署过程。
安装docker、nginx、certbot:
apt -y update
apt -y install curl nginx python3-certbot-nginx
curl -fsSL https://get.docker.com -o get-docker.sh
sh get-docker.sh
克隆项目存储库:
cd /opt
git clone -b master https://github.com/misskey-dev/misskey.git
cd misskey
git checkout master
复制配置文件:
cp .config/example.yml .config/default.yml
cp .config/docker_example.env .config/docker.env
编辑default.yml:
nano .config/default.yml
你至少需要改动以下配置:
url: https://misskey.example.com // 你的实例域名

db:
  host: db // postgresql的主机,应与docker-compose.yml内的services名保持一致
  port: 5432
  db: misskey // 设置你的数据库名
  user: misskey // 设置你的数据库用户名
  pass: password // 设置你的数据库用户密码

redis:
  host: redis // redis的主机,应与docker-compose.yml内的services名保持一致
  port: 6379
编辑docker.env:
nano .config/docker.env
在这里配置好你在default.yml里面填写的数据库信息:
POSTGRES_PASSWORD=password
POSTGRES_USER=misskey
POSTGRES_DB=misskey
构建镜像并初始化数据库:
docker compose build
docker compose run --rm web yarn run init
完成之后即可启动Misskey:
docker compose up -d
接下来配置nginx反向代理,新建nginx配置:
nano /etc/nginx/sites-available/misskey
写入如下配置:
map $http_upgrade $connection_upgrade {
    default upgrade;
    ''      close;
}

proxy_cache_path /tmp/nginx_cache levels=1:2 keys_zone=cache1:16m max_size=1g inactive=720m use_temp_path=off;

server {
    listen 80;
    listen [::]:80;
    server_name misskey.example.com;
    client_max_body_size 0;

    location / {
        proxy_pass http://127.0.0.1:3000;
        proxy_set_header Host $host;
        proxy_http_version 1.1;
        proxy_redirect off;

        proxy_set_header X-Real-IP $remote_addr;
        proxy_set_header X-Forwarded-For $proxy_add_x_forwarded_for;
        proxy_set_header X-Forwarded-Proto https;

        proxy_set_header Upgrade $http_upgrade;
        proxy_set_header Connection $connection_upgrade;

        proxy_cache cache1;
        proxy_cache_lock on;
        proxy_cache_use_stale updating;
        add_header X-Cache $upstream_cache_status;
    }
}
启用新的nginx配置:
ln -s /etc/nginx/sites-available/misskey /etc/nginx/sites-enabled/misskey
签发ssl证书:
certbot --nginx
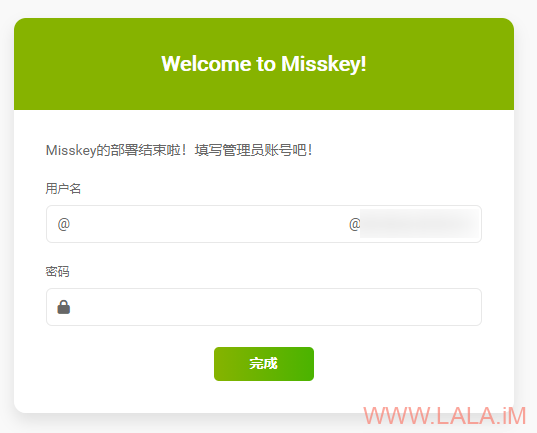
访问你的域名如果正常即可创建管理员账号:
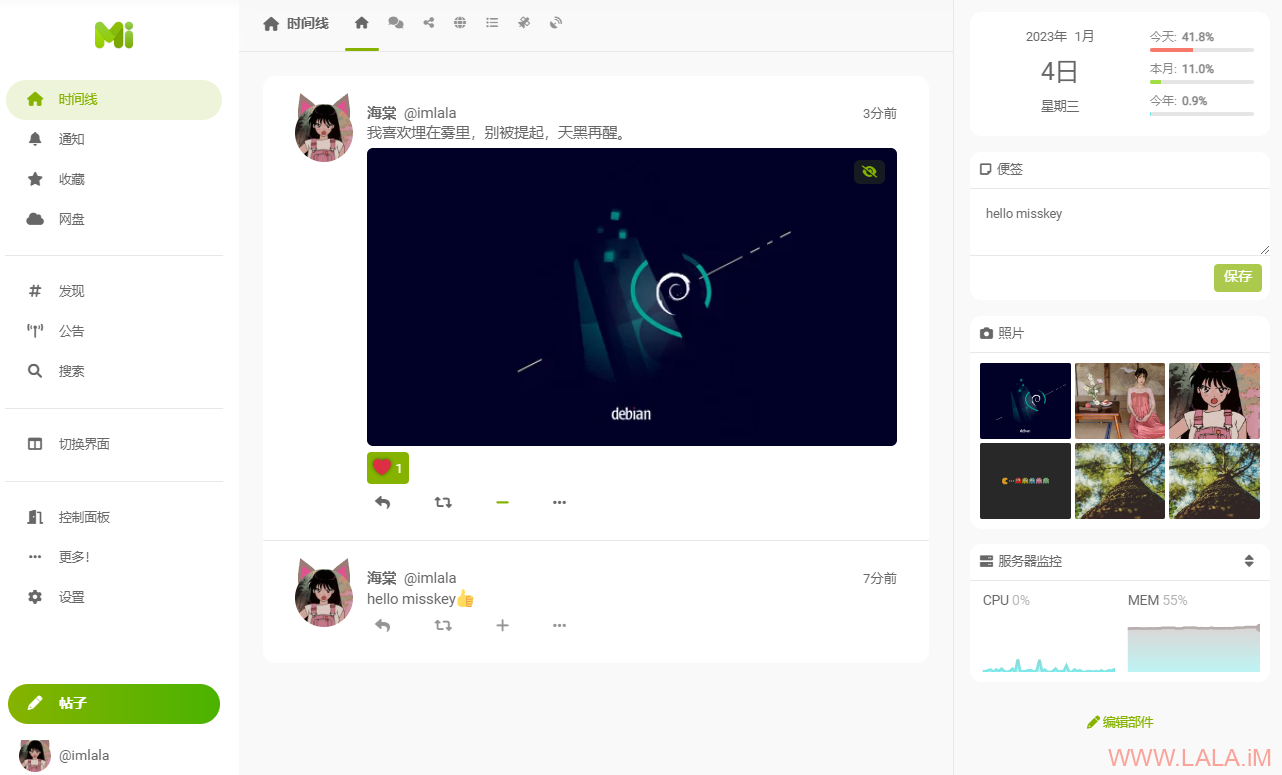
预览:
补充:
由于misskey依赖nodejs,而构建docker镜像的时候nodejs会占用比较多的内存,小内存机器可能会构建失败。
如果你的机器内存不够可以直接用dockerhub上面的镜像:https://hub.docker.com/r/misskey/misskey
另外建议在配置好反向代理后将docker-compose.yml内暴露的3000端口修改为仅监听在本地:
ports:
  - "127.0.0.1:3000:3000"
也可以看看:
https://misskey-hub.net/en/docs/install.html
https://misskey-hub.net/en/docs/admin/nginx.html
 荒岛
荒岛









博主能出一期宝塔搭建misskey的教程吗?我不太会用代码搭建,总是不同的位置弹红码
抱歉我很久没用过宝塔了,不太了解这个面板,可能帮不到你。
如果你按照这篇文章搭建的时候哪里出错了,可以把日志发上来看看。
大哥可不可以推荐一款主要以P2P端到端传输文件的web项目呀
类似这样的吗:
https://github.com/RobinLinus/snapdrop
https://github.com/kern/filepizza
你好,配合NginxProxyManager作为前端代理有尝试过吗?
你好,我没有用过NginxProxyManager,但看样子应该是没什么问题的。NginxProxyManager相当于一个nginx的web界面,把nginx配置文件的内容做成了可视化而已。
请问博主您配置完成后,有遇到过头像背景等图片显示不出来的问题嘛?
几种情况会导致你说的这个问题,如果你是新安装的,一般都是这个原因导致的:https://github.com/misskey-dev/misskey/pull/9560
把files目录的所有者改为991就行:chown -hR 991.991 ./files
还有一种情况是启用了缓存远程文件,然后你又在后台清理过远程文件的缓存,misskey不会更新用户的头像url、背景图片的url。需要你自己手动点“更新远程用户信息”才行。
我也遇到同样问题,可能是第二种情况,但是我找不到哪里启用了缓存远程文件,和在哪里手动点“更新远程用户信息”,请指教哈。
lala 这是咋啦
#0 61.03 …/node_modules/@tensorflow/tfjs-node install$ node scripts/install.js
#0 61.03 …/node_modules/@tensorflow/tfjs-node install: CPU-linux-4.4.0.tar.gz
#0 61.03 …/node_modules/@tensorflow/tfjs-node install: * Downloading libtensorflow
#0 61.03 …/node_modules/@tensorflow/tfjs-node install: https://storage.googleapis.com/tensorflow/libtensorflow/libtensorflow-cpu-linux-x86_64-2.9.1.tar.gz
#0 61.03 …/node_modules/@tensorflow/tfjs-node install: * Building TensorFlow Node.js bindings
#0 61.03 …/node_modules/@tensorflow/tfjs-node install: Done
#0 110.5 WARN An error occurred while uploading /misskey/node_modules/.pnpm/@tensorflow+tfjs-node@4.4.0_seedrandom@3.0.5/node_modules/@tensorflow/tfjs-node
#0 136.1 node:internal/child_process:413
#0 136.1 throw errnoException(err, ‘spawn’);
#0 136.1 ^
#0 136.1
#0 136.1 Error: spawn ENOMEM
#0 136.1 at ChildProcess.spawn (node:internal/child_process:413:11)
#0 136.1 at spawn (node:child_process:757:9)
#0 136.1 at spawn (/root/.cache/node/corepack/pnpm/8.3.1/dist/pnpm.cjs:83642:19)
#0 136.1 at runCmd_ (/root/.cache/node/corepack/pnpm/8.3.1/dist/pnpm.cjs:99793:20)
#0 136.1 at /root/.cache/node/corepack/pnpm/8.3.1/dist/pnpm.cjs:99737:11
#0 136.1 at process.processTicksAndRejections (node:internal/process/task_queues:77:11) {
#0 136.1 errno: -12,
#0 136.1 code: ‘ENOMEM’,
#0 136.1 syscall: ‘spawn’
#0 136.1 }
#0 136.1
#0 136.1 Node.js v18.16.0
#0 141.3 Killed
——
failed to solve: process “/bin/sh -c pnpm i –frozen-lockfile –aggregate-output” did not complete successfully: exit code: 137
刚刚看见了最后几句话 我应该知道问题在哪了
lala 我用docker pull misskey/misskey拉取镜像后 该怎么搞
小白好难
lala 猫耳朵怎么弄的 我搭建好了
我搭建好了