
如果你因为种种原因不想再使用各类基于mihomo内核的GUI客户端了,那么可以尝试一下直接用裸核,裸核除了第一次配置的时候会麻烦一点(搓配置文件),后续使用是很爽的。
openSUSE Tumbleweed是我主要使用的Linux发行版,实际上下面的这些配置步骤应该适用于大部分使用systemd的Linux系统。
下载mihomo内核/解压/给执行权限:
wget https://github.com/MetaCubeX/mihomo/releases/download/v1.19.16/mihomo-linux-amd64-v3-go123-v1.19.16.gz
gzip -d mihomo-linux-amd64-v3-go123-v1.19.16.gz
sudo chmod +x mihomo-linux-amd64-v3-go123-v1.19.16
重命名并移动到/usr/local/bin:
sudo mv mihomo-linux-amd64-v3-go123-v1.19.16 /usr/local/bin/mihomo
创建运行时的目录和配置文件:
sudo mkdir /etc/mihomo
sudo nano /etc/mihomo/config.yaml
我的配置如下:
mixed-port: 7890
allow-lan: true
tcp-concurrent: true
find-process-mode: strict
mode: rule
log-level: info
ipv6: false
keep-alive-interval: 30
unified-delay: true

profile:
  store-selected: true
  store-fake-ip: false

external-controller: 127.0.0.1:9090
external-controller-cors:
  allow-origins:
    - '*'
  allow-private-network: true
secret: "89641937"
external-ui: "./ui"
external-ui-name: zashboard
external-ui-url: "https://github.com/Zephyruso/zashboard/archive/refs/heads/gh-pages.zip"

tun:
  enable: true
  stack: mixed
  auto-route: true
  auto-redirect: false
  auto-detect-interface: true
  dns-hijack:
    - any:53
  strict-route: true
  mtu: 1500

dns:
  enable: true
  cache-algorithm: arc
  prefer-h3: false
  use-hosts: true
  use-system-hosts: true
  listen: 127.0.0.1:6868
  ipv6: false
  enhanced-mode: redir-host
  default-nameserver:
    - 223.5.5.5
    - 119.29.29.29
  nameserver:
    - https://cloudflare-dns.com/dns-query
    - https://dns.google/dns-query
  proxy-server-nameserver:
    - https://dns.alidns.com/dns-query
    - https://doh.pub/dns-query
  direct-nameserver:
    - https://dns.alidns.com/dns-query
    - https://doh.pub/dns-query
  respect-rules: true

sniffer:
  enable: true
  force-dns-mapping: true
  parse-pure-ip: true
  sniff:
    HTTP:
      ports:
        - 80
        - 8080-8880
      override-destination: true
    TLS:
      ports:
        - 443
        - 8443

proxies:
  - name: proxy1
    type: vless
    server: 89.64.19.37
    port: 443
    network: tcp
    udp: true
    tls: true
    servername: www.cloudflare.com
    reality-opts:
      public-key: xxxx
      short-id: "xxxx"
    client-fingerprint: chrome
    uuid: uuid
    packet-encoding: xudp
    flow: xtls-rprx-vision
  - name: proxy2
    type: ss
    server: 89.64.19.37
    port: 8080
    network: tcp
    udp: true
    password: xxxx
    cipher: chacha20-ietf-poly1305

proxy-groups:
  - name: 🌍 VPN
    icon: https://cdn.jsdelivr.net/gh/Koolson/Qure@master/IconSet/Color/Hijacking.png
    type: select
    proxies:
      - ⚡️ Fastest
      - 🎲 Random
      - proxy1
      - proxy2
  - name: ⚡️ Fastest
    icon: https://cdn.jsdelivr.net/gh/Koolson/Qure@master/IconSet/Color/Auto.png
    type: url-test
    tolerance: 150
    url: https://cp.cloudflare.com/generate_204
    interval: 300
    proxies:
      - proxy1
      - proxy2
  - name: 🎲 Random
    icon: https://cdn.jsdelivr.net/gh/Koolson/Qure@master/IconSet/Color/Filter.png
    type: fallback
    url: https://cp.cloudflare.com/generate_204
    interval: 300
    proxies:
      - proxy1
      - proxy2

rule-providers:
  torrent-trackers:
    type: http
    behavior: domain
    format: mrs
    url: https://github.com/legiz-ru/mihomo-rule-sets/raw/main/other/torrent-trackers.mrs
    path: ./rule-sets/torrent-trackers.mrs
    interval: 86400
    proxy: ⚡️ Fastest
  torrent-clients:
    type: http
    behavior: classical
    format: yaml
    url: https://github.com/legiz-ru/mihomo-rule-sets/raw/main/other/torrent-clients.yaml
    path: ./rule-sets/torrent-clients.yaml
    interval: 86400
    proxy: ⚡️ Fastest
  geosite-cn:
    type: http
    behavior: domain
    format: mrs
    url: https://github.com/MetaCubeX/meta-rules-dat/raw/meta/geo/geosite/cn.mrs
    path: ./rule-sets/geosite-cn.mrs
    interval: 86400
    proxy: ⚡️ Fastest
  geoip-cn:
    type: http
    behavior: ipcidr
    format: mrs
    url: https://github.com/MetaCubeX/meta-rules-dat/raw/meta/geo/geoip/cn.mrs
    path: ./rule-sets/geoip-cn.mrs
    interval: 86400
    proxy: ⚡️ Fastest
  geosite-private:
    type: http
    behavior: domain
    format: mrs
    url: https://github.com/MetaCubeX/meta-rules-dat/raw/meta/geo/geosite/private.mrs
    path: ./rule-sets/geosite-private.mrs
    interval: 86400
    proxy: ⚡️ Fastest
  geoip-private:
    type: http
    behavior: ipcidr
    format: mrs
    url: https://github.com/MetaCubeX/meta-rules-dat/raw/meta/geo/geoip/private.mrs
    path: ./rule-sets/geoip-private.mrs
    interval: 86400
    proxy: ⚡️ Fastest

rules:
  - RULE-SET,torrent-clients,DIRECT
  - RULE-SET,torrent-trackers,DIRECT
  - RULE-SET,geosite-private,DIRECT
  - RULE-SET,geosite-cn,DIRECT
  - RULE-SET,geoip-private,DIRECT
  - RULE-SET,geoip-cn,DIRECT
  - MATCH,🌍 VPN
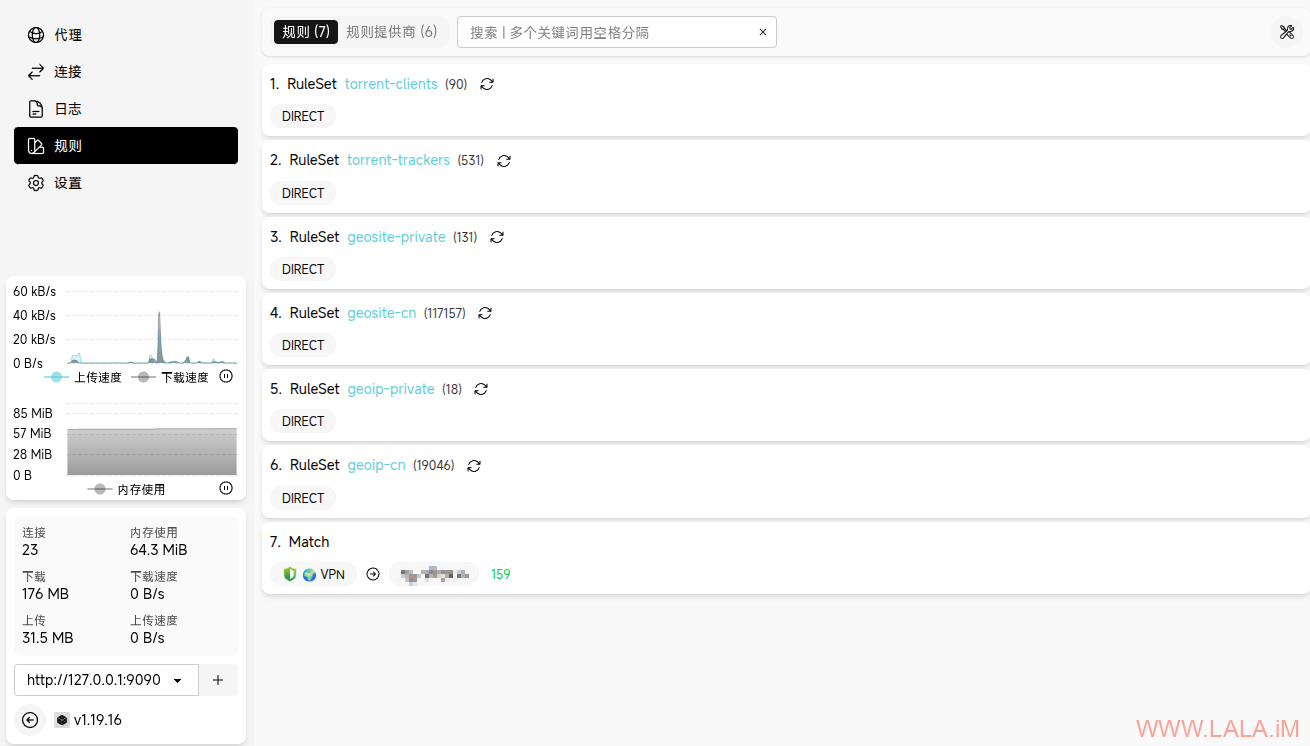
简单说下这个配置的效果:
1.使用zashboard作为Web控制面板,访问:http://127.0.0.1:9090/ui/zashboard/ 密码:89641937
2.DNS模式使用realip+嗅探。(我不喜欢用FakeIP)我用了很多测试DNS泄露的网站均没有检测到漏(没有在本机抓包验证,不能百分百肯定,应该是不会漏=-=)
3.我自己的使用习惯是Tun,所以默认启用Tun模式,如果要使用系统代理也可以用端口7890。
4.分流规则全部使用rule-set,并且规则很简单,没有搞一大堆乱七八糟的规则在里面,除了geosite/geoip外,就只加了和bt下载相关的(个人使用习惯:下小姐姐必备)
5.出站代理的只配置了vless/ss,仅用作演示。如果你要添加其他协议的节点请参考官方的“出站代理”文档
我自己是不使用公共机场服务的,所有的节点都是自建,所以上面的配置没有涉及到proxy-providers(代理集合或者叫代理供应商)但是我最近一直在使用remnawavepanel,所以也可以把remnawavepanel提供的订阅链接配置上:
proxy-providers:
  remnawave:
    type: http
    url: "https://sub.example.com/xxxx"
    path: ./proxy_providers/remnawave.yaml
    interval: 3600
    size-limit: 0
然后在proxy-groups里面使用刚才配置的proxy-providers:
proxy-groups:
  - name: 🌍 VPN
    icon: https://cdn.jsdelivr.net/gh/Koolson/Qure@master/IconSet/Color/Hijacking.png
    type: select
    proxies:
      - ⚡️ Fastest
      - 🎲 Random
      - proxy1
      - proxy2
    use:
      - remnawave
  - name: ⚡️ Fastest
    icon: https://cdn.jsdelivr.net/gh/Koolson/Qure@master/IconSet/Color/Auto.png
    type: url-test
    tolerance: 150
    url: https://cp.cloudflare.com/generate_204
    interval: 300
    proxies:
      - proxy1
      - proxy2
    use:
      - remnawave
  - name: 🎲 Random
    icon: https://cdn.jsdelivr.net/gh/Koolson/Qure@master/IconSet/Color/Filter.png
    type: fallback
    url: https://cp.cloudflare.com/generate_204
    interval: 300
    proxies:
      - proxy1
      - proxy2
    use:
      - remnawave
创建systemd服务:
sudo nano /etc/systemd/system/mihomo.service
写入如下配置:
[Unit]
Description=mihomo Daemon, Another Clash Kernel.
After=network.target NetworkManager.service systemd-networkd.service iwd.service

[Service]
Type=simple
LimitNPROC=500
LimitNOFILE=1000000
CapabilityBoundingSet=CAP_NET_ADMIN CAP_NET_RAW CAP_NET_BIND_SERVICE CAP_SYS_TIME CAP_SYS_PTRACE CAP_DAC_READ_SEARCH CAP_DAC_OVERRIDE
AmbientCapabilities=CAP_NET_ADMIN CAP_NET_RAW CAP_NET_BIND_SERVICE CAP_SYS_TIME CAP_SYS_PTRACE CAP_DAC_READ_SEARCH CAP_DAC_OVERRIDE
Restart=always
ExecStartPre=/usr/bin/sleep 1s
ExecStart=/usr/local/bin/mihomo -d /etc/mihomo
ExecReload=/bin/kill -HUP $MAINPID

[Install]
WantedBy=multi-user.target
启动并设置开机自启:
sudo systemctl enable --now mihomo
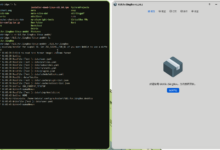
效果:


我从无界时代过来的一直习惯走http代理全局不分流 ,现在这些翻墙软件分流是真复杂
我还用过轮子的自由门呢= =,还有GoAgent、蓝灯这些。。再然后就是ss的天下了。分流确实更先进,能解决不少问题。。
请问下lala在win上用什么,也是裸核吗
win现在用的是gui for singbox,本来linux也是想用这个的,但是在x11下白屏,wayland下直接打不开,别的gui用不习惯,功能太多太杂,或者多少有点问题,就直接跑裸核了。linux也可以用sing-box的,但是不想搓json了,就用mihomo了。
感谢回复,正好最近sparkle归档了,想着换一个,我去试试gui for singbox
gui for singbox第一次接触可能有点难上手,如果你搓过sing-box的配置文件应该更容易使用。这个软件就是没有v2rayN那么简单粗暴=-=,但是gui for singbox插件特别多,你花点时间学一下就会觉得这个是真香。