
TincVPN是一个P2PVPN,即两端可以直接通信,虚拟局域网内只需要一台机器(VPS)能够有外网访问的能力即可,一旦两端建立起连接,流量就不会再经过VPS。
其实TincVPN可以代替ZeroTier,虽然ZeroTier免费版也足够用,但用着ZeroTier的公共Moon/WEB面板,总感觉差了点意思。而TincVPN就是全部资源都归自己管,当然部署起来也就会麻烦许多。
在Debian10(VPS)上安装配置TincVPN(用作服务端):
apt -y install tinc net-tools
开启IPv4转发:
echo "net.ipv4.ip_forward = 1" >> /etc/sysctl.conf && sysctl -p
创建一个名为imlala的虚拟网络(目录):
mkdir -p /etc/tinc/imlala && mkdir -p /etc/tinc/imlala/hosts
新建tinc.conf配置文件:
nano /etc/tinc/imlala/tinc.conf
网络名就是imlala,网卡接口名vpn,使用switch模式,以及如下的加密方式:
Name=imlala
Interface=vpn
Mode=switch
Cipher=aes-256-cbc
Digest=sha512
新建hosts文件,这个文件名必须和tinc.conf内的Name一致:
nano /etc/tinc/imlala/hosts/imlala
写入如下配置:
Address = 你的VPS公网IP
Subnet = 10.0.0.1/32
完成之后生成密匙对:
tincd -n imlala -K4096
按两下回车全部保持默认配置,生成完成之后,对应的文件路径:
/etc/tinc/imlala/rsa_key.priv # 私钥
/etc/tinc/imlala/hosts/imlala # 公钥
配置虚拟网卡tinc-up:
nano /etc/tinc/imlala/tinc-up
写入:
#!/bin/sh
ifconfig $INTERFACE 10.0.0.1 netmask 255.255.255.0
配置虚拟网卡tinc-down:
nano /etc/tinc/imlala/tinc-down
写入:
#!/bin/sh
ifconfig $INTERFACE down
给执行权限:
chmod +x /etc/tinc/imlala/tinc-*
启动:
systemctl start tinc@imlala
systemctl enable tinc@imlala
在第二台Debian10上(我这边还是VPS)上安装配置TincVPN(用作客户端)
安装和之前一模一样:
apt -y install tinc net-tools
同样和之前一样新建一个imlala的目录以及hosts目录:
mkdir -p /etc/tinc/imlala && mkdir -p /etc/tinc/imlala/hosts
新建tinc.conf配置文件:
nano /etc/tinc/imlala/tinc.conf
写入如下配置,其中需要注意的是ConnectTo的值需要指定为服务端的网络名称,如果你和我一样配置了加密,那么加密方式也需要和服务端对应:
Name=node_us
Interface=vpn
Mode=switch
ConnectTo=imlala
Cipher=aes-256-cbc
Digest=sha512
新建hosts文件:
nano /etc/tinc/imlala/hosts/node_us
写入:
Subnet = 10.0.0.2/32
生成密匙对:
tincd -n imlala -K4096
配置虚拟网卡tinc-up:
nano /etc/tinc/imlala/tinc-up
写入:
#!/bin/sh
ifconfig $INTERFACE 10.0.0.2 netmask 255.255.255.0
配置虚拟网卡tinc-down:
nano /etc/tinc/imlala/tinc-down
写入:
#!/bin/sh
ifconfig $INTERFACE down
给执行权限:
chmod +x /etc/tinc/imlala/tinc-*
启动TincVPN:
systemctl start tinc@imlala
systemctl enable tinc@imlala
现在我们需要交换公钥,首先把服务端的公钥复制到客户端内:
scp /etc/tinc/imlala/hosts/imlala root@vpsip:/etc/tinc/imlala/hosts
再把客户端的公钥复制到服务端内:
scp /etc/tinc/imlala/hosts/node_us root@vpsip:/etc/tinc/imlala/hosts
这样两台Linux之间就实现了内网互通。
接下来最主要的是如何把TincVPN放到Windows上运行(当作客户端。)因为我的主力机都是Windows,所以这非常关键。其实配置起来大同小异,我主要是参考了官方的这个文档:
https://www.tinc-vpn.org/examples/windows-install/
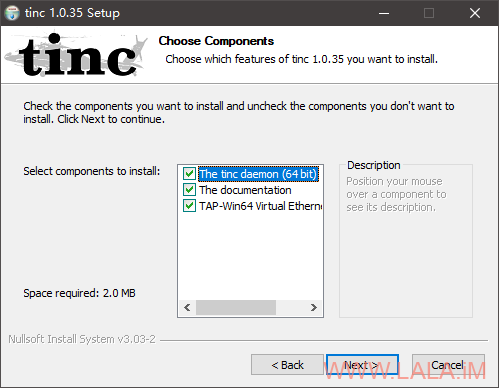
首先下载安装包:
https://www.tinc-vpn.org/packages/windows/tinc-1.0.35-install.exe
安装的时候一定要勾选TAP-Win64:
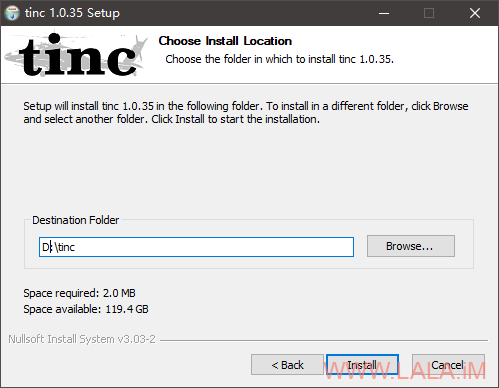
默认安装在C盘,建议Win10换到别的盘符,避免后续配置的时候遇到一堆需要管理员权限的问题:
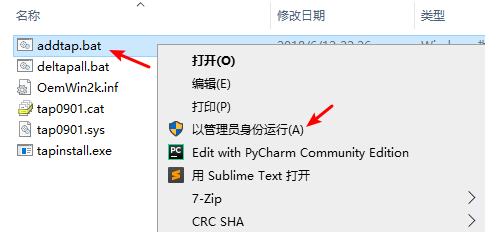
进到安装软件的根目录,打开tap-win64目录,用管理员权限运行addtap.bat:
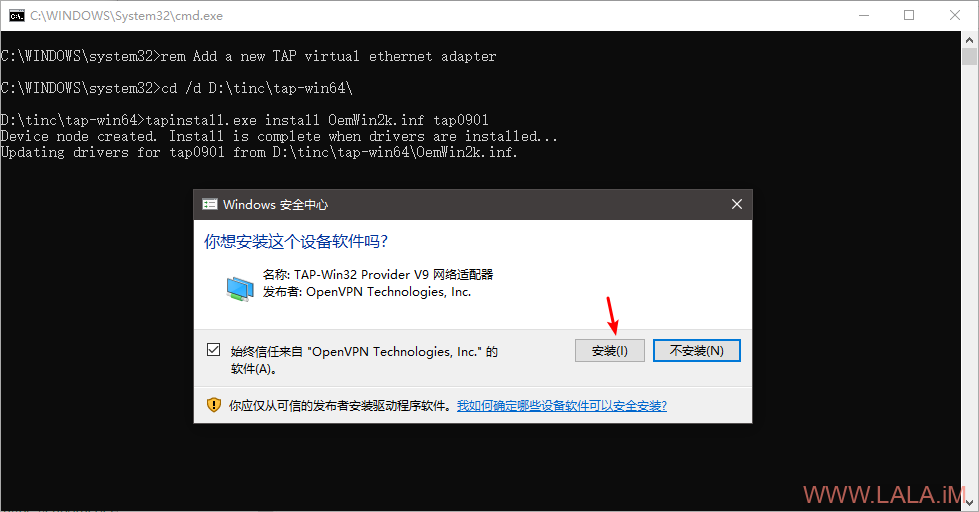
安装驱动:
之后打开网络连接看看有没有新增加一个TAP设备:
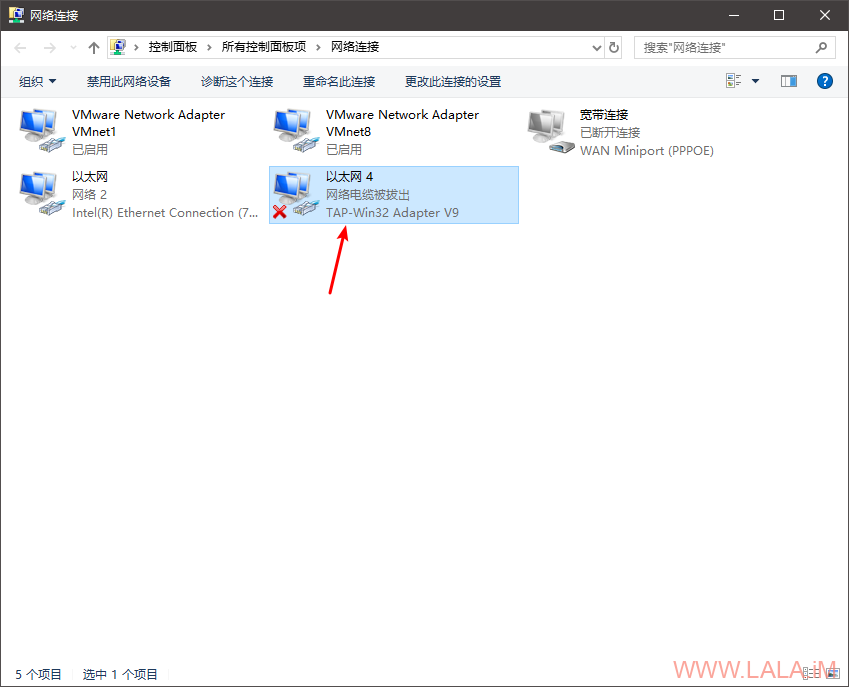
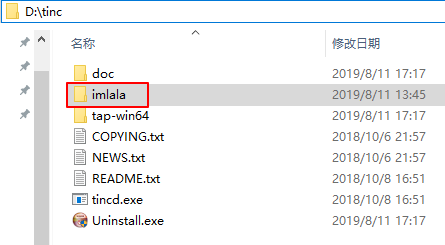
回到软件根目录,新建一个网络(文件夹)我这边建立文件夹名称为imlala,然后在imlala这个文件夹内再新建一个hosts文件夹。
接着在imlala这个文件夹内新建一个tinc.conf,配置内容如下:
Name=node_family
Interface=vpn
Mode=switch
ConnectTo=imlala
Cipher=aes-256-cbc
Digest=sha512
在hosts文件夹内新建一个node_family文件(名字必须和tinc.conf内的Name一致)写入如下配置:
Subnet = 10.0.0.3/32
之后用管理员权限打开CMD或者PowerShell,进入到软件根目录,生成密匙对:
d:
cd tinc
./tincd -n imlala -K4096
最后和服务端(VPS)交换公钥,也就是把node_family公钥文件上传到VPS的/etc/tinc/imlala/hosts目录。
同理,服务端上的imlala公钥文件下载到本地的hosts文件夹下即可。
可能有点懵?目录结构,软件根目录结构:
在imlala文件夹下的结构:
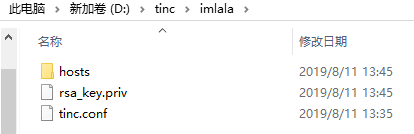
hosts文件夹下就是服务端的公钥文件/客户端公钥文件:

还没完,还有非常关键的几个步骤,注意到我们之前在tinc.conf配置的虚拟网卡接口名是:
Interface=vpn
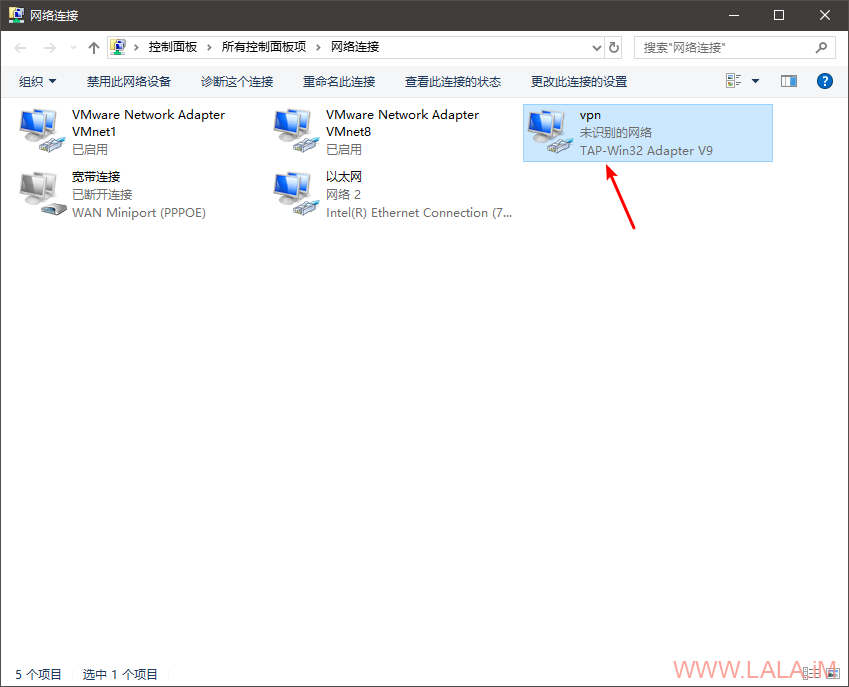
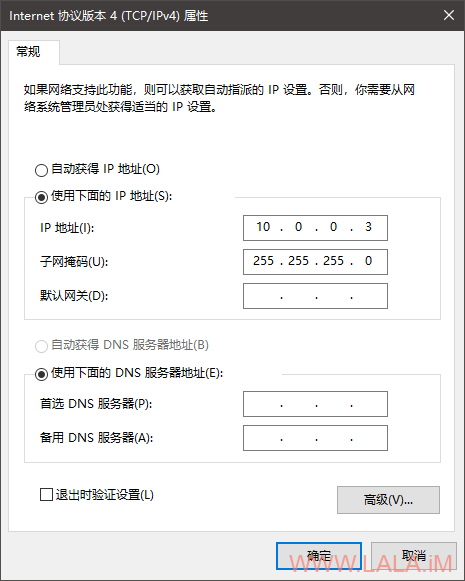
现在需要打开Windows的网络连接界面,把TAP-Win32 Adapter V9这个设备的名称改为vpn:
接着为这个设备配置IP,配置的IP必须和node_family文件内的保持一致:
创建服务:
tincd -n imlala
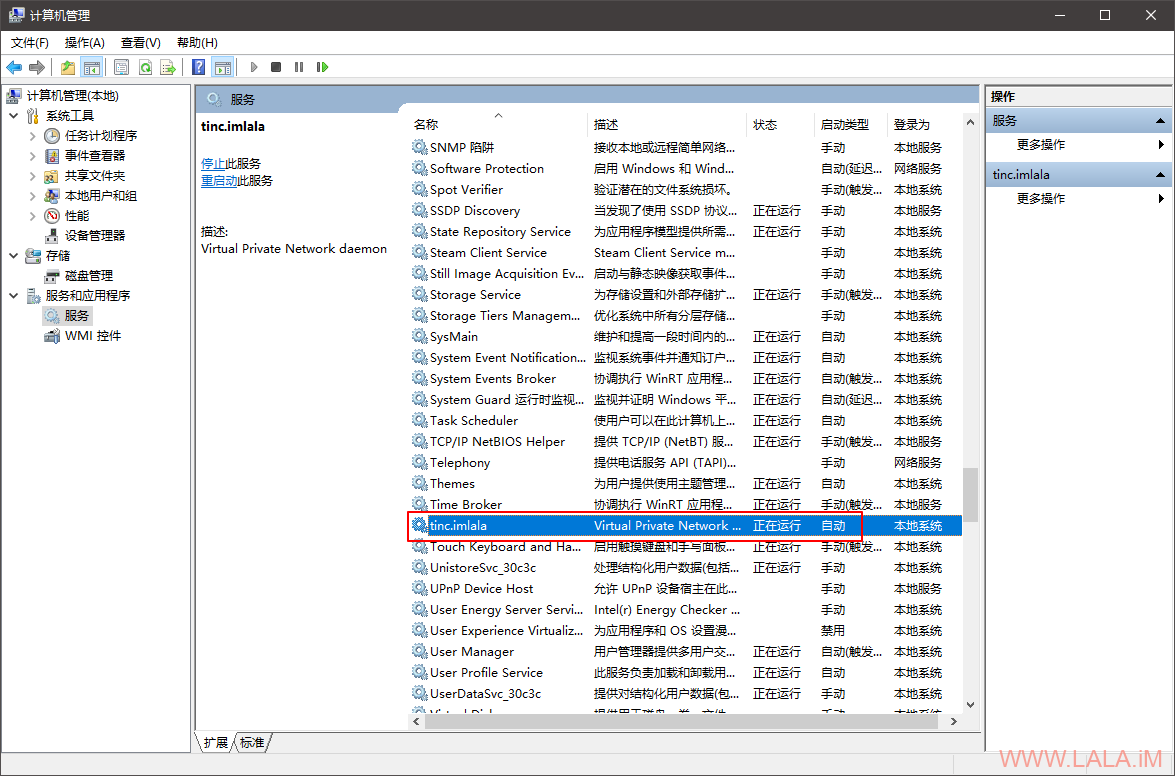
最后在Windows的计算机管理,启动服务:
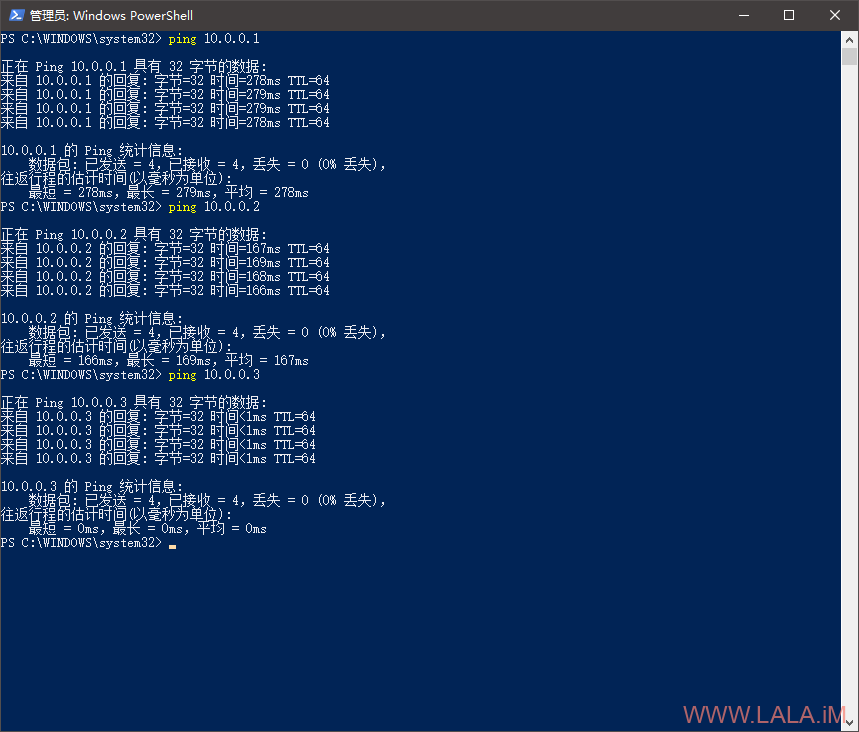
现在测试,三台机器应该都可以相互Ping通:
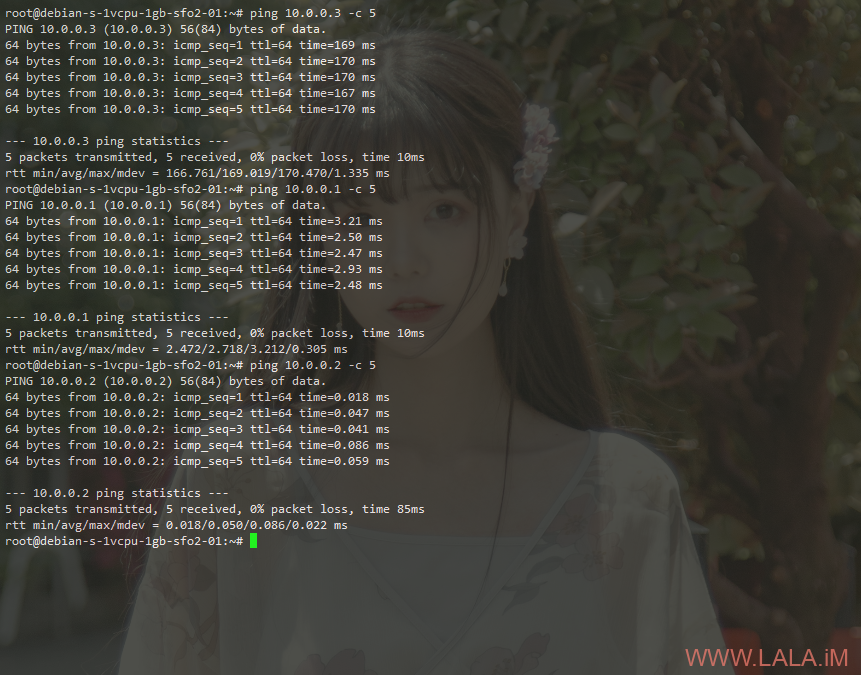
在第二台客户端机器内测试Ping,一切正常:


建立之后如果就不需要VPS支持,而是两台主机直接通信,那么可以作为类似ngrok这些内网传透的使用,而且,速度飞快啊
就是这个作用。。群晖暴露服务/在家想连公司电脑等等,都可以用这个,速度快的一匹。。
在家想连公司电脑?我选择闪送
最重要的你好像没提到,两个局域网内的所有子设备都需要安装吗?要的话就比不上zerotier了。zerotier可以在路由器部署后实现两个局域网内所有子设备互通。
没考虑那么多,要是路由上面跑的系统是Debian估计也很好实现。另外你这个IP有点6,好评。。
我试了一下,可以ping通,但好像不是P2P的,流量还是走的VPS,我传文件试了。是我哪里的设置问题吗?
你具体是如何测试的?这是官方的原话:
Automatic full mesh routing
Regardless of how you set up the tinc daemons to connect to each other, VPN traffic is always (if possible) sent directly to the destination, without going through intermediate hops.
看你的教程简直就是享受 ,给一下建议把复制密匙那部分写到启动程序之前,还有一个问题大佬你这个教程没有关于防火墙和云服务器安全组相关的。
水这篇文章的时候用的不是云服务器,如果是的话可能会加上。。。
我配置之后,只能ping到自己,ping不通对方
找到原因了,win11需要禁用多路由传送器协议