
nebula是slack开源的一款overlay网络工具,简单点理解就像一个p2pvpn,和tincvpn类似。
nebula还具有一定的打洞能力,可以用来做内网穿透。本文介绍一下简单的搭建和使用方法。
用到3台机器:
1.阿里云香港,用作lighthouse(灯塔)节点。
2.upcloud圣何塞,普通节点。
3.家里的windows10电脑,普通节点。
目标是3台机器可以互相通信。
阿里云/upcloud的机器系统都是Debian10,首先安装supervisor用于进程守护:
apt -y update
apt -y install supervisor
systemctl enable supervisor
接着在这两台机器内下载好二进制文件/解压:
mkdir -p /opt/nebula && cd /opt/nebula
wget https://github.com/slackhq/nebula/releases/download/v1.2.0/nebula-linux-amd64.tar.gz
tar -xzvf nebula-linux-amd64.tar.gz
在灯塔节点上执行下面的命令颁发证书(这将生成ca.crt和ca.key)
./nebula-cert ca -name "imlala"
添加灯塔节点(这将生成lighthouse.crt和lighthouse.key)
./nebula-cert sign -name "lighthouse" -ip "10.0.0.1/24"
添加普通节点(生成的东西和上面的一样,就是一对证书)
./nebula-cert sign -name "upcloud" -ip "10.0.0.2/24"
./nebula-cert sign -name "home" -ip "10.0.0.3/24"
在灯塔节点上新建配置文件:
nano config.yml
写入如下配置:
pki:
  ca: /opt/nebula/ca.crt
  cert: /opt/nebula/lighthouse.crt
  key: /opt/nebula/lighthouse.key

static_host_map:
  "10.0.0.1": ["你的服务器公网IP:4242"]

lighthouse:
  am_lighthouse: true
  interval: 60

listen:
  host: 0.0.0.0
  port: 4242

punchy:
  punch: true

cipher: chachapoly

tun:
  dev: nebula1
  drop_local_broadcast: false
  drop_multicast: false
  tx_queue: 500
  mtu: 1300

logging:
  level: info
  format: text

firewall:
  conntrack:
    tcp_timeout: 12m
    udp_timeout: 3m
    default_timeout: 10m
    max_connections: 100000

  outbound:
    - port: any
      proto: any
      host: any

  inbound:
    - port: any
      proto: any
      host: any
接下来新建supervisor配置文件:
nano /etc/supervisor/conf.d/nebula.conf
写入如下配置:
[program:nebula]
priority=1
directory=/opt/nebula
command=/opt/nebula/nebula -config config.yml
autostart=true
autorestart=true
redirect_stderr=true
stdout_logfile=/var/log/supervisor/nebula.log
然后update一下就可以跑起来了:
supervisorctl update
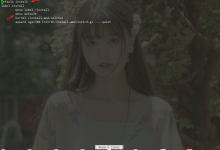
如果正常的话,通过ip a应该可以看到一个名为nebula1的接口:
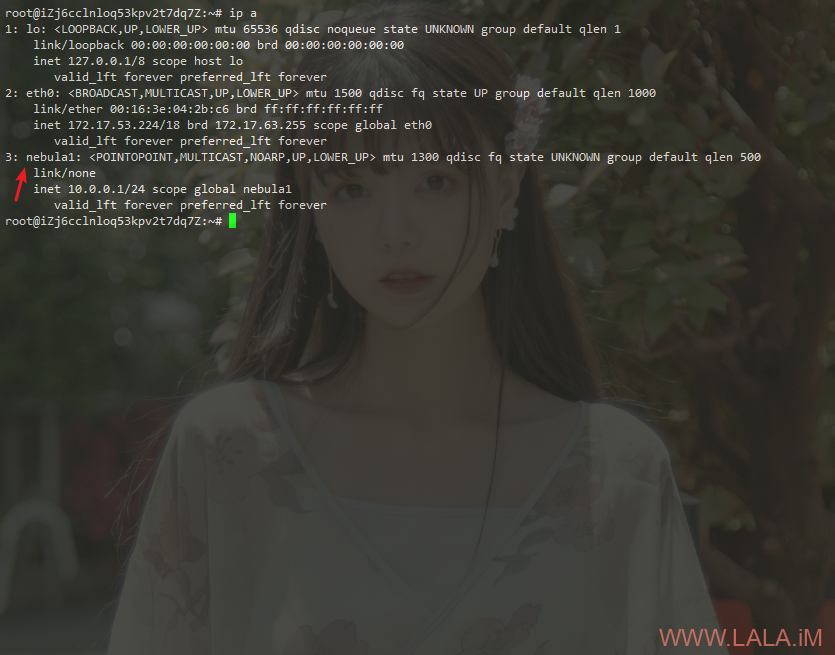
这样灯塔节点就配置完成了。
接下来配置upcloud的普通节点,首先我们需要把之前在灯塔节点上生成的对应节点的证书保存过来。
需要注意的是ca.crt也是需要保存过来的,这里我直接就用scp传过来:
scp ca.crt upcloud.crt upcloud.key 服务器公网IP:/opt/nebula
然后只需要新建一个配置文件稍微改改就行:
nano config.yml
写入如下配置(需要改动的地方我加了注释:)
pki:
  ca: /opt/nebula/ca.crt
  cert: /opt/nebula/upcloud.crt # 对应你这个节点的证书
  key: /opt/nebula/upcloud.key # 对应你这个节点的密钥

static_host_map:
  "10.0.0.1": ["灯塔节点服务器的公网IP:4242"]

lighthouse:
  am_lighthouse: false # 普通节点这里需要改为false
  interval: 60
  hosts:
    - "10.0.0.1" # 普通节点需要在这里指定灯塔节点的内部IP,这里不是灯塔节点的公网IP

listen:
  host: 0.0.0.0
  port: 4242

punchy:
  punch: true

cipher: chachapoly # 加密方式必须一致

tun:
  dev: nebula1
  drop_local_broadcast: false
  drop_multicast: false
  tx_queue: 500
  mtu: 1300

logging:
  level: info
  format: text

firewall:
  conntrack:
    tcp_timeout: 12m
    udp_timeout: 3m
    default_timeout: 10m
    max_connections: 100000

  outbound:
    - port: any
      proto: any
      host: any

  inbound:
    - port: any
      proto: any
      host: any
最后还是和之前一样配置一下supervisor跑起来就行了。
windows的配置也大同小异,大概说明一下吧。
1.安装TAP驱动:https://openvpn.net/community-downloads/
2.下载对应架构的二进制文件解压:
https://github.com/slackhq/nebula/releases/download/v1.2.0/nebula-windows-amd64.zip
3.用sftp或者其他你知道的方法把灯塔节点上生成的证书保存到本地。
4.复制一份本文在上述列出的普通节点的配置文件,改动如下所示的内容:
pki:
  ca: C:/Users/LALA/Desktop/nebula/nebula-windows-amd64/ca.crt
  cert: C:/Users/LALA/Desktop/nebula/nebula-windows-amd64/home.crt
  key: C:/Users/LALA/Desktop/nebula/nebula-windows-amd64/home.key
5.使用powershell以管理员(必须是管理员)的身份执行下面的命令启动即可:
cd C:/Users/LALA/Desktop/nebula/nebula-windows-amd64
./nebula.exe -config config.yml
6.nebula也可以在windows上把自身安装成服务,这样后续就不需要用到powershell了:
./nebula -service install -config C:\Users\LALA\Desktop\nebula\nebula-windows-amd64\config.yml
启动服务:
./nebula -service start -config C:\Users\LALA\Desktop\nebula\nebula-windows-amd64\config.yml
重启/停止/卸载服务:
./nebula -service restart
./nebula -service stop
./nebula -service uninstall
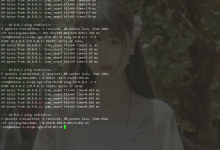
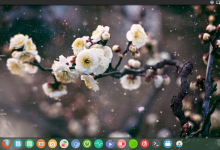
最后简单测试一下:


这能不能抗封锁?
估计可以,但不推荐。专业的事情留给专业的工具做吧,v2/ss这些肯定比这个好。
进程守护用 Systemd 不香吗?
说实话,我个人觉得supervisor在某些时候比systemd香。尤其是写dockerfile的时候。。
好像ipv6不支持?而且只能走udp吧
是的。
在win下运行nebula -config config.yml,会出现“failed to run ‘netsh’ to set address: exit status 1”。然后有台机器不知道怎么弄的,错误没了能用了,另一台死活不行
开powershell用管理员权限
艹 我一直认为8.1没有powershell
最后用低版本解决了,看来有bug
走 UDP,那不是被 QOS 很严重
也可以试试zerotier