sing-box是一个通用代理平台,对标v2ray-core,有很多新的特性,具体可看这里:
https://sing-box.sagernet.org/zh/features/
这里记录下配置过程,主要是trojan相关的配置,我使用了nginx的ngx_stream_ssl_preread模块进行sni分流。
首先安装sing-box,你可以选择下载预构建好的二进制文件:
https://github.com/SagerNet/sing-box/releases
也可以自行构建,自己构建的话可以支持更多功能,比如ACME、QUIC这些,具体支持的构建标志可看这里:
https://sing-box.sagernet.org/zh/
由于我后续的配置用到了ACME这个功能,所以这里采用自行构建的方式来安装。首先安装构建需要用到的依赖:
apt -y update
apt -y install curl git build-essential libssl-dev libevent-dev zlib1g-dev gcc-mingw-w64
安装golang:
curl -L https://go.dev/dl/go1.19.1.linux-amd64.tar.gz -o go1.19.1.linux-amd64.tar.gz
tar -C /usr/local -xzf go1.19.1.linux-amd64.tar.gz
echo 'export PATH=$PATH:/usr/local/go/bin' > /etc/profile.d/golang.sh
source /etc/profile.d/golang.sh
这里我编译一个1.1-beta6全功能版本,如果不需要某些功能比如tor自己去掉相关的构建标志即可:
go install -v -tags \
with_quic,\
with_grpc,\
with_wireguard,\
with_shadowsocksr,\
with_ech,with_utls,\
with_acme,\
with_clash_api,\
with_gvisor,\
with_embedded_tor,\
with_lwip \
github.com/sagernet/sing-box/cmd/sing-box@v1.1-beta6
交叉编译出windows平台可用的二进制文件:
env GOOS=windows GOARCH=amd64 CGO_ENABLED=1 CC=x86_64-w64-mingw32-gcc \
go install -v -tags \
with_quic,\
with_grpc,\
with_wireguard,\
with_shadowsocksr,\
with_ech,with_utls,\
with_acme,\
with_clash_api,\
with_gvisor,\
with_lwip \
github.com/sagernet/sing-box/cmd/sing-box@v1.1-beta6
复制编译好的文件:
cp $(go env GOPATH)/bin/sing-box /usr/local/bin/
新建sing-box需要用到的目录:
mkdir -p /usr/local/etc/sing-box
新建systemd服务:
nano /etc/systemd/system/sing-box.service
写入如下配置:
[Unit]
Description=sing-box service
Documentation=https://sing-box.sagernet.org
After=network.target nss-lookup.target

[Service]
CapabilityBoundingSet=CAP_NET_ADMIN CAP_NET_BIND_SERVICE
AmbientCapabilities=CAP_NET_ADMIN CAP_NET_BIND_SERVICE
ExecStart=/usr/local/bin/sing-box run -c /usr/local/etc/sing-box/config.json
Restart=on-failure
RestartSec=1800s
LimitNOFILE=infinity

[Install]
WantedBy=multi-user.target
新建sing-box的配置文件:
nano /usr/local/etc/sing-box/config.json
trojan协议的配置:
{
  "log": {
    "level": "info"
  },
  "inbounds": [
    {
      "type": "trojan",
      "tag": "trojan-in",
      "listen": "127.0.0.1",
      "listen_port": 52000,
      "tcp_fast_open": true,
      "udp_fragment": true,
      "sniff": true,
      "sniff_override_destination": false,
      "udp_timeout": 300,
      "proxy_protocol": true,
      "proxy_protocol_accept_no_header": false,
      "users": [
        {
          "name": "imlala",
          "password": "password"
        }
      ],
      "tls": {
        "enabled": true,
        "server_name": "sing-box.example.com",
        "alpn": [
          "http/1.1"
        ],
        "min_version": "1.2",
        "max_version": "1.3",
        "certificate_path": "",
        "key_path": "",
        "acme": {
          "domain": ["sing-box.example.com"],
          "data_directory": "/usr/local/etc/sing-box",
          "default_server_name": "",
          "email": "imlala@example.com",
          "provider": "letsencrypt"
        }
      },
      "fallback": {
        "server": "127.0.0.1",
        "server_port": 23333
      }
    }
  ],
  "outbounds": [
    {
      "type": "direct",
      "tag": "direct"
    }
  ]
}
hysteria协议的配置:
{
  "log": {
    "level": "info"
  },
  "inbounds": [
    {
      "type": "hysteria",
      "tag": "hysteria-in",
      "listen": "::",
      "listen_port": 52001,
      "tcp_fast_open": false,
      "udp_fragment": true,
      "sniff": true,
      "sniff_override_destination": false,
      "proxy_protocol": false,
      "proxy_protocol_accept_no_header": false,
      "up_mbps": 500,
      "down_mbps": 500,
      "auth_str": "password",
      "max_conn_client": 2048,
      "disable_mtu_discovery": false,
      "tls": {
        "enabled": true,
        "server_name": "hysteria.example.com",
        "alpn": [
          "h3"
        ],
        "min_version": "1.2",
        "max_version": "1.3",
        "certificate_path": "",
        "key_path": "",
        "acme": {
          "domain": ["hysteria.example.com"],
          "data_directory": "/usr/local/etc/sing-box",
          "default_server_name": "",
          "email": "imlala@example.com",
          "provider": "letsencrypt"
        }
      }
    }
  ],
  "outbounds": [
    {
      "type": "direct",
      "tag": "direct"
    }
  ]
}
实际上你可以把trojan和hysteria的配置写在一个配置文件内,只是我个人并不使用hysteria,这里关于hysteria的配置是某位网友让我帮忙水个教程的,所以我单独列出来。另外由于hysteria的特性,肯定也是不支持用nginx做sni分流的。
接下来安装一个nginx:
apt -y install nginx
如果你服务器内的nginx已经在运行了,请先停止运行,务必将80、443端口空出来留给sing-box的acme使用:
systemctl stop nginx
检查你的配置是否正确:
sing-box check -c /usr/local/etc/sing-box/config.json
启动sing-box并设置开机自启:
systemctl enable --now sing-box
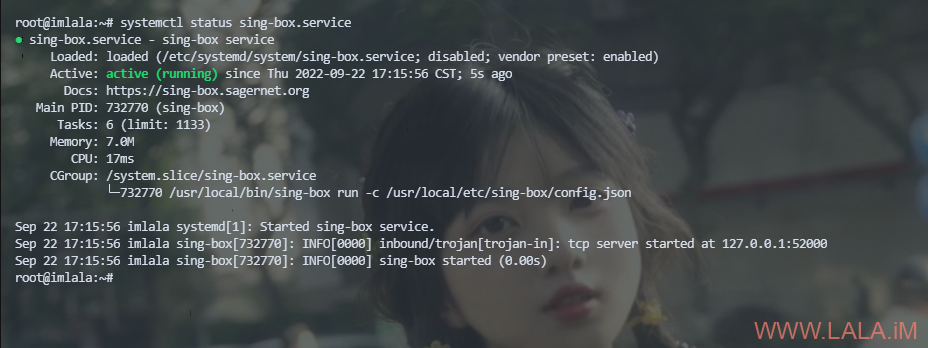
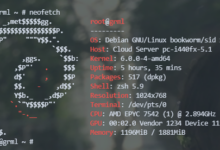
确保sing-box的服务正常工作:
systemctl status sing-box
如图所示:
接下来编辑nginx的主配置文件:
nano /etc/nginx/nginx.conf
写入如下配置,用于sni分流,注意这里启用了proxy_protocol:
stream {
        map $ssl_preread_server_name $singbox {
                sing-box.example.com trojan;
                wordpress.example.com wordpress;
                typecho.example.com typecho;
        }
        upstream trojan {
                server 127.0.0.1:52000; # trojan协议的端口
        }
        upstream wordpress {
                server 127.0.0.1:52100; # 你的第一个网站的ssl端口
        }
        upstream typecho {
                server 127.0.0.1:52200; # 你的第二个网站的ssl端口
        }
        server {
                listen 443      reuseport;
                listen [::]:443 reuseport;
                proxy_pass      $singbox;
                ssl_preread     on;
                proxy_protocol  on;
        }
}
接下来简单搭建一个回落站点,随便搞个静态页面都可以,这里我就用这个小游戏好了:
cd /var/www/html
git clone https://github.com/tusenpo/FlappyFrog.git flappyfrog
新建一个nginx站点配置文件,用于回落站点:
nano /etc/nginx/conf.d/fallback.conf
写入如下配置:
server {
        listen 80;
        server_name sing-box.example.com;
        if ($host = sing-box.example.com) {
                return 301 https://$host$request_uri;
        }
        return 404;
}

server {
        listen 127.0.0.1:23333;
        server_name sing-box.example.com;
        index index.html;
        root /var/www/html/flappyfrog;
}
注:
虽然sing-box的trojan协议支持proxy_protocol,但是sing-box的fallback目前不支持proxy_protocol,所以回落站点就不能配置接收proxy_protocol。
这也意味着目前回落站点无法获取到访客真实ip。期待sing-box加入类似xray-core的xver功能。
你的其他站点是可以配置接收proxy_protocol的,一个示例配置:
set_real_ip_from 127.0.0.1;
real_ip_header proxy_protocol;

server {
        listen 80;
        server_name wordpress.example.com;
        if ($host = wordpress.example.com) {
                return 301 https://$host$request_uri;
        }
        return 404;
}

server {
        listen 127.0.0.1:52100 ssl proxy_protocol;
        server_name wordpress.example.com;
        index index.html index.php;
        root /var/www/wordpress;
        ssl_certificate ...;
        ssl_certificate_key ...;
        ...
}
检查nginx配置是否正确:
nginx -t
配置无误后,启动nginx:
systemctl start nginx
服务端的配置到此就完成了,接下来是客户端的配置。
我这里使用的是windows,之前在linux上交叉编译了windows的二进制文件,所以下载到本地就可以用了。
trojan客户端的配置:
{
  "log": {
    "level": "info",
    "timestamp": true
  },
  "dns": {
    "servers": [
      {
        "tag": "cloudflare",
        "address": "https://1.1.1.1/dns-query"
      },
      {
        "tag": "china",
        "address": "local",
        "detour": "direct"
      }
    ],
    "rules": [
      {
        "domain": "sing-box.example.com",
        "geosite": "cn",
        "server": "china"
      }
    ],
    "disable_cache": true,
    "disable_expire": true
  },
  "inbounds": [
    {
      "type": "mixed",
      "tag": "mixed-in",
      "listen": "::",
      "listen_port": 20080,
      "sniff": true,
      "set_system_proxy": true
    }
  ],
  "outbounds": [
    {
      "type": "trojan",
      "tag": "trojan-out",
      "server": "sing-box.example.com",
      "server_port": 443,
      "password": "password",
      "tls": {
        "enabled": true,
        "disable_sni": false,
        "server_name": "sing-box.example.com",
        "insecure": false,
        "alpn": [
          "http/1.1"
        ]
      },
      "multiplex": {
        "enabled": true,
        "protocol": "smux",
        "max_connections": 5,
        "min_streams": 4,
        "max_streams": 0
      },
      "connect_timeout": "5s",
      "tcp_fast_open": true,
      "udp_fragment": true
    },
    {
      "type": "direct",
      "tag": "direct"
    },
    {
      "type": "block",
      "tag": "block"
    }
  ],
  "route": {
    "rules": [
      {
        "geosite": "cn",
        "geoip": "cn",
        "outbound": "direct"
      },
      {
        "geosite": "category-ads-all",
        "outbound": "block"
      }
    ]
  }
}
hysteria客户端配置:
{
  "log": {
    "level": "info",
    "timestamp": true
  },
  "dns": {
    "servers": [
      {
        "tag": "cloudflare",
        "address": "https://1.1.1.1/dns-query"
      },
      {
        "tag": "china",
        "address": "local",
        "detour": "direct"
      }
    ],
    "rules": [
      {
        "domain": "hysteria.example.com",
        "geosite": "cn",
        "server": "china"
      }
    ],
    "disable_cache": true,
    "disable_expire": true
  },
  "inbounds": [
    {
      "type": "mixed",
      "tag": "mixed-in",
      "listen": "::",
      "listen_port": 20080,
      "sniff": true,
      "set_system_proxy": true
    }
  ],
  "outbounds": [
    {
      "type": "hysteria",
      "tag": "hysteria-out",
      "server": "hysteria.example.com",
      "server_port": 52001,
      "up_mbps": 20,
      "down_mbps": 100,
      "auth_str": "password",
      "disable_mtu_discovery": false,
      "tls": {
        "enabled": true,
        "disable_sni": false,
        "server_name": "hysteria.example.com",
        "insecure": false,
        "alpn": [
          "h3"
        ]
      },
      "connect_timeout": "5s",
      "tcp_fast_open": false,
      "udp_fragment": true
    },
    {
      "type": "direct",
      "tag": "direct"
    },
    {
      "type": "block",
      "tag": "block"
    }
  ],
  "route": {
    "rules": [
      {
        "geosite": "cn",
        "geoip": "cn",
        "outbound": "direct"
      },
      {
        "geosite": "category-ads-all",
        "outbound": "block"
      }
    ]
  }
}
打开终端运行sing-box客户端:
cd C:\Users\LALA\Desktop\sing-box
.\sing-box.exe run -c config.json
gui客户端目前还没有很好的支持,v2rayN的pre-release刚刚支持添加sing-box的自定义配置:
https://github.com/2dust/v2rayN/releases/tag/5.36
如果你使用v2rayN,务必将sing-box的设置系统代理改为false,这与v2rayN的设置系统代理会产生冲突:
"set_system_proxy": false
我测试了一下,目前v2rayN对sing-box的自定义配置支持有很多问题,甚至不能正常工作。目前不推荐用v2rayN运行sing-box。
 荒岛
荒岛







感谢你的分享!!!
https://github.com/MatsuriDayo/nekoray 这个项目支持sing-box的vpn模式及sing-box的内核模式,感觉上比v2rayN要更原生地支持sing-box,而且有windows版及linux桌面版
可以的,我待会装一个用用看。
哪些参数是要替换成自己服务器的呢?
sing-box和nginx里面的域名改成你自己的,再就是sing-box里面的acme邮箱地址,其他的不需要修改。
有两种 gRPC 实现,所以不加 with_grpc tag 也是可以用 gRPC 的,而且性能可能会更好
2个客户端的配置放在一个config文件中有可能吗?是不是需要listen两个端口地址了?
貌似现在最新版的sing-box不支持入站trojan填写:
“proxy_protocol”: true,
“proxy_protocol_accept_no_header”: false,
nginx中的配置好像也不能直接反代。用stream的话暂时没有弄出来。