
Nyaa这么出名的东西就不用多介绍了,出名到被欧盟一锅端,当时是因为什么被端了我也记的不是很清楚了。就简要说下被端了之后没多久的一些事情吧。。。
Nyaa本是一个国外著名的BT种子站,它与现在的那些磁力站不同的地方就在于Nyaa所有的种子都是由用户自己上传分享的,而磁力站多数都是爬虫自动爬。Nyaa其实是2个站点的总称,分为表站和里站,表站就是用户上传一些正常向的资源,而里站你们懂的,各种R18应有尽有,所以Nyaa有一大群肥宅/痴汉/二次元用户。。。
就是这样一个站被端了后,大概才不到半个月的时间网上就流出了这个站点的部分数据库,然后又没过多久就莫名其妙的出现了几个自称Nyaa的站点,但是应该都是假站,或者说是想借Nyaa的热度来蹭一波人气,但是不管初衷如何,能够继承Nyaa继续给广大宅男提供一个分享资源的平台,那么就是受欢迎的。
所以就目前而言,我个人觉得做的比较好的站点就是:nyaa.si。并且这个站点的维护者把源码在Github上面开源了,任何人都可以搭建。
下面我写一下这个程序的搭建教程,需要用到的环境和工具:
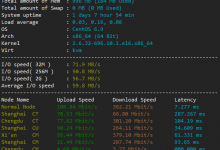
CentOS7 X64/FlashFXP/Xshell
更新系统/安装EPEL源/安装开发工具包:
yum -y update
yum -y install epel-release
yum -y groupinstall "Development Tools"
关闭系统防火墙:
systemctl stop firewalld.service
关闭SELinux:
vi /etc/selinux/config
SELINUX=disabled
setenforce 0
然后我们先安装一个LNMP环境,其实不需要用到PHP,但是这个程序对数据库的操作比较多,我们可以借助有PHP的支持来安装一个phpMyAdmin方便管理数据库。
先装Nginx,创建一个源:
vi /etc/yum.repos.d/nginx.repo
写入:
[nginx]
name=nginx repo
baseurl=http://nginx.org/packages/centos/7/$basearch/
gpgcheck=0
enabled=1
然后yum安装:
yum -y install nginx
安装MySQL5.7,创建一个源:
vi /etc/yum.repos.d/mysql-community.repo
写入:
[mysql57-community]
name=MySQL 5.7 Community Server
baseurl=http://repo.mysql.com/yum/mysql-5.7-community/el/7/$basearch/
enabled=1
gpgcheck=0
gpgkey=file:///etc/pki/rpm-gpg/RPM-GPG-KEY-mysql
然后yum安装:
yum -y install mysql-community-server
安装PHP7.2,安装一个webtatic源:
rpm -Uvh https://mirror.webtatic.com/yum/el7/webtatic-release.rpm
然后yum安装:
yum -y install php72w-fpm php72w-cli php72w-common php72w-gd php72w-mysqlnd php72w-odbc php72w-pdo php72w-pgsql php72w-xmlrpc php72w-xml php72w-mbstring php72w-opcache
启动Nginx/MySQL/PHP:
systemctl start nginx
systemctl start mysqld
systemctl start php-fpm
创建Nginx/MySQL/PHP开机启动:
systemctl enable nginx
systemctl enable mysqld
systemctl enable php-fpm
获取默认的MySQLROOT密码:
grep 'temporary password' /var/log/mysqld.log
修改ROOT密码:
mysqladmin -u root -p password
重启MySQL:
systemctl restart mysqld
然后通过FlashFXP把如下路径的php.ini文件下载到本地
/etc/php.ini
762行去掉注释:
cgi.fix_pathinfo=1
1264行去掉注释:
session.save_path = "/tmp"
将修改好的文件上传替换。
回到终端创建session目录并给777权限:
mkdir /var/lib/php/session
cd /var/lib/php
chmod -R 777 session
重启PHP:
systemctl restart php-fpm
现在我们来下载/解压/重命名phpMyAdmin:
cd /usr/share/nginx/
yum -y install wget unzip
wget https://files.phpmyadmin.net/phpMyAdmin/4.8.3/phpMyAdmin-4.8.3-all-languages.zip
unzip phpMyAdmin-4.8.3-all-languages.zip
mv phpMyAdmin-4.8.3-all-languages phpmyadmin
chown -R apache:apache phpmyadmin
新建一个Nginx站点配置文件:
vi /etc/nginx/conf.d/phpmyadmin.conf
写入:
server {
    listen       2333;
    server_name  你的站点域名;

    #charset koi8-r;
    #access_log  /var/log/nginx/host.access.log  main;

    location / {
        root   /usr/share/nginx/phpmyadmin;
        index  index.html index.htm index.php;
    }

    location ~ \.php$ {
        root           /usr/share/nginx/phpmyadmin;
        fastcgi_pass   127.0.0.1:9000;
        fastcgi_index  index.php;
        fastcgi_param  SCRIPT_FILENAME  /usr/share/nginx/phpmyadmin$fastcgi_script_name;
        include        fastcgi_params;
    }

}
重启Nginx:
systemctl restart nginx
至此LNMP+phpMyAdmin就安装好了,phpMyAdmin的访问地址是:你的站点域名+端口2333
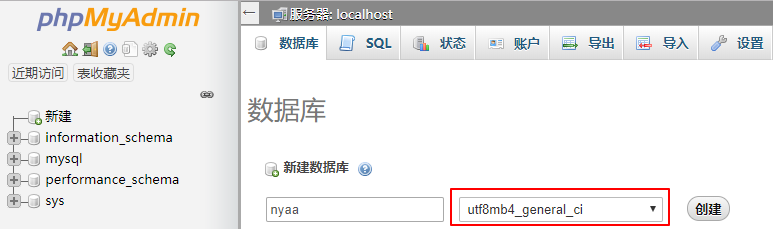
登录到phpMyadmin内,首先我们创建一个数据库,命名为:nyaa,数据库编码选择如下图所示的:
接下来开始部署Nyaa,先安装一些Python所需的依赖:
yum -y install git gcc make zlib zlib-devel readline readline-devel readline-static openssl openssl-devel openssl-static sqlite-devel bzip2-devel bzip2-libs libffi-devel
然后安装Pyenv:
curl -L https://github.com/pyenv/pyenv-installer/raw/master/bin/pyenv-installer | bash
这条命令执行完成后可能会有回显内容,类似如下:
export PATH="/root/.pyenv/bin:$PATH"
eval "$(pyenv init -)"
eval "$(pyenv virtualenv-init -)"
把你的这些内容加到:
vi ~/.bash_profile
然后另其生效:
source ~/.bash_profile
然后我们使用Pyenv安装Python3.6.1:
pyenv install 3.6.1
这个安装过程可能比较慢,各位耐心等待,等待安装完成后,创建虚拟环境:
pyenv virtualenv 3.6.1 nyaa
然后我们进入Nginx的站点目录:
cd /usr/share/nginx
拉取项目文件:
git clone https://github.com/nyaadevs/nyaa.git
进入到项目目录:
cd nyaa
将项目目录的Python设置成我们之前创建的环境:
pyenv local nyaa
接着安装mysql-devel:
yum -y install mysql-devel
然后安装Nyaa所需依赖:
pip install -r requirements.txt
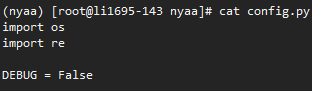
现在复制一份配置文件并编辑:
cp config.example.py config.py
vi config.py
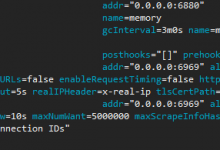
在这个配置文件内,我们主要改动的内容如下:
1.
DEBUG = True
改为
DEBUG = False
如图所示:
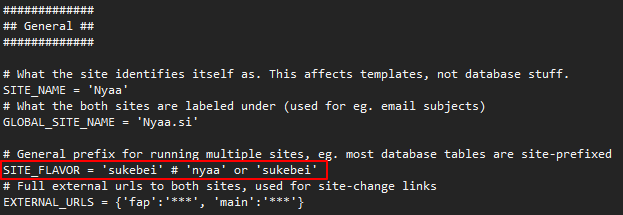
2.站点的运行模式,默认有nyaa和sukebei(sukebei就是R18),如图所示:
3.MySQL数据库连接信息,

格式如下:
mysql://数据库账号:数据库密码@localhost/数据库名?charset=utf8mb4
4.
USE_ELASTIC_SEARCH = False
改为
USE_ELASTIC_SEARCH = True
这个修改是让Nyaa支持Elasticsearch全文搜索,待会我们再来配置Elasticsearch。
5.其他配置信息,比如邮箱SMTP/验证码等等都可以在这个配置文件里面设置,这里就不多说了,根据自己的需求来更改。
现在我们导入数据:
python db_create.py
接着运行:
./db_migrate.py stamp head
现在我们来安装Elasticsearch,Elasticsearch需要JAVA8的支持,所以我们先安装JAVA:
yum -y install java-1.8.0-openjdk*
然后就可以安装Elasticsearch了,先导入密匙:
rpm --import https://artifacts.elastic.co/GPG-KEY-elasticsearch
新建一个源:
vi /etc/yum.repos.d/elasticsearch.repo
写入:
[elasticsearch-6.x]
name=Elasticsearch repository for 6.x packages
baseurl=https://artifacts.elastic.co/packages/6.x/yum
gpgcheck=1
gpgkey=https://artifacts.elastic.co/GPG-KEY-elasticsearch
enabled=1
autorefresh=1
type=rpm-md
然后通过yum安装:
yum -y install elasticsearch
最后运行Elasticsearch并设置开机启动:
systemctl start elasticsearch.service
systemctl enable elasticsearch.service
现在我们来配置Nyaa的Elasticsearch搜索,首先复制一份配置文件:
cp es_sync_config.example.json es_sync_config.json
编辑这个配置文件:
vi es_sync_config.json
在这个配置文件内正确填写你的nyaa数据库信息:
{
    "save_loc": "/tmp/pos.json",
    "mysql_host": "127.0.0.1",
    "mysql_port": 3306,
    "mysql_user": "root",
    "mysql_password": "你的数据库密码",
    "database": "nyaa",
    "internal_queue_depth": 10000,
    "es_chunk_size": 10000,
    "flush_interval": 5
}
然后我们编辑MySQL的my.cnf:
vi /etc/my.cnf
在[mysqld]的下方加入:
log-bin
server_id=1
binlog-format=row
接着再重启一次MySQL:
systemctl restart mysqld
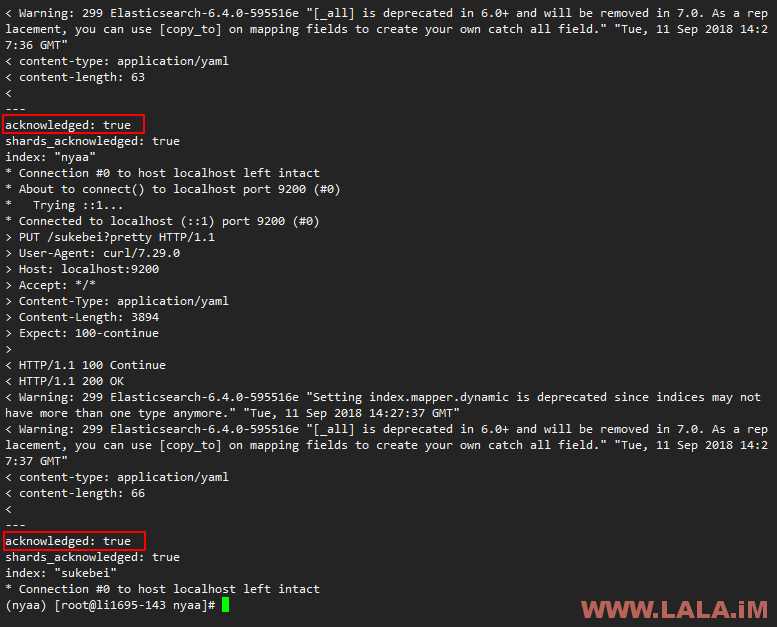
然后创建索引:
./create_es.sh
如果正常会回显两次如下图的内容:
然后运行如下命令导入种子数据:
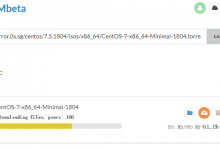
python import_to_es.py
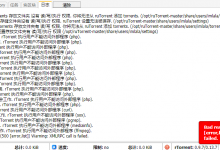
正常导入的话,会有类似如下图的回显:
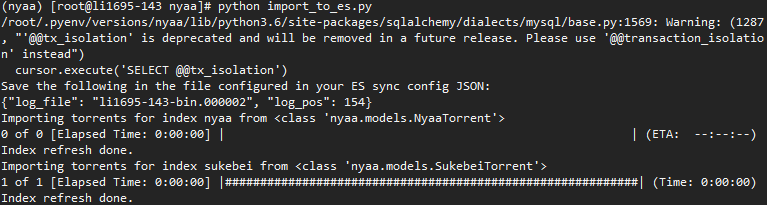
但是Elasticsearch的搜索不是实时入库的,也就是说如果在这次导入之后又有新种子上传进来,那么新的种子信息是搜索不到的,我们必须再执行一次import_to_es.py。Nyaa官方为了解决这个问题是用sync_es.py来根据MySQL的日志实现实时更新,但是我配置了很久sync_es.py也没配置成功。。。
所以,我目前有一个比较笨的方式是用crontab来每天执行一次import_to_es.py导入全部种子信息:
crontab -e
然后写入:
0 0 * * * /root/.pyenv/versions/3.6.1/envs/nyaa/bin/python /usr/share/nginx/nyaa/import_to_es.py
现在我们就可以运行Nyaa了,先安装一个screen:
yum -y install screen
然后创建一个新的会话:
screen -S nyaa
在新会话内运行Nyaa:
python run.py
键盘组合键Ctrl+A+D切换回来,现在我们配置Nginx的反向代理。
新建一个Nginx站点配置文件:
vi /etc/nginx/conf.d/nyaaproxy.conf
写入:
server {
    listen       80;
    server_name  你的站点域名;

location / {
    proxy_pass       http://0.0.0.0:5500;
    proxy_set_header Host      $host;
    proxy_set_header X-Real-IP $remote_addr;
    proxy_set_header Upgrade   $http_upgrade;
    proxy_set_header Connection "upgrade";
    proxy_http_version         1.1;
    proxy_redirect             off;
    }
}
最后重启Nginx:
systemctl restart nginx
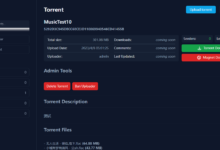
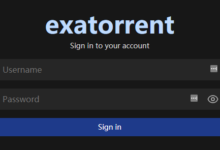
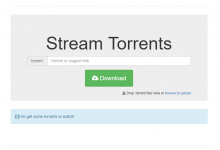
现在不出意外打开你的浏览器,可以看到Nyaa的WEB界面了:

补充一点关于Nyaa这个程序的管理员设置。
首先去网站前台注册一个普通账号,然后使用phpMyAdmin登录进去找到user这张表:
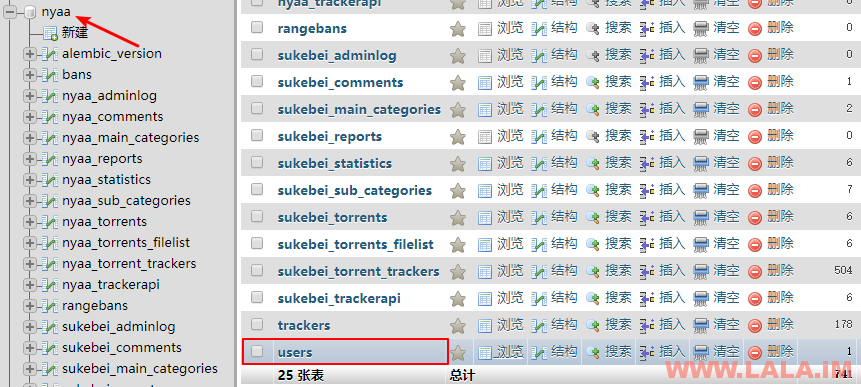
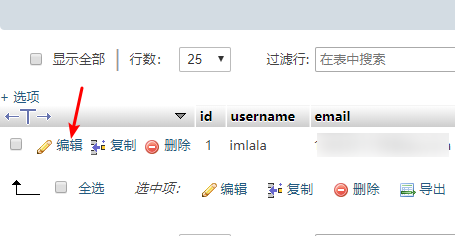
点浏览,找到你要设置的管理员账号,然后点编辑:
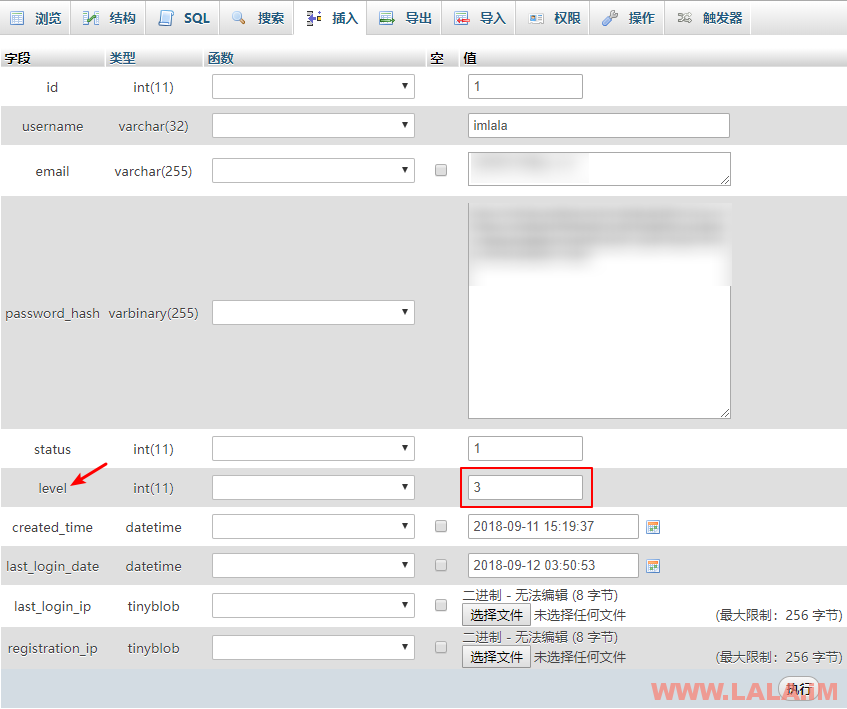
找到level这个字段,0是User/1是Trusted/2是Moderator/3是Administrator,我们修改成3就行了:


这个里站域名是多少
sukebei.nyaa.si,资源感觉还比较少。
创建索引出错
./create_es.sh
* About to connect() to localhost port 9200 (#0)
* Trying 127.0.0.1…
* Connection refused
* Trying ::1…
* Failed to connect to ::1: No route to host
* Failed connect to localhost:9200; No route to host
* Closing connection 0
curl: (7) Failed to connect to ::1: No route to host
* About to connect() to localhost port 9200 (#0)
* Trying 127.0.0.1…
* Connection refused
* Trying ::1…
* Failed to connect to ::1: No route to host
* Failed connect to localhost:9200; No route to host
* Closing connection 0
curl: (7) Failed to connect to ::1: No route to host
(nyaa) [root@VM_117_113_centos nyaa]# ./create_es.sh
* About to connect() to localhost port 9200 (#0)
* Trying 127.0.0.1…
* Connection refused
* Trying ::1…
* Failed to connect to ::1: No route to host
* Failed connect to localhost:9200; No route to host
* Closing connection 0
curl: (7) Failed to connect to ::1: No route to host
* About to connect() to localhost port 9200 (#0)
* Trying 127.0.0.1…
* Connection refused
* Trying ::1…
* Failed to connect to ::1: No route to host
* Failed connect to localhost:9200; No route to host
* Closing connection 0
curl: (7) Failed to connect to ::1: No route to host
亲测 Elasticsearch 1G小内存不要装,启动不了
ES默认配置是占用1G内存左右,可以修改配置改成512MB:/etc/elasticsearch/jvm.options
博主,你好,请问您可以出一个复活海盗湾项目 the open bay 的搭建教程吗?https://github.com/isohuntto/openbay
海盗湾不是一直活着在么。。。。另外这个项目4年没更新了= =
搭建是不会搭建了,这个站点我先收藏了