
这个可以在配置比较低的机器上运行(最低配512M内存应该就行)也可以利用PM2适当调整进程数来增加爬虫的效率。
程序需要用到nodejs/mongodb/redis,下面一起安装一下:
apt -y update
apt -y install build-essential gnupg curl wget git
curl -sL https://deb.nodesource.com/setup_13.x | bash -
wget -qO - https://www.mongodb.org/static/pgp/server-4.2.asc | apt-key add -
echo "deb http://repo.mongodb.org/apt/debian buster/mongodb-org/4.2 main" | tee /etc/apt/sources.list.d/mongodb-org-4.2.list
apt -y update
apt -y install nodejs mongodb-org redis-server
启动mongodb/设置mongodb和redis开机自启:
systemctl start mongod.service
systemctl enable mongod.service redis-server.service
拉取项目源码/安装依赖:
cd /opt
git clone https://github.com/thejordanprice/p2pspider.git
cd p2pspider
npm install
安装PM2进程管理器:
npm install -g pm2
如果什么配置都不更改的话(保持默认)那么使用下面的命令即可启动:
pm2 start ecosystem.json
建议还是搞一台配置好一点的机器,这样爬虫爬的更快,然后你可以根据机器配置来适当调整进程:
nano ecosystem.json
适当调整instances的数量,例如一台2H2G的VPS可以把webserver的instances改为2,daemon的instances改为8:
{
  "apps" : [{
    //
    "name"      : "webserver",
    "script"    : "bin/webserver.js",
    "watch"     : true,
    "instances" : 2,
    "exec_mode" : "cluster",
    "max_memory_restart": "100M"
  },{
    //
    "name"       : "daemon",
    "script"     : "bin/daemon.js",
    "watch"      : true,
    "instances"  : 8,
    "exec_mode"  : "cluster",
    "max_memory_restart": "125M"
  }]
}
如果之前按默认配置启动了程序,后续修改ecosystem.json要使其生效,应该先delete掉之前的进程再启动:
pm2 delete all
pm2 start ecosystem.json
设置开机自启:
pm2 startup
pm2 save
这个程序还有一个简单的用户验证功能,如果你搭建了之后不想公开给别人使用,可以编辑webserver.js:
nano bin/webserver.js
去掉下面这段代码的注释,然后添加你的账号和密码:
app.use(basicAuth({
  users: {
    'imlala': 'password',
    'username': 'password',
  },
  challenge: true,
  realm: 'Secret Place'
}));
重启即可生效:
pm2 restart all
可能有人很关心备份的问题,毕竟自己辛辛苦苦爬了很久的磁力要是万一丢了就太可惜了。所以这里也简单写一下如何给这个程序备份:
cd /opt/p2pspider
mongodump -d magnetdb
cd ..
tar -czvf /opt/p2pspider.tar.gz p2pspider
scp p2pspider.tar.gz serverip:/opt
恢复(按照文章之前的步骤在机器上安装好nodejs/mongodb/redis):
cd /opt
tar -xzvf p2pspider.tar.gz
cd p2pspider
mongorestore dump/
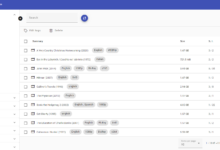
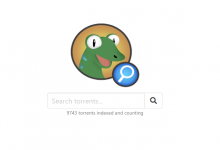
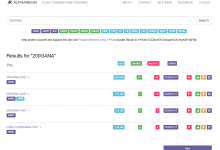
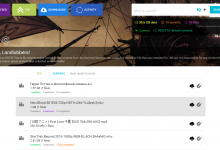
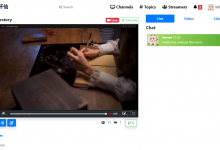
一些预览:

搜索结果页面:


1H1G可以吗?把webserver的instances改为1,daemon的instances改为4吗?这个脚本可以加域名吗?添加账号密码那一步有点不明白,能否讲的细一点,具体修改哪里,账号密码是不是填在password那里?
我弄了个docker镜像你直接用docker部署吧。。
好的,简单多了,谢谢
拉拉不打算开个爬虫网站嘛
弄了一个自用来着,数据还不是很多。。
大佬如何是用nginx反代,配置应该怎样写?
你把这篇文章里面的nginx配置复制出来:https://lala.im/6617.html,7000端口改成8080就可以了。
感谢!但是现在打开网站后,发现昨晚安装完,爬到现在,一个种子都没有入库……
我的vps本身已经安装了宝塔,装了nginx、php这些,再用docker部署应该也没问题吧?
估计是端口问题,我刚从Vultr打包搬运到套路云,一开始也是一个磁链都没入库,后来防火墙放行端口后就可以了。
请问应该放行哪些端口?
8080/tcp
6881/udp
是基于debian10吗
数据库分离需要修改哪个文件?