
官网:https://bitmagnet.io,项目地址:https://github.com/bitmagnet-io/bitmagnet
部署环境:Debian12,内存至少4GB。
安装需要用到的软件包:
apt -y update
apt -y install curl nginx python3-certbot-nginx apache2-utils
curl -fsSL https://get.docker.com -o get-docker.sh
sh get-docker.sh
创建目录和compose文件:
mkdir -p /opt/bitmagnet && cd /opt/bitmagnet && nano docker-compose.yml
写入如下内容:
services:
  bitmagnet:
    image: ghcr.io/bitmagnet-io/bitmagnet:latest
    container_name: bitmagnet
    ports:
      - "127.0.0.1:3333:3333"
      - "3334:3334/tcp"
      - "3334:3334/udp"
    restart: unless-stopped
    environment:
      - POSTGRES_HOST=postgres
      - POSTGRES_PASSWORD=hidden
    #      - TMDB_API_KEY=your_api_key
    command:
      - worker
      - run
      - --keys=http_server
      - --keys=queue_server
      - --keys=dht_crawler
    depends_on:
      postgres:
        condition: service_healthy

  postgres:
    image: postgres:16-alpine
    container_name: bitmagnet-postgres
    volumes:
      - ./data/postgres:/var/lib/postgresql/data
    restart: unless-stopped
    environment:
      - POSTGRES_PASSWORD=hidden
      - POSTGRES_DB=bitmagnet
      - PGUSER=postgres
    shm_size: 1g
    healthcheck:
      test:
        - CMD-SHELL
        - pg_isready
      start_period: 20s
      interval: 10s
启动:
docker compose up -d
因bitmagnet目前没有实现身份认证功能,并且在webui内可以删除种子信息,如果暴露在公网上非常不安全。
为解决这个问题,我在上述配置中将3333端口(webui端口)监听在本地,然后用nginx去反代,这样就可以配置一个http basic验证。
如果你不打算暴露在公网运行,仅在自己的nas、homelab等局域网环境运行则无需反代。
创建htpasswd文件:
htpasswd -c /etc/nginx/.htpasswd imlala
新建nginx站点配置文件:
nano /etc/nginx/sites-available/bitmagnet
写入如下配置:
upstream bitmagnet {
    server 127.0.0.1:3333;
}

server {
    listen 80;
    server_name bitmagnet.example.com;

    location / {
        auth_basic "auth";
        auth_basic_user_file /etc/nginx/.htpasswd;
        proxy_pass http://bitmagnet;
        proxy_set_header Host $host;
        proxy_set_header X-Real-IP $remote_addr;
        proxy_set_header X-Forwarded-For $proxy_add_x_forwarded_for;
        proxy_set_header X-Forwarded-Proto $scheme;
        proxy_set_header X-Forwarded-Protocol $scheme;
    }
}
启用站点:
ln -s /etc/nginx/sites-available/bitmagnet /etc/nginx/sites-enabled/bitmagnet
申请tls证书:
certbot --nginx --email imlala@example.com --agree-tos --no-eff-email
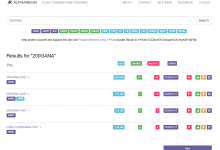
下面是我搭建的一个实例,运行了差不多1天,爬了12万多的数据:
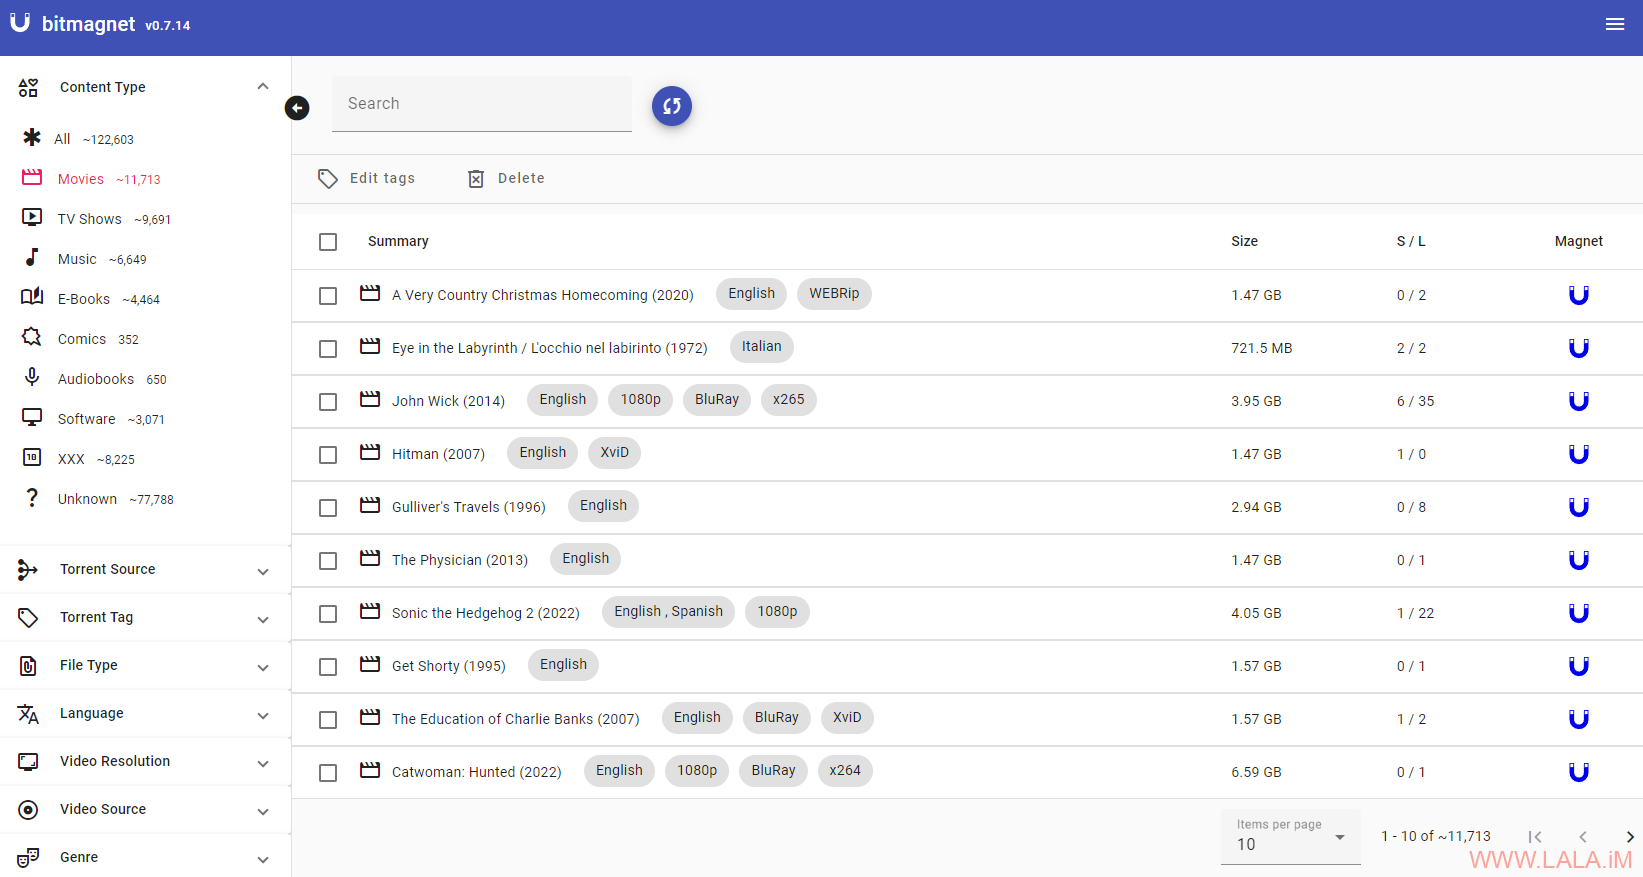
此时的资源占用情况如下,CPU是i5-6500t,一直在27左右,内存一共吃了大概3GB:


docker compose up -d 出现 yaml: line 27: block sequence entries are not allowed in this context
请问,怎么解决?谢谢
根据提示,我只能知道你的compose文件内第27行的配置有问题。。具体啥问题,需要你把完整的compose配置贴上来。。
我尝试安装在群晖docker里。postgres是起来了,但是bitmagnet起不来,看了日志视乎意思是连不上postgres数据库。不知道怎么回事。
换了个平台好像搭建成功,docker面板里看运行正常,但是3333口子webui还未连上。不知是否需要等一段时间?请告知。
你把ports下面的127.0.0.1:3333:3333改成3333:3333,然后把容器down掉重新up应该就好了。
博主你好!你指的是compose里把本地127删掉,刚输3333端口就行了是吗?哦,有道理,这样它是指向本地的。
我是试试。感谢!
嘿嘿!果真是这个问题。现在OK了。界面出来了。感谢!
已经挂了好几天了。到现在一个链都没有,是因为要上魔法呢,还是其它还需要做什么操作。望指点
WARN dht_crawler dhtcrawler/bootstrap.go:20 failed to resolve bootstrap node address: lookup router.silotis.us on 127.0.0.11:53: no such host
看log是不是连不上啊?
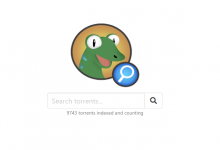
给大家找到了一个好看的前端 ,https://github.com/journey-ad/Bitmagnet-Next-Web
作者好像没维护了?