
最近lastpass更改了免费政策,强行劝退一波用户,包括我在内。。
其实就算lastpass不改白嫖政策,我也早就不想用这货了。。用了这么多年,它那个浏览器插件的界面属实是难看。。
之前一直都比较懒,也不想搞自建啥的,就一直将就用着lastpass,这回下决心换成bitwarden了。
我在之前也写过bitwarden_rs安装的文章,不过是基于docker的方法,由于我现在这台机器不能用docker(虚拟化不支持)所以就用编译的方法了。
系统是debian10,首先安装下面的包并启动nginx:
apt -y update
apt -y install wget curl git sudo nginx build-essential pkg-config libssl-dev libsqlite3-dev
systemctl enable --now nginx
安装rust:
curl --proto '=https' --tlsv1.2 -sSf https://sh.rustup.rs | sh
source $HOME/.cargo/env
拉取bitwarden_rs的项目代码:
git clone https://github.com/dani-garcia/bitwarden_rs.git
cd bitwarden_rs/
编译:
cargo build --features sqlite --release
注意:这里我为了方便维护和管理使用的是sqlite数据库。因为就我自己用,没必要上mysql。而且我想这种东西就算你开放给别人用,也要别人敢用你的服务。。
编译需要一定的时间,编译完成后复制二进制文件到/usr/bin目录下给执行权限:
cp target/release/bitwarden_rs /usr/bin/bitwarden_rs
chmod +x /usr/bin/bitwarden_rs
接下来创建一个名为bitwarden_rs的用户:
useradd -m -d /opt/bitwarden_rs -s /sbin/nologin bitwarden_rs
把这个用户加到sudo组:
adduser bitwarden_rs sudo
现在我们需要创建用于存放数据的目录和安装web-vault:
cd /opt/bitwarden_rs
sudo -u bitwarden_rs mkdir data
sudo -u bitwarden_rs wget https://github.com/dani-garcia/bw_web_builds/releases/download/v2.18.2/bw_web_v2.18.2.tar.gz
sudo -u bitwarden_rs tar -xzvf bw_web_v2.18.2.tar.gz
注意:这里我为了方便就直接用作者预编译好的web-vault,当然如果你要连web-vault也自己编译的话也行,但是我觉得没啥必要,因为编译web-vault需要nodejs,装个nodejs是小事,但是这货编译起来机器内存至少要2G。。极大的增加了小鸡的成本,所以个人不建议自己编译web-vault。
创建.env配置文件:
nano /etc/bitwarden_rs.env
写入如下配置:
SIGNUPS_ALLOWED=true
WEBSOCKET_ENABLED=true
WEBSOCKET_ADDRESS=127.0.0.1
WEBSOCKET_PORT=3012
ROCKET_ADDRESS=127.0.0.1
ROCKET_PORT=8000
创建systemd服务:
nano /etc/systemd/system/bitwarden_rs.service
写入如下配置:
[Unit]
Description=Bitwarden Server (Rust Edition)
Documentation=https://github.com/dani-garcia/bitwarden_rs
After=network.target

[Service]
User=bitwarden_rs
Group=bitwarden_rs
WorkingDirectory=/opt/bitwarden_rs
ReadWriteDirectories=/opt/bitwarden_rs
EnvironmentFile=/etc/bitwarden_rs.env
ExecStart=/usr/bin/bitwarden_rs
LimitNOFILE=1048576
LimitNPROC=64
PrivateTmp=true
PrivateDevices=true
ProtectHome=true
ProtectSystem=strict
AmbientCapabilities=CAP_NET_BIND_SERVICE

[Install]
WantedBy=multi-user.target
启动以及设置bitwarden_rs开机自启:
systemctl daemon-reload
systemctl start bitwarden_rs.service
systemctl enable bitwarden_rs.service
创建nginx站点配置文件:
nano /etc/nginx/conf.d/bitwarden_rs.conf
写入如下配置:
server {
    listen 80;
    server_name bitwarden.ohshit.club;
    client_max_body_size 0;

    location / {
        proxy_pass http://127.0.0.1:8000;
        proxy_set_header Host $host;
        proxy_set_header X-Real-IP $remote_addr;
        proxy_set_header X-Forwarded-For $proxy_add_x_forwarded_for;
        proxy_set_header X-Forwarded-Proto $scheme;
    }

    location /notifications/hub {
        proxy_pass http://127.0.0.1:3012;
        proxy_set_header Upgrade $http_upgrade;
        proxy_set_header Connection "upgrade";
    }

    location /notifications/hub/negotiate {
        proxy_pass http://127.0.0.1:8000;
    }
}
安装certbot:
apt -y install snapd
snap install core
snap refresh core
snap install --classic certbot
ln -s /snap/bin/certbot /usr/bin/certbot
使用certbot为你的站点自动签发证书:
certbot --nginx
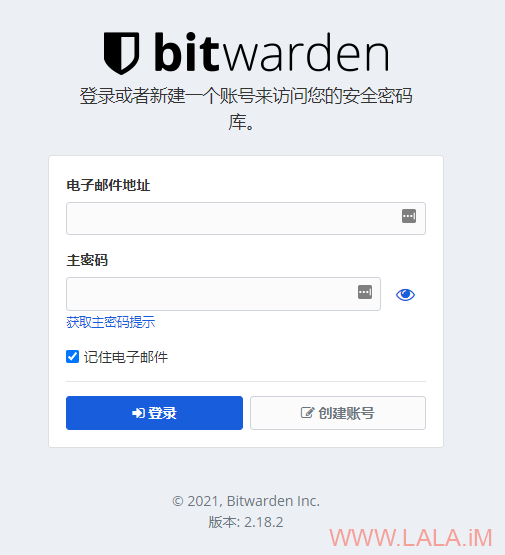
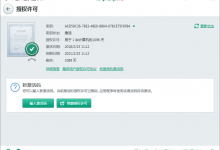
访问你的域名,如果正常你将可以看到这个页面:
如果不正常,执行下面的命令查看报错的日志信息:
journalctl -u bitwarden_rs.service
在你注册好账号后,建议再次编译.env配置文件:
nano /etc/bitwarden_rs.env
将注册功能关掉:
SIGNUPS_ALLOWED=false
重启bitwarden_rs服务使其生效:
systemctl restart bitwarden_rs.service


6的,lala不过我好像看网上有人可以在openvz虚拟化架构下用docker

自己编译的话更新什么的有点麻烦,当然锻炼下自己维护的能力也是挺好的
openvz的我也不清楚,proxmox下的lxc是可以的,我之前配置过。。这个更新的话也不麻烦,有新版本重新编译一下就行了。
大佬推荐的是不错,但配置好像要2核2G有点奢侈。可以不用域名吗?
2核2G是在哪里看到的。。如果你可以用docker的话,256m内存都可以跑,编译的话也只需要512m内存,编译之后运行就和用docker占用的内存一样。。不用域名的话就在配置文件里面把ROCKET_ADDRESS=127.0.0.1改成ROCKET_ADDRESS=0.0.0.0然后就可以用端口访问了。
谢谢大佬
改了之后,注册填表完送出,发生错误,此浏览器只允许HTTPS中打开,什么情况
谢谢,我去照办
国内机器编译的时候报错:error: failed to resolve patches for `https://github.com/rust-lang/crates.io-index`
怎么解决?拉拉
找个国外的vps编译完把二进制文件传到国内机,或者直接在国内机上设置代理。