
你可能听说过Mastodon,Soapbox就是Mastodon的一个前端,Soapbox的界面看起来就像是一个高仿的Twitter。
而Rebased是专门为Soapbox定制的后端,提供更多嵌合Soapbox的功能。
如果你有一个现成的Mastodon或者Pleroma实例也可以直接安装Soapbox(等于给你实例的前端界面换个主题模板)而不需要额外去安装一个新的后端。但是既然Soapbox有专门的后端,那这篇文章就记录一下整个完整的安装过程。
首先安装一些需要用到的软件包:
apt -y update
apt -y install nginx python3-certbot-nginx postgresql postgresql-contrib ffmpeg imagemagick git curl
安装后续编译erlang、elixir、rebased所需的依赖:
apt -y install build-essential cmake unzip autoconf m4 libncurses5-dev libssl-dev fasttext libimage-exiftool-perl libmagic-dev unixodbc-dev xsltproc fop
创建一个名为rebased的用户,并设置不允许登录shell:
useradd -r -s /sbin/nologin -m -d /var/lib/rebased -U rebased
登录到rebased用户:
su - -s /bin/bash rebased
克隆rebased项目源码:
git clone -b develop https://gitlab.com/soapbox-pub/rebased
安装asdf版本管理工具:
git clone https://github.com/asdf-vm/asdf.git ~/.asdf --branch v0.10.0
echo ". $HOME/.asdf/asdf.sh" >> ~/.bashrc
echo ". $HOME/.asdf/completions/asdf.bash" >> ~/.bashrc
source ~/.bashrc
添加asdf的erlang、elixir插件:
asdf plugin add erlang https://github.com/asdf-vm/asdf-erlang.git
asdf plugin add elixir https://github.com/asdf-vm/asdf-elixir.git
进入到rebased项目的根目录:
cd /var/lib/rebased/rebased
rebased强依赖指定的erlang、elixir版本,所以作者在项目根目录内创建了.tool-versions文件。
这个文件内指定了具体的erlang、elixir版本号,所以我们直接执行下面的命令即可开始编译安装erlang、elixir:
asdf install
接下来安装elixir的基本编译工具:
mix local.hex --force
mix local.rebar --force
获取elixir的依赖:
mix deps.get
最后编译rebased:
MIX_ENV=prod mix compile
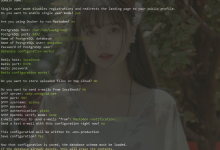
在编译完成之后,现在我们来生成实例的配置文件,执行如下命令会有一个向导:
MIX_ENV=prod mix pleroma.instance gen
整个过程如下:
What domain will your instance use? (e.g mysite.com) [] soapbox.example.com // 输入你的实例域名
What is the name of your instance? (e.g. Our Wonderful Community) [soapbox.example.com]  // 输入你的实例名字
What is your admin email address? (this will be public) []  imlala@example.com // 管理员邮箱
What email address do you want to use for sending email notifications? [imlala@example.com]  // 用于发送email的邮件地址
Do you want search engines to index your site? (y/n) [y]  // 输入y允许
Where will your database live? [localhost]  // 直接回车保持默认的配置
What shall we name your database? [pleroma]  // 直接回车保持默认的配置
What shall we name your database user? [pleroma]  // 直接回车保持默认的配置
What shall be your database password? [autogenerated]  // 直接回车保持默认的配置
What port will the app listen to (leave it if you are using the default setup with nginx)? [4000]  // 直接回车保持默认的配置
What IP will the app listen to (leave it if you are using the default setup with nginx)? [127.0.0.1]  // 直接回车保持默认的配置
将生成好的配置文件重命名:
mv config/generated_config.exs config/prod.secret.exs
登出rebased用户:
exit
登录到postgres用户下:
su - postgres
导入数据库:
psql -f /var/lib/rebased/rebased/config/setup_db.psql
登出postgres用户:
exit
重新登录到rebased用户下:
su - -s /bin/bash rebased
进入到项目根目录,执行数据库迁移命令:
cd rebased
MIX_ENV=prod mix ecto.migrate
等待数据库迁移完成,之后登出rebased用户:
exit
新建systemd服务:
systemctl edit --force --full rebased.service
写入如下配置:
[Unit]
Description=Pleroma social network
After=network.target postgresql.service

[Service]
ExecReload=/bin/kill $MAINPID
KillMode=process
Restart=on-failure

User=rebased
Environment="MIX_ENV=prod"
Environment="HOME=/var/lib/rebased"
WorkingDirectory=/var/lib/rebased/rebased
Environment="PATH=/var/lib/rebased/.asdf/shims:/var/lib/rebased/.asdf/bin:/usr/local/sbin:/usr/local/bin:/usr/sbin:/usr/bin:/sbin:/bin"
ExecStart=/var/lib/rebased/.asdf/shims/mix phx.server

PrivateTmp=true
ProtectHome=true
ProtectSystem=full
PrivateDevices=false
CapabilityBoundingSet=~CAP_SYS_ADMIN

[Install]
WantedBy=multi-user.target
启动rebased并设置开机自启:
systemctl enable --now rebased.service
现在配置nginx反向代理,新建nginx配置文件:
nano /etc/nginx/sites-available/rebased
写入如下配置:
proxy_cache_path /tmp/rebased-media-cache levels=1:2 keys_zone=rebased_media_cache:10m max_size=10g
                 inactive=720m use_temp_path=off;

upstream phoenix {
    server 127.0.0.1:4000 max_fails=5 fail_timeout=60s;
}

server {
    listen         80;
    listen         [::]:80;
    server_name    soapbox.example.com;

    gzip_vary on;
    gzip_proxied any;
    gzip_comp_level 6;
    gzip_buffers 16 8k;
    gzip_http_version 1.1;
    gzip_types text/plain text/css application/json application/javascript text/xml application/xml application/xml+rss text/javascript application/activity+json application/atom+xml;

    client_max_body_size 0;
    ignore_invalid_headers off;

    proxy_http_version 1.1;
    proxy_set_header Upgrade $http_upgrade;
    proxy_set_header Connection "upgrade";
    proxy_set_header Host $http_host;
    proxy_set_header X-Forwarded-For $proxy_add_x_forwarded_for;

    location / {
        proxy_pass http://phoenix;
    }

    location ~ ^/(media|proxy) {
        proxy_cache        rebased_media_cache;
        slice              1m;
        proxy_cache_key    $host$uri$is_args$args$slice_range;
        proxy_set_header   Range $slice_range;
        proxy_cache_valid  200 206 301 304 1h;
        proxy_cache_lock   on;
        proxy_ignore_client_abort on;
        proxy_buffering    on;
        chunked_transfer_encoding on;
        proxy_pass         http://phoenix;
    }
}
做一个软链接启用新的nginx配置:
ln -s /etc/nginx/sites-available/rebased /etc/nginx/sites-enabled/rebased
签发ssl证书:
certbot --nginx
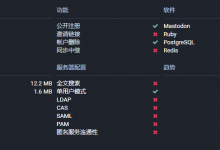
现在访问你的域名,如果一切正常你将可以看到类似下图的界面:

至此rebased后端安装完成,接下来就是soapbox前端的安装了。
登录到rebased用户下:
su - -s /bin/bash rebased
进入到如下目录:
cd rebased/instance
下载soapbox的压缩包并解压即可完成安装:
curl -L https://gitlab.com/soapbox-pub/soapbox/-/jobs/artifacts/develop/download?job=build-production -o soapbox.zip
unzip soapbox.zip
rm -rf soapbox.zip
回到上级目录,现在来创建你的管理员账号:
cd ..
MIX_ENV=prod mix pleroma.user new imlala imlala@example.com --admin
exit
接下来配置全文搜索,首先需要安装一个postgresql-server-dev-all的软件包:
apt -y install postgresql-server-dev-all
克隆pg_jieba的项目源码并编译安装:
git clone https://github.com/jaiminpan/pg_jieba
cd pg_jieba/
git submodule update --init --recursive
mkdir build && cd build
cmake ..
make
make install
登录到postgres用户下:
su - postgres
执行psql命令:
psql
列出所有数据库:
\list
可以看到我们之前配置的数据库名是pleroma:
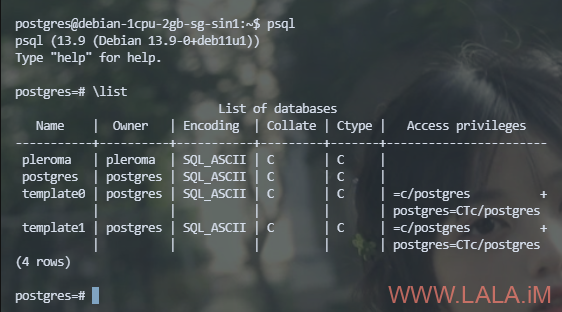
现在连接到这个数据库:
\connect pleroma
在这个数据库内创建扩展:
create extension pg_jieba;
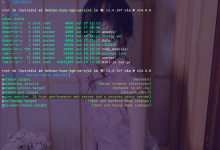
查询可用的搜索配置:
\dF
如果正常的话,这里会列出下面的4个配置:jiebacfg、jiebahmm、jiebamp、jiebaqry,如图所示:

登出postgres用户:
quit
exit
登录到rebased用户下:
su - -s /bin/bash rebased
进入到rebased项目的根目录:
cd rebased
执行下面的命令创建索引:
MIX_ENV=prod mix pleroma.database set_text_search_config public.jiebaqry
在刚才我们查询到一共有4种可用的配置,如果你不想使用jiebaqry也可以使用其他的配置,4种里面任意选择一种即可,例如切换到jiebacfg:
MIX_ENV=prod mix pleroma.database set_text_search_config public.jiebacfg
等待索引创建完成退出rebased用户,并重启postgresql数据库:
exit
systemctl restart postgresql
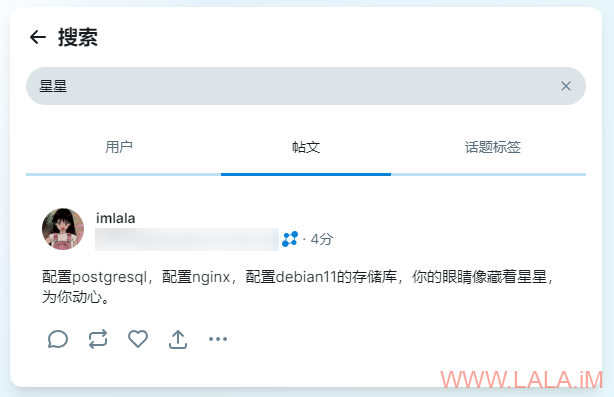
现在我们在soapbox的前端测试一下中文搜索,如果正常就能搜索中文内容了:
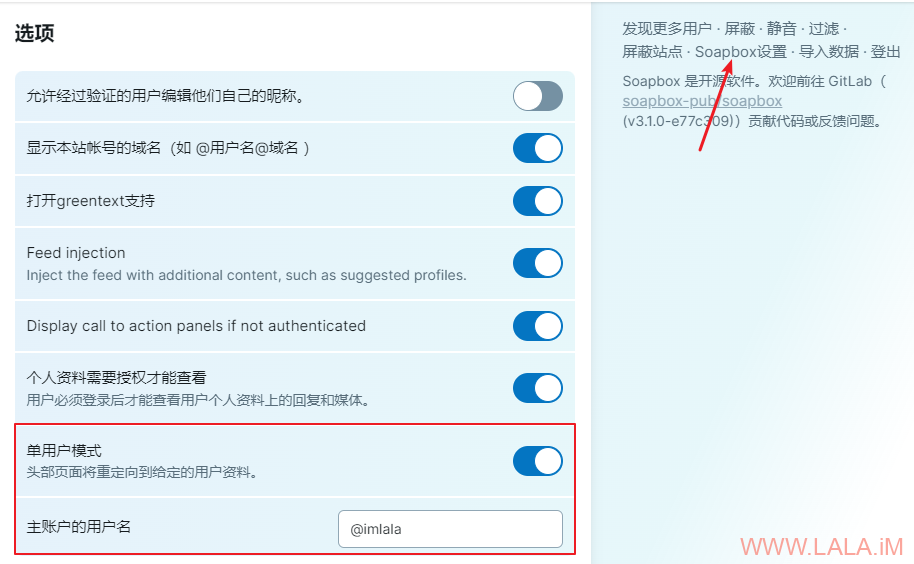
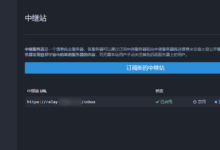
soapbox也支持单用户模式,可以这样设置:
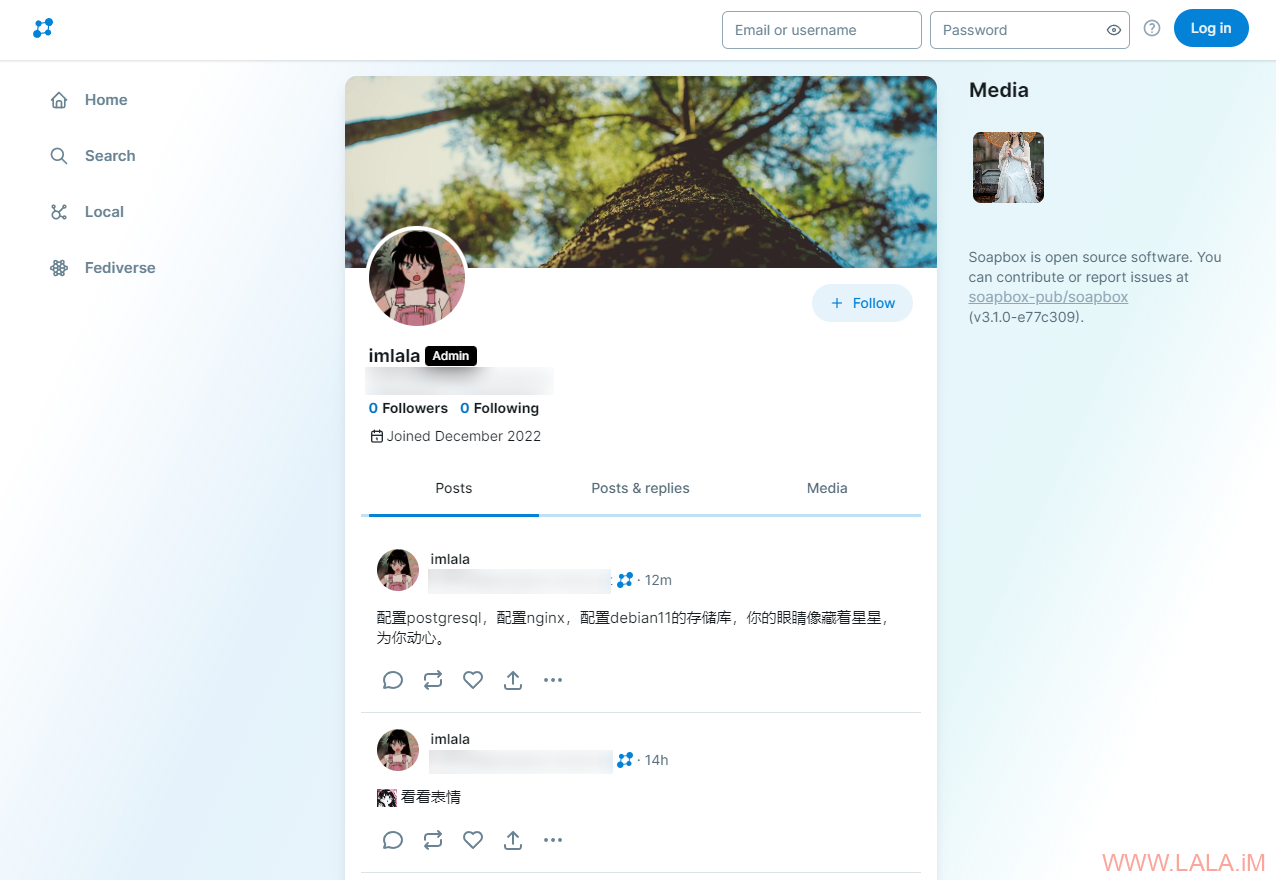
实例作为单用户运行的时候,访问主页的时候就会变成下面这种界面,和twitter非常像:
参考资料:
https://docs-develop.pleroma.social/backend/configuration/howto_search_cjk/
https://www.postgresql.org/docs/current/textsearch-configuration.html
https://git.pleroma.social/pleroma/pleroma/-/issues/2758
https://github.com/jaiminpan/pg_jieba
https://asdf-vm.com/zh-hans/guide/getting-started.html
https://github.com/asdf-vm/asdf-elixir
https://github.com/asdf-vm/asdf-erlang


还是觉得HumHub比较好