最近想试试nginx-quic分支里面的nginx版本,支持http3/quic。
由于我这台机器已经用包管理器装过debian官方repo里面的nginx了,而且也有几个站点在运行,不想做出太大的改动,所以我想了个办法干脆直接替换掉nginx的二进制文件。
官方建议用提供quic支持的库来构建nginx,目前主要有3种库可供选择:libressl、quictls、boringssl。
目前nginx官方提供的预构建包里面用的是quictls,我这里把这3个库的编译安装方法都记录一下,你只需任选其一即可。
下面所有的编译安装都不会影响到debian系统默认的openssl,你可以放心操作。
安装编译所需的依赖:
apt -y install build-essential automake autoconf libtool perl git
编译安装libressl:
cd /usr/local/src
git clone -b v3.7.2 https://github.com/libressl/portable.git libressl
cd libressl/
./autogen.sh
./configure --prefix="/usr/local/libressl"
make check
make install
echo '/usr/local/libressl/lib' | tee /etc/ld.so.conf.d/libressl.conf
ldconfig
编译安装quictls:
cd /usr/local/src
git clone -b openssl-3.0.8-quic1 https://github.com/quictls/openssl.git
cd openssl/
./Configure --prefix=/usr/local/quictls
make
make test
make install
echo '/usr/local/quictls/lib64' | tee /etc/ld.so.conf.d/quictls.conf
ldconfig
如果你选择boringssl,则需要额外装几个包:
apt -y install curl cmake ninja-build libunwind-dev
并且还需要安装golang:
curl -L https://go.dev/dl/go1.20.4.linux-amd64.tar.gz -o go1.20.4.linux-amd64.tar.gz
tar -C /usr/local -xzf go1.20.4.linux-amd64.tar.gz
echo 'export PATH=$PATH:/usr/local/go/bin' > /etc/profile.d/golang.sh
source /etc/profile.d/golang.sh
编译boringssl:
cd /usr/local/src
git clone https://github.com/google/boringssl
cd boringssl/
cmake -G Ninja -B build
ninja -C build
安装编译nginx-quic所需的其他依赖:
apt build-dep nginx
克隆nginx-quic的代码:
apt -y install mercurial
cd /usr/local/src
hg clone -b quic https://hg.nginx.org/nginx-quic
cd nginx-quic/
使用libressl配置:
./auto/configure \
`nginx -V 2>&1 | sed "s/ \-\-/ \\\ \n\t--/g" | grep "\-\-" | grep -ve opt= -e param= -e build=` \
--with-http_v3_module \
--with-stream \
--with-stream_ssl_module \
--with-stream_realip_module \
--with-stream_ssl_preread_module \
--with-cc-opt="-I/usr/local/libressl/include" \
--with-ld-opt="-L/usr/local/libressl/lib -static"
使用quictls配置:
./auto/configure \
`nginx -V 2>&1 | sed "s/ \-\-/ \\\ \n\t--/g" | grep "\-\-" | grep -ve opt= -e param= -e build=` \
--with-http_v3_module \
--with-stream \
--with-stream_ssl_module \
--with-stream_realip_module \
--with-stream_ssl_preread_module \
--with-cc-opt="-I/usr/local/quictls/include" \
--with-ld-opt="-L/usr/local/quictls/lib64 -static"
使用boringssl配置:
./auto/configure \
`nginx -V 2>&1 | sed "s/ \-\-/ \\\ \n\t--/g" | grep "\-\-" | grep -ve opt= -e param= -e build=` \
--with-http_v3_module \
--with-stream \
--with-stream_ssl_module \
--with-stream_realip_module \
--with-stream_ssl_preread_module \
--with-cc-opt="-I/usr/local/src/boringssl/include" \
--with-ld-opt="-L/usr/local/src/boringssl/build/ssl -L/usr/local/src/boringssl/build/crypto -static"
上面的编译参数我加了几个我平时常用的模块,比如stream_ssl_preread_module模块,你也可以按需修改相关的参数,更多具体的配置可参考这里:http://nginx.org/en/docs/configure.html
现在开始编译:
make
编译完成后会在objs目录下存放nginx的二进制文件,可以先尝试运行看看是否正常:
cd objs/
./nginx -V
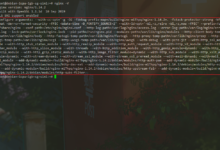
使用libressl编译回显应该如下图所示:
使用quictls编译回显应该如下图所示:
使用boringssl编译回显应该如下图所示:
接下来替换包管理器安装的nginx。为防止替换掉二进制文件后系统升级nginx,可以先设置禁止系统升级nginx:
apt-mark hold nginx
查看nginx这个包在不在hold列表:
apt-mark showhold
停止正在运行的nginx服务:
systemctl stop nginx
用我们自己编译的nginx替换:
cp nginx /usr/sbin/nginx
重新启动nginx:
systemctl start nginx
查看运行状态,如果一切正常则应该如下图所示:
这里额外提一点:这篇文章是静态编译的nginx,所以你还可以直接把编译好的nginx传到其他机器用:
scp nginx root@1.2.3.4:/root
现在来配置站点支持http3,下面这是一个示例配置:
server {
...
    ...
    listen 443 quic reuseport;
    listen [::]:443 quic reuseport;
    add_header Alt-Svc 'h3=":443"; ma=86400';
    quic_retry on;
    ssl_early_data on;
    ...
...
}
nginx-quic还在积极开发,有很多配置参数一直在变化,比如这个更改:https://hg.nginx.org/nginx-quic/rev/69bae2437d74
原本listen字段里面是用http3这个参数来配置,但是现在改成了quic。
又比如这个更改:https://hg.nginx.org/nginx-quic/rev/44553428288d
本来是有http_quic_module这个模块的,但现在已经合并到ngx_http_v3_module里面了。
所以未来有关http3的配置可能还会有改动,务必多关注官方的项目存储库:https://hg.nginx.org/nginx-quic
检查站点是否支持http3,可以使用这个网站:https://http3check.net/
 荒岛
荒岛


