
首先要准备一个域名并接入到CloudFlare。这些步骤就不多BB了,省略。。。
开始我们可以先只使用CloudFlare的DNS,不开启CDN功能,即CF界面的那个云朵的图标改成灰色,显示DNS only即可。
这样做的用意是:
1.如果一开始就套CF的CDN,速度不理想,特别是晚上的时候,看个1080P估计都够呛。
2.一般需要套CDN的时候,都是小鸡的IP被墙了再开启,这样就可以救活小鸡了,说白了就是个救急的办法,不到万不得已没有必要套CDN。
利用v2ray-plugin,我们可以实现这样一套配置:shadowsocks+websocket+tls+nginx。
以下步骤Debian9/10/Ubuntu18.04/19.04通用,首先安装需要用到的软件:
apt -y install shadowsocks-libev libsodium-dev python-certbot-nginx nginx
安装v2ray-plugin:
wget https://github.com/shadowsocks/v2ray-plugin/releases/download/v1.2.0/v2ray-plugin-linux-amd64-v1.2.0.tar.gz
tar -xzvf v2ray-plugin-linux-amd64-v1.2.0.tar.gz
mv v2ray-plugin_linux_amd64 /usr/bin/v2ray-plugin
rm -rf v2ray-plugin-linux-amd64-v1.2.0.tar.gz
编辑shadowsocks-libev的配置文件:
nano /etc/shadowsocks-libev/config.json
修改为:
{
    "server":["::1", "127.0.0.1"],
    "mode":"tcp_and_udp",
    "server_port":51234, # shadowsocks服务port
    "local_port":1080,
    "password":"你的SS连接密码",
    "timeout":60,
    "method":"chacha20-ietf-poly1305",
    "plugin":"v2ray-plugin", # 加载v2ray插件
    "plugin_opts":"server;path=/woweizhangzhexu1s;loglevel=none" # v2ray插件配置
}
重启shadowsocks-libev:
systemctl restart shadowsocks-libev
systemctl enable shadowsocks-libev
接着新建一个nginx站点配置文件:
nano /etc/nginx/conf.d/shadowsocks.conf
只需写入下面的配置即可:
server {
    listen       80;
    server_name  web.sn0w.observer; # 换成你自己的域名

location /woweizhangzhexu1s { # v2ray插件配置的path
    proxy_pass                  http://127.0.0.1:51234; # shadowsocks服务port
    proxy_redirect              off;
    proxy_http_version          1.1;
    proxy_set_header Upgrade    $http_upgrade;
    proxy_set_header Connection "upgrade";
    proxy_set_header Host       $http_host;
    }
}
剩下的申请SSL证书/配置SSL都交给certbot帮我们自动处理:
certbot --nginx --agree-tos --no-eff-email --email xxxxx@qq.com
在certbot配置过程中提示我们是否要强制SSL的时候选择2:
Please choose whether or not to redirect HTTP traffic to HTTPS, removing HTTP access.
- - - - - - - - - - - - - - - - - - - - - - - - - - - - - - - - - - - - - - - -
1: No redirect - Make no further changes to the webserver configuration.
2: Redirect - Make all requests redirect to secure HTTPS access. Choose this for
new sites, or if you're confident your site works on HTTPS. You can undo this
change by editing your web server's configuration.
- - - - - - - - - - - - - - - - - - - - - - - - - - - - - - - - - - - - - - - -
Select the appropriate number [1-2] then [enter] (press 'c' to cancel): 2
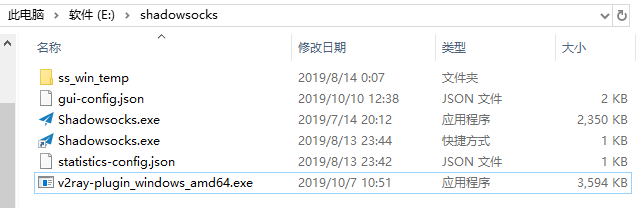
服务端这边就配置好了,接下来是客户端,首先要下载v2ray-plgun的win版本,下载地址:
https://github.com/shadowsocks/v2ray-plugin/releases
文件解压到shadowsocks软件的根目录(运行目录),如图所示:
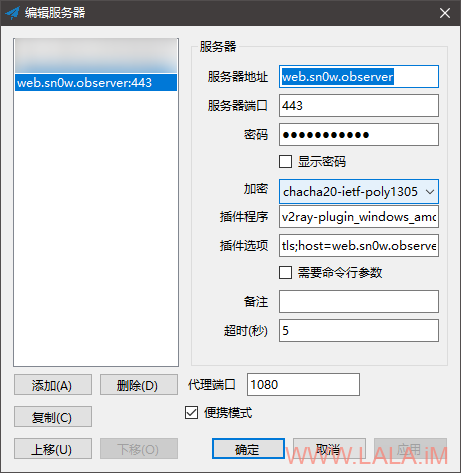
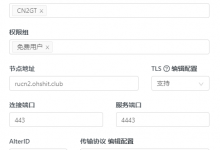
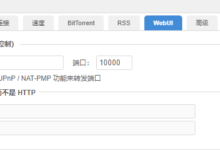
shadowsocks客户端配置如下:
服务器地址:你的域名
服务器端口:443(切记这里的端口是nginx监听的443端口)
密码:你在服务端上配置的密码
加密:你在服务端上配置的加密方式
插件程序:v2ray-plugin_windows_amd64
插件选项:tls;host=web.sn0w.observer;path=/woweizhangzhexu1s
注:host换成你自己的域名,path后面的路径对应nginx上面的配置以及服务端上的配置。
如图所示:
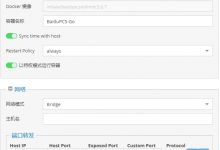
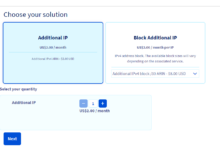
假设某一天我们小鸡的IP被墙了,此时我们只需要再多做2个步骤即可救活小鸡,首先在CloudFlare把域名接入CDN,然后在SSL/TLS界面把配置改成Full(strict)即可:


想问一下大佬照文章的教程配置完后 还想在启用 adguard home 的加密设置可以吗?
你说的加密设置指的是?adguard里面的DoT/DoH么?
是的 我之前一直在琢磨这事就是用 nginx 转移 443 端口 上 v2ray-plugin 的同时可以开启 adguard 的 DoT/DoH功能 但我自己能力有限试了几次都失败了 这次看见大佬这篇教程就想请教一下 这套方案可行性~
我猜测DoT应该可以,DoH可能端口会冲突,我待会试试看。。
坐等大佬教程
申请SSL证书/配置SSL,这步出错,能详细点吗?
certbot申请证书是全自动的,没有什么好详细说的了,最好能把你的错误日志发上来。
我遇到过的错误无非:1.域名解析还没生效/2.域名一个星期内申请的证书过多/3.申请时使用only模式需要用到的80/443端口被占(但本文是使用的nginx模式,不存在这个问题)
一直用obfs混淆,昨晚无意中看到说obfs已不维护了,现在推荐用v2ray-plugin,就想着换掉,结果这一折腾就是整整一夜。按照博主的教程重复了四遍(每次都VPS重装系统),没有任何报错,但最终都是装完测试却连不上,完全不知道问题出在哪儿。我还是回归v2套cf和ss套obfs的日子算了。小白真不适合折腾,每次折腾都是步步艰难万险。心好累。
不死心,试了第五遍,还是不行。
重新 Google 了一个 Docker 部署的教程 https://ssu.tw/index.php/archives/31/ ,ws + TLS ,终于成功了。
谢谢博主和所有无私分享教程的大佬们,感恩。
时隔10个来月过去,才翻到站长大大的这篇教学,翻到老哥你这条评论,我参考站长的教学,也是遇到跟你同样的情况


看到老哥你的评论后,想试试docker部署,但老哥你分享的参考教程链接失效了(还想参考下啊啊啊)
老哥还有同类教程么?在某歌搜索,没翻到了
openwrt里shadowsocks的插件名称和插件参数怎么填?