tuic是一个基于quic协议的高性能代理,更多介绍:https://github.com/EAimTY/tuic
安装服务端:
apt -y update
apt -y install wget certbot
mkdir /opt/tuic && cd /opt/tuic
wget https://github.com/EAimTY/tuic/releases/download/0.8.1/tuic-server-0.8.1-x86_64-linux-gnu
chmod +x tuic-server-0.8.1-x86_64-linux-gnu
新建tuic配置文件:
nano config.json
写入如下配置:
{
    "port": 443,
    "token": ["example"],
    "certificate": "/opt/tuic/fullchain.pem",
    "private_key": "/opt/tuic/privkey.pem",
    "ip": "0.0.0.0",
    "congestion_controller": "bbr",
    "alpn": ["h3"]
}
新建systemd配置文件:
nano /lib/systemd/system/tuic.service
写入如下配置:
[Unit]
Description=Delicately-TUICed high-performance proxy built on top of the QUIC protocol
Documentation=https://github.com/EAimTY/tuic
After=network.target

[Service]
User=root
WorkingDirectory=/opt/tuic
ExecStart=/opt/tuic/tuic-server-0.8.1-x86_64-linux-gnu -c config.json
Restart=on-failure
RestartPreventExitStatus=1
RestartSec=5

[Install]
WantedBy=multi-user.target
申请证书:
certbot certonly \
--standalone \
--agree-tos \
--no-eff-email \
--email imlala@example.com \
-d tuic.example.com
将证书保存到tuic配置文件内配置的位置:
cat /etc/letsencrypt/live/tuic.example.com/fullchain.pem > /opt/tuic/fullchain.pem
cat /etc/letsencrypt/live/tuic.example.com/privkey.pem > /opt/tuic/privkey.pem
启动tuic服务并设置开机自启:
systemctl enable --now tuic.service
新建一个certbot的hook脚本文件,用于让tuic重新加载续期后的新证书:
nano /etc/letsencrypt/renewal-hooks/post/tuic.sh
写入如下内容:
#!/bin/bash
cat /etc/letsencrypt/live/tuic.example.com/fullchain.pem > /opt/tuic/fullchain.pem
cat /etc/letsencrypt/live/tuic.example.com/privkey.pem > /opt/tuic/privkey.pem
systemctl restart tuic.service
给脚本执行权限:
chmod +x tuic.sh
测试续期的情况以及脚本能否正常运行:
certbot renew --cert-name tuic.example.com --dry-run
服务端到这里就全部配置完成了,接下来在这个页面下载客户端:
https://github.com/EAimTY/tuic/releases
我这里使用windows,下载对应架构的文件:
https://github.com/EAimTY/tuic/releases/download/0.8.1/tuic-client-0.8.1-x86_64-windows-gnu.exe
新建客户端的config.json配置文件,在文件内写入如下配置:
{
    "relay": {
        "server": "tuic.example.com",
        "port": 443,
        "token": "example",
        "udp_relay_mode": "quic",
        "congestion_controller": "bbr",
        "alpn": ["h3"],
        "disable_sni": false,
        "reduce_rtt": true
    },
    "local": {
        "port": 2080,
        "ip": "127.0.0.1"
    },
    "log_level": "info"
}
打开powershell运行tuic客户端:
./tuic-client-0.8.1-x86_64-windows-gnu.exe -c config.json
接下来配置v2ray的分流,这里我使用v2rayn,直接给出一份适用于v2rayn的配置文件:
{
  "policy": {
    "system": {
      "statsOutboundUplink": true,
      "statsOutboundDownlink": true
    }
  },
  "log": {
    "access": "",
    "error": "",
    "loglevel": "warning"
  },
  "inbounds": [
    {
      "tag": "socks",
      "port": 10808,
      "listen": "127.0.0.1",
      "protocol": "socks",
      "sniffing": {
        "enabled": false,
        "destOverride": [
          "http",
          "tls"
        ]
      },
      "settings": {
        "auth": "noauth",
        "udp": true,
        "allowTransparent": false
      }
    },
    {
      "tag": "http",
      "port": 10809,
      "listen": "127.0.0.1",
      "protocol": "http",
      "sniffing": {
        "enabled": false,
        "destOverride": [
          "http",
          "tls"
        ]
      },
      "settings": {
        "auth": "noauth",
        "udp": true,
        "allowTransparent": false
      }
    }
  ],
  "outbounds": [
    {
      "tag": "proxy",
      "protocol": "socks",
      "settings": {
        "servers": [
          {
            "address": "127.0.0.1",
            "port": 2080,
            "users": []
          }
        ]
      }
    },
    {
      "tag": "block",
      "protocol": "blackhole",
      "settings": {}
    },
    {
      "tag": "direct",
      "protocol": "freedom",
      "settings": {}
    }
  ],
  "routing": {
    "domainStrategy": "IPOnDemand",
    "rules": [
      {
        "type": "field",
        "outboundTag": "block",
        "domain": ["geosite:category-ads-all"]
      },
      {
      	"type": "field",
        "outboundTag": "direct",
        "domain": ["geosite:cn"]
      },
      {
        "type": "field",
        "outboundTag": "direct",
        "ip": [
          "geoip:cn",
          "geoip:private"
        ]
      }
    ]
  }
}
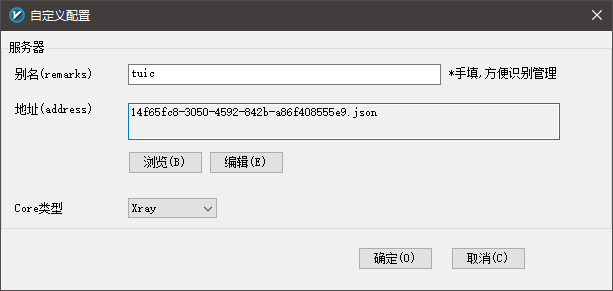
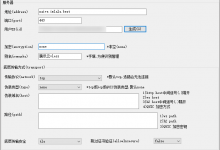
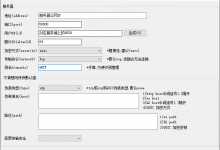
将上面的配置保存为任意名字的.json配置文件,然后在v2rayn添加自定义配置服务器即可:
 荒岛
荒岛






大佬,有空时能不能写下这个项目的教程:https://github.com/fuzhengwei/itstack-ark-wx-test
大佬,聊天室我的账号登录不了@protonmail.com的,邀请码是啥呢?
登录不了是密码忘记了吗?里面没什么重要信息的话,自己重新注册一个吧,邮箱随便填,我没有配置smtp。没有邀请码,注册好了就自动加入默认的群组。
没有邀请码注册不了,提示必须填写邀请码才可以注册
我大概知道怎么回事了,你可能注册错了,现在的聊天室网址是chat.ohsb.net,原来的那个chat.233.fi已经作废了,我博客上面的地址没更新过来。。。
另外chat.233.fi现在指向的这个网站也不是我的,我之前的聊天室搭建在甲骨文,后来甲骨文的这台机器我释放了,但是域名解析记录没删,现在这个站应该是别人开的甲骨文正好又分配到我之前的ip了。。。
无巧不成书
这东西要tlc证书 没域名用不来啊 hysteria 能忽略证书错误,这个是真不会
大佬 安卓客户端咋整 谢谢
用sagernet去
hy tcu这两个特征神器,被gfw抓到直接ip起步