
这篇介绍一下如何用OpenLiteSpeed来实现V2Ray+WebSocket+TLS+CDN。
首先我们来安装openlitespeed和certbot:
apt -y update
apt -y install wget
wget -O - http://rpms.litespeedtech.com/debian/enable_lst_debian_repo.sh | bash
apt -y install openlitespeed certbot
接下来装一下v2ray/清空默认的配置文件/生成一个uuid:
bash <(curl -L -s https://install.direct/go.sh)
echo > /etc/v2ray/config.json
cat /proc/sys/kernel/random/uuid
编辑v2ray的配置文件:
nano /etc/v2ray/config.json
写入如下配置:
{
  "log": {
    "loglevel": "info",
    "access": "/var/log/v2ray/access.log",
    "error": "/var/log/v2ray/error.log"
  },
  "inbounds": [
    {
      "port": 10000,
      "listen":"127.0.0.1",
      "protocol": "vmess",
      "settings": {
        "clients": [
          {
            "id": "你生成的UUID",
            "alterId": 64
          }
        ]
      },
      "streamSettings": {
        "network": "ws",
        "wsSettings": {
        "path": "/sometimesnaive"
        }
      }
    }
  ],
  "outbounds": [
    {
      "protocol": "freedom",
      "settings": {}
    }
  ]
}
检查v2ray配置是否有误:
/usr/bin/v2ray/v2ray -config /etc/v2ray/config.json -test
没问题的话重启v2ray使新的配置生效:
systemctl restart v2ray
接下来需要配置OpenLiteSpeed,需要做的配置有:
1.更改OpenLiteSpeed的WEB控制台密码
2.新建一个SSL监听器
3.新建一个虚拟主机
4.映射虚拟主机到相应的监听器
关于这4个步骤,本文不再重复,如果你不会操作的话可以参考这篇文章:
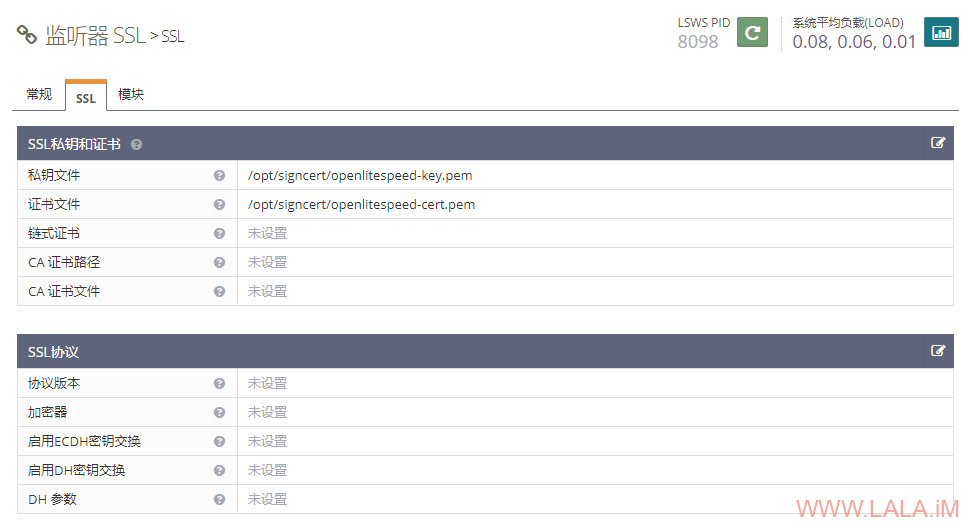
这里只简单截几张配置好的图片,首先是SSL监听器:
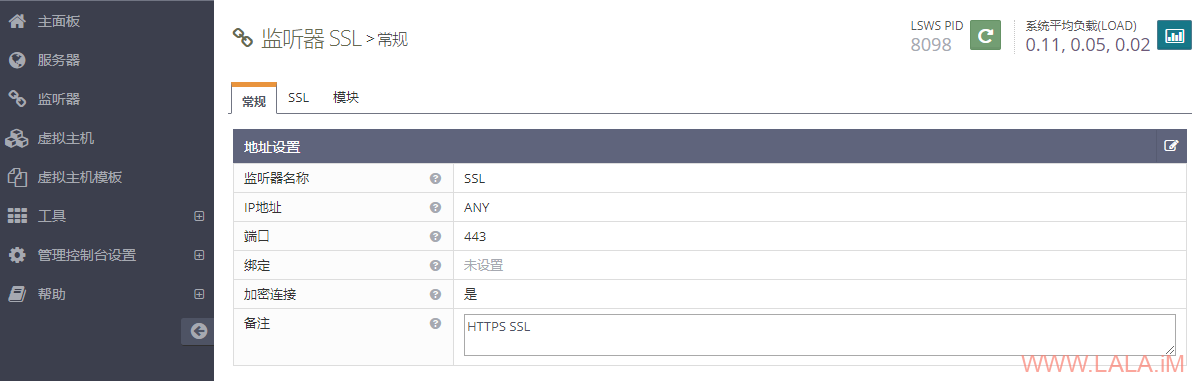
SSL监听器这里我用的自签证书:
接着是新建虚拟主机,“基本”配置:
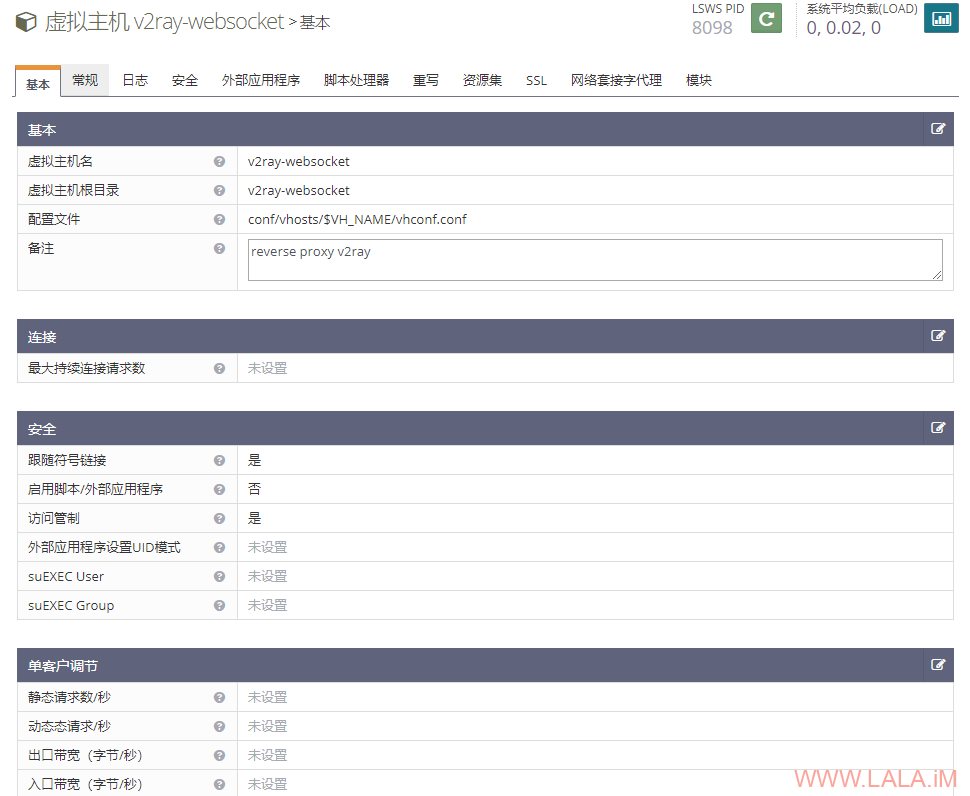
你可能需要先把虚拟主机的目录创建好才能进行这项配置,基于上图内的配置,你可以直接执行下面的命令创建好目录:
mkdir /usr/local/lsws/v2ray-websocket
mkdir /usr/local/lsws/v2ray-websocket/html
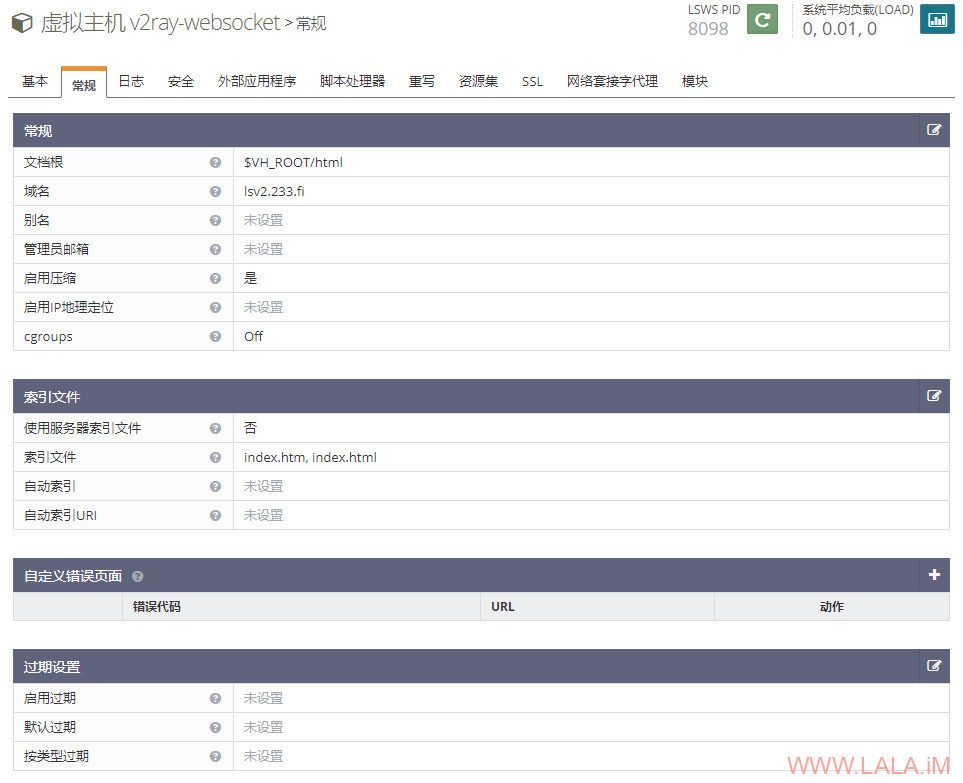
然后是“常规”配置:
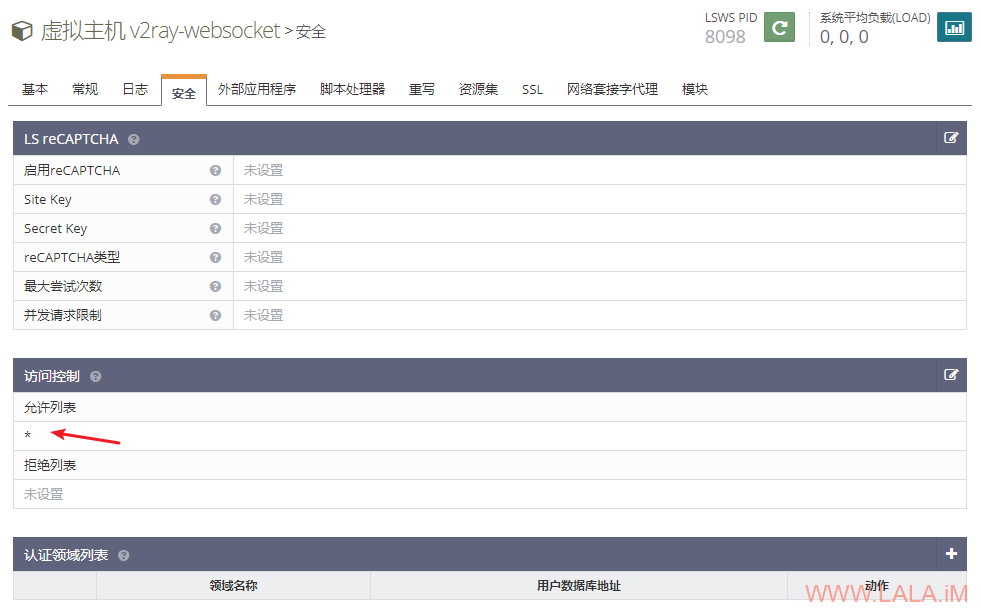
此外在“安全”这个选项卡内,访问控制这里要填写一个*允许所有人访问:
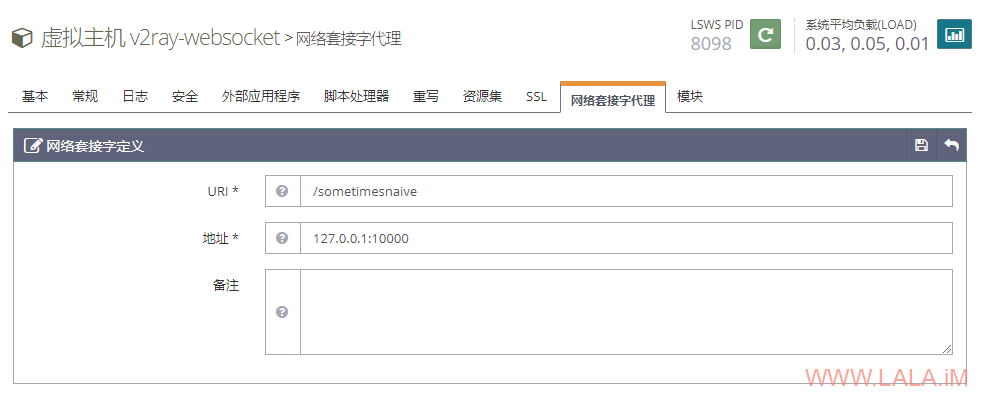
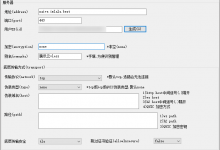
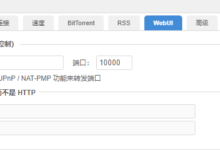
现在来到非常关键的一步了,找到“网络套接字代理”,在这里新建一个websocket代理,如果你之前没有改动v2ray的配置,那么按下图填写即可:
虚拟主机就新建好了,其实如果你嫌麻烦的话也可以在你现有的虚拟主机内直接添加一个“网络套接字代理”,这样就不用新建虚拟主机了。
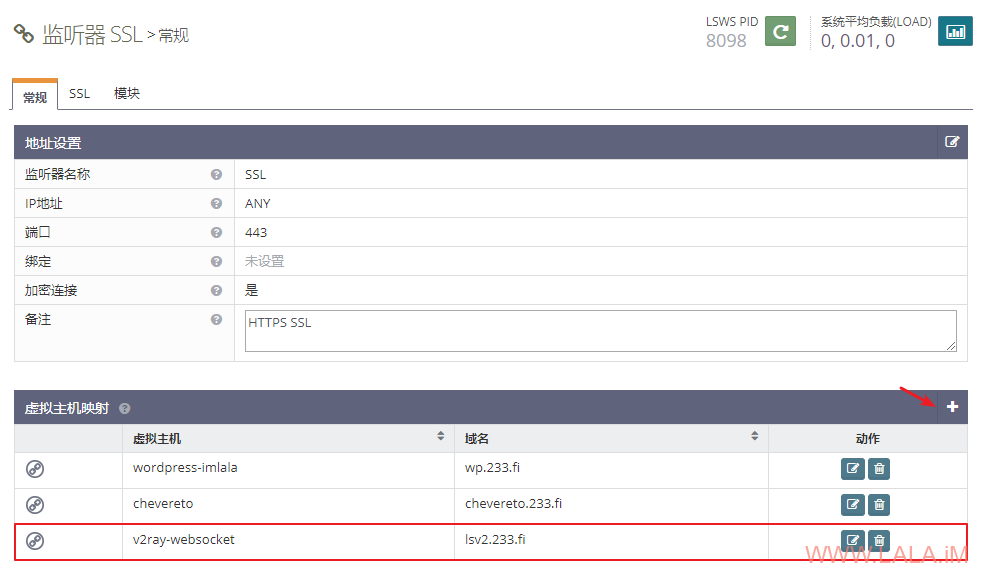
接下来把刚才新建的这个虚拟主机映射给刚创建的SSL监听器:
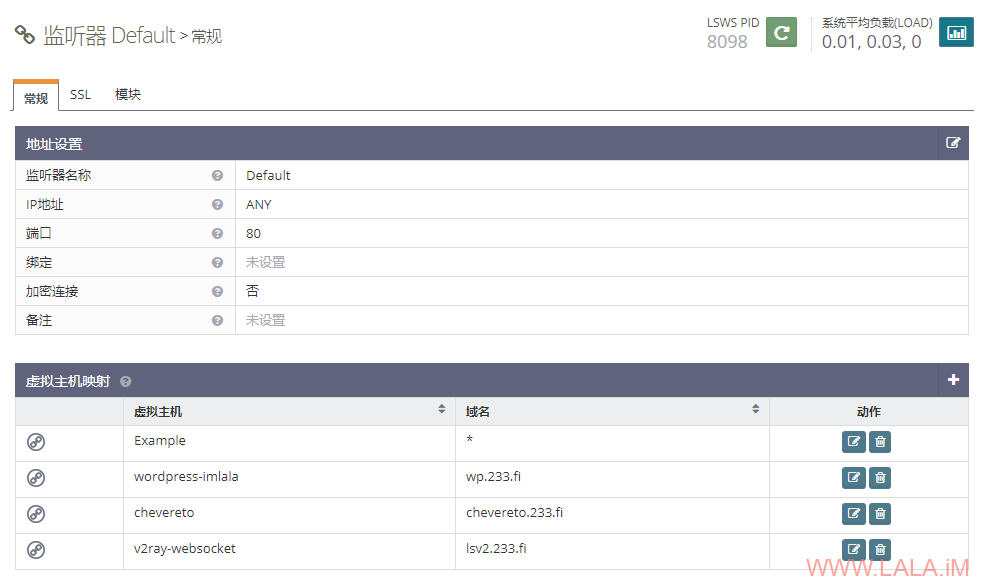
同时你也需要映射给80端口的default监听器(待会使用certbot签发letencrypt证书的时候用到:)
在OpenLiteSpeed的WEB控制台上重启使刚才配置的这些内容生效。
现在你可以使用certbot签发一个域名证书:
certbot certonly --agree-tos --no-eff-email --email xxxx@qq.com --webroot -w /usr/local/lsws/v2ray-websocket/html -d lsv2.233.fi
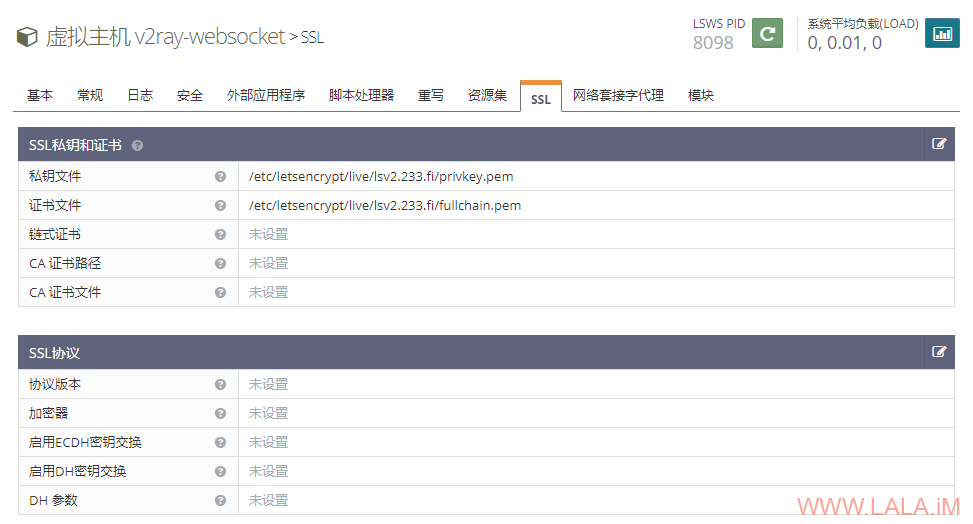
然后回到虚拟主机,找到“SSL”配置,按下图填上你刚新建的证书:
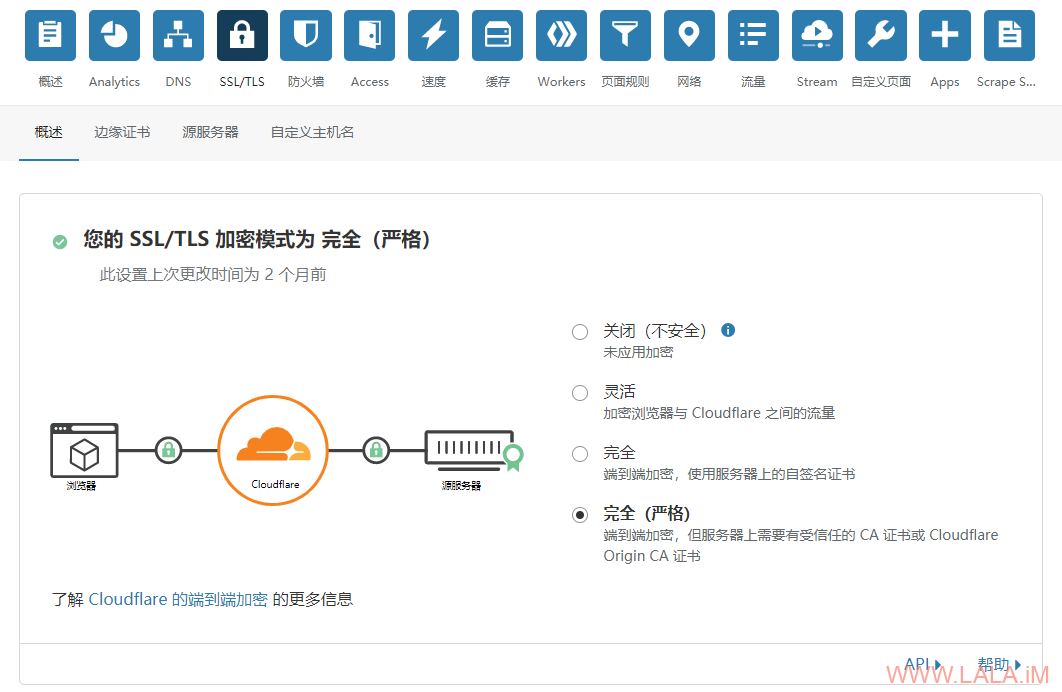
最后在CloudFlare的SSL/TLS界面把加密设置为完全(严格)
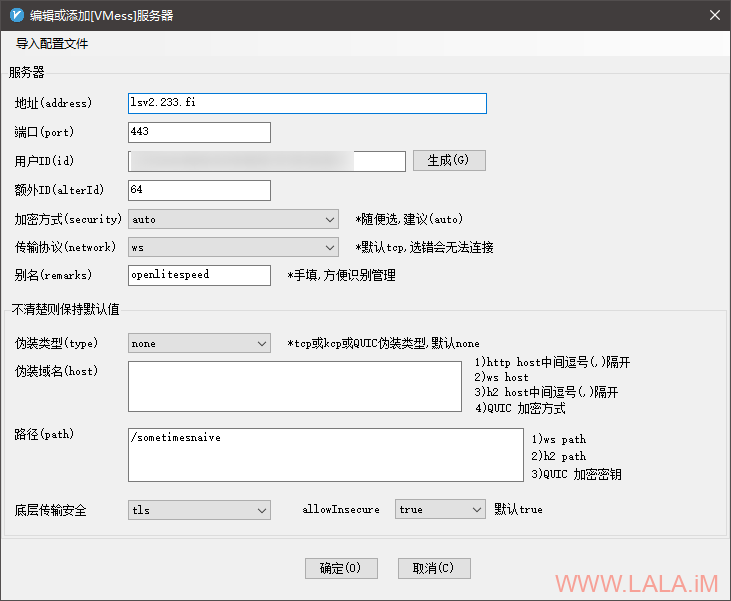
v2rayN客户端的配置:
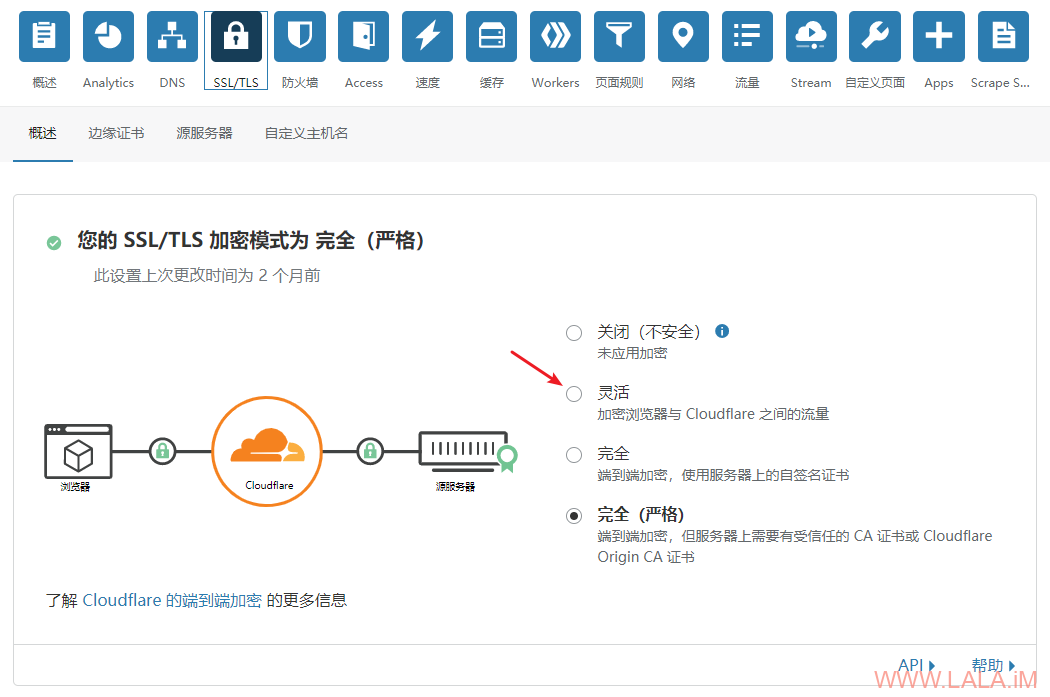
这里额外补充点内容,如果你只是单纯的想套CDN的话(始终使用CDN,不考虑直接与源服务器连接)那么你可以偷懒省略一些步骤。
OpenLiteSpeed的虚拟主机可以不配置SSL证书,然后在CloudFlare的SSL/TLS界面把加密设置为灵活:


lala我们啥时候还能再次蹦迪
lala,啥时候做个xfilesharing的安装教程,这个程序不是一般呃牛🐮,来你网站也快1年,学到了不少东西,最喜欢的就是安装教程类的!希望做个xfilesharing的教程哦
这个程序收费的呀,而且我没找到比较新一点的开心版。。
你可以看看yetishare这个,功能也很丰富。
lala啥时候研究一下https://spug.qbangmang.com/docs/about-spug/
这个我前几天貌似在哪里看到过,看介绍赶脚很不错的样子,而且还可以docker一把梭
谢谢大佬,按照教程一步一步成功了, 但我想问一下,Docker不是更简单吗?还可以几种科学上网方式同时并存。
你是说用docker运行openlitespeed吗?可以是可以,但是这种webservers类的软件用docker感觉不利于配置,而且openlitespeed和php是绑定的关系,不像nginx就一个纯webserver。。
我说的是docker安装v2ray,ss,trojan,一台服务器三合一。
“v2ray的TLS流量可被简单特征码匹配精准识别(附PoC)”,和本文中用的TLS,不一样吧 当前v2ray core的这个Bug对本文没任何影响吧
影响。。
服务端客户端都更新了,安卓上 BifrostV 今天疑似已不行了,换 v2rayNG 正好参考上文 v2rayN客户端的配置设置
lala 能帮一下吗,同样也是openlitespeed反代websocket,我这反代的是mattermost聊天室的后端,显示
Failed to upgrade websocket connection.”,”caller”:”web/context.go:105″,”path”:”/api/v4/websocket”,”request_id”:”m8ct7x3f7jbozxjws1s5h6bpqw”,”ip_addr”:”2001:xxxxxx:xxxx:xxxx”,”user_id”:”hcyuqj4yqfb79nxpbemuti1uqr”,”method”:”GET”,”err_where”:”connect”,”http_code”:500,”err_details”:”websocket: the client is not using the websocket protocol: ‘upgrade’ token not found in ‘Connection’ header”}
实在不懂怎么写
ols反代不好用,不是刚需的话还是用nginx吧。。
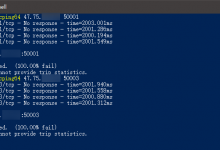
openlitespeed 的websocket , V2rayN 客户端日志提示 error 400 bad request