
昨天在TG上面和一个老哥吹水,无意间老哥发给我一个Gayhub的链接,看这个项目名字觉得有点牛逼,打开看了一下,好像确实有那么点意思~
这个trojan主要是可以伪装成HTTPS的正常流量绕过GFW的检测,实现爬梯功能。当然某些情况下也能帮助你解决QoS的问题。
本来我想着应该很好在CentOS上安装的吧,结果看了wiki半天,CentOS呢?怎么木有?各种各样的系统都支持唯独不支持CentOS?这波操作秀的秀的,没办法,自己那股倔劲上来了,我非要把这个装到CentOS上面去。
因为这个程序开发用到的很多依赖版本都很新,CentOS上面支持的版本都过于老旧,所以很遗憾几乎所有的软件都需要靠编译来安装。
好吧,然后就是下面的各种折腾了,这里记录一下过程。。。
首先,如果你也想和我一样把这个trojan装到CentOS7上面的话,你需要准备下面几样东西:
1.一个域名解析到你的VPSIP上(trojan连接需要使用域名)
2.一台内存大于1GB的VPS(编译软件需要)
更新系统:
yum -y update
把系统自带的openssl/cmake卸载掉。
yum -y remove openssl openssl-devel cmake
安装EPEL源:
yum -y install epel-release
安装开发工具包:
yum -y groupinstall "Development Tools"
安装certbot用于签发SSL证书:
yum -y install certbot
安装编译openssl/cmake/boost所需的依赖:
yum -y install wget git libtool perl-core zlib-devel bzip2-devel python-devel
首先编译安装openssl:
cd
wget https://www.openssl.org/source/openssl-1.1.1.tar.gz
tar -xzvf openssl-1.1.1.tar.gz
cd openssl-1.1.1
./config --prefix=/usr/local/openssl --openssldir=/usr/local/openssl shared zlib
make
make test
make install
完成之后新建一个动态连接库文件:
vi /etc/ld.so.conf.d/openssl-1.1.1.conf
写入:
/usr/local/openssl/lib
另其生效:
ldconfig -v
接着配置环境变量,新建一个配置文件:
vi /etc/profile.d/openssl.sh
写入:
pathmunge /usr/local/openssl/bin
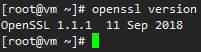
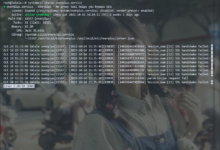
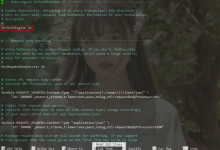
这样openssl就安装完成了,使用如下命令查看一下版本号:
openssl version
如图所示是最新版本1.1.1:
接下来编译安装cmake,这个比较容易没什么坑:
cd
wget https://cmake.org/files/v3.12/cmake-3.12.3.tar.gz
tar -xzvf cmake-3.12.3.tar.gz
cd cmake-3.12.3
./bootstrap
gmake
gmake install
最后来编译安装boost,这个玩意比较耗时间,机器性能好的话,30分钟左右吧:
cd
wget https://dl.bintray.com/boostorg/release/1.68.0/source/boost_1_68_0.tar.gz
tar -xzvf boost_1_68_0.tar.gz
cd boost_1_68_0
./bootstrap.sh --prefix=/usr/local/include/boost
./b2
./b2 install
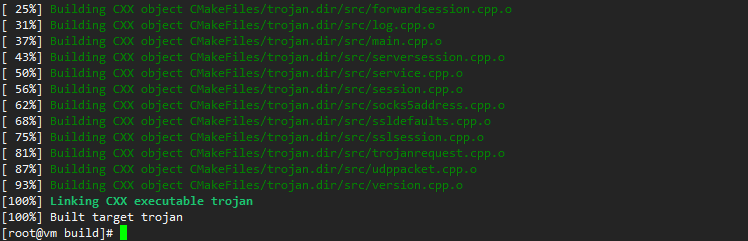
现在终于可以编译安装trojan了:
cd
git clone https://github.com/trojan-gfw/trojan.git
cd trojan
mkdir build && cd build/
cmake .. -DENABLE_MYSQL=OFF -DENABLE_SSL_KEYLOG=ON -DFORCE_TCP_FASTOPEN=ON -DSYSTEMD_SERVICE=AUTO -DOPENSSL_ROOT_DIR=/usr/local/openssl -DBOOST_INCLUDEDIR=/usr/local/include/boost/include
make
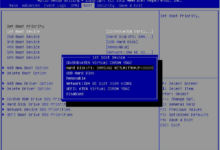
如果一切正常,那么你将看到类似下图的输出:
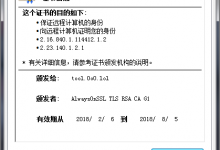
现在给你的域名申请一枚Let’s Encrypt的SSL证书(example.com替换成你的域名):
certbot certonly --standalone -d example.com
申请成功之后证书的路径如下:
/etc/letsencrypt/live/example.com/fullchain.pem
/etc/letsencrypt/live/example.com/privkey.pem
现在我们复制编译好的trojan二进制文件到usr/local/bin:
cp trojan /usr/local/bin/
接着复制trojan的systemd服务文件:
cp trojan.service /etc/systemd/system/
然后新建一个trojan配置文件存放目录:
mkdir -p /usr/local/etc/trojan
新建配置文件:
vi /usr/local/etc/trojan/config.json
写入如下的配置内容(你需要根据自己的信息来修改):
{
    "run_type": "server",
    "local_addr": "0.0.0.0",
    "local_port": 443,
    "remote_addr": "127.0.0.1",
    "remote_port": 80,
    "password": [
        "设置一个密码"
    ],
    "log_level": 1,
    "ssl": {
        "cert": "/etc/letsencrypt/live/example.com/fullchain.pem",
        "key": "/etc/letsencrypt/live/example.com/privkey.pem",
        "key_password": "",
        "cipher": "ECDHE-ECDSA-AES256-GCM-SHA384:ECDHE-RSA-AES256-GCM-SHA384:ECDHE-ECDSA-CHACHA20-POLY1305:ECDHE-RSA-CHACHA20-POLY1305:ECDHE-ECDSA-AES128-GCM-SHA256:ECDHE-RSA-AES128-GCM-SHA256:ECDHE-ECDSA-AES256-SHA384:ECDHE-RSA-AES256-SHA384:ECDHE-ECDSA-AES128-SHA256:ECDHE-RSA-AES128-SHA256",
        "prefer_server_cipher": true,
        "alpn": [
            "http/1.1"
        ],
        "reuse_session": true,
        "session_ticket": false,
        "session_timeout": 600,
        "plain_http_response": "",
        "curves": "",
        "dhparam": ""
    },
    "tcp": {
        "no_delay": true,
        "keep_alive": true,
        "fast_open": true,
        "fast_open_qlen": 20
    },
    "mysql": {
        "enabled": false,
        "server_addr": "127.0.0.1",
        "server_port": 3306,
        "database": "trojan",
        "username": "trojan",
        "password": ""
    }
}
OK,现在就可以尝试启动trojan了:
systemctl daemon-reload
systemctl start trojan.service
设置开机启动:
systemctl enable trojan.service
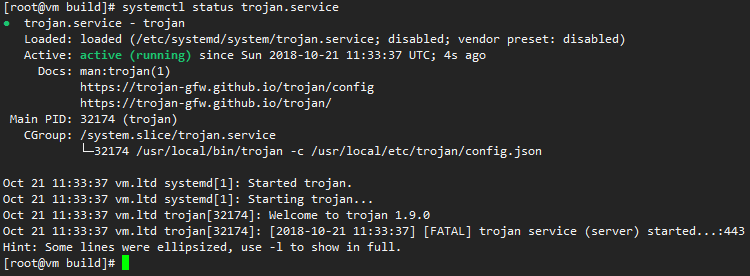
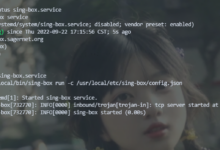
查看运行状态:
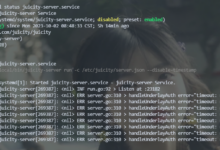
systemctl status trojan.service
如果一切正常,你将可以看到类似下图信息:
现在把系统的防火墙关闭:
systemctl stop firewalld.service
systemctl disable firewalld.service
服务端至此就部署完成了,接下来是客户端,Win客户端已经有现成的exe了,下载下来直接用即可,不过还是得先配置客户端文件:
{
    "run_type": "client",
    "local_addr": "127.0.0.1",
    "local_port": 10800,
    "remote_addr": "你的域名",
    "remote_port": 443,
    "password": [
        "你的密码"
    ],
    "append_payload": true,
    "log_level": 1,
    "ssl": {
        "verify": true,
        "verify_hostname": true,
        "cert": "",
        "cipher": "ECDHE-ECDSA-AES128-GCM-SHA256:ECDHE-RSA-AES128-GCM-SHA256:ECDHE-ECDSA-AES256-GCM-SHA384:ECDHE-RSA-AES256-GCM-SHA384:ECDHE-ECDSA-CHACHA20-POLY1305-SHA256:ECDHE-RSA-CHACHA20-POLY1305-SHA256:ECDHE-RSA-AES128-SHA:ECDHE-RSA-AES256-SHA:RSA-AES128-GCM-SHA256:RSA-AES256-GCM-SHA384:RSA-AES128-SHA:RSA-AES256-SHA:RSA-3DES-EDE-SHA",
        "sni": "",
        "alpn": [
            "h2",
            "http/1.1"
        ],
        "reuse_session": true,
        "session_ticket": false,
        "curves": ""
    },
    "tcp": {
        "no_delay": true,
        "keep_alive": true,
        "fast_open": false,
        "fast_open_qlen": 20
    }
}
以上配置保存到软件根目录下的config.json内即可,不过需要你注意的是:
1.我为了避免这个和SSR的冲突,我把本地端口监听改成了10800,如果你不需要可以改成1080,反正这个随你自行发挥。
2.密码填写你服务端上password字段设置的密码而不是key_password,此外key_password这个字段也可以不设置留空。
3.域名直接填写你的域名地址,不要带什么http/www这些。
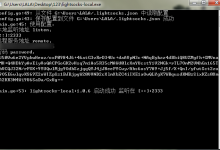
设置完成之后,打开你的CMD或者PowerShell,进入到软件的目录运行软件即可:
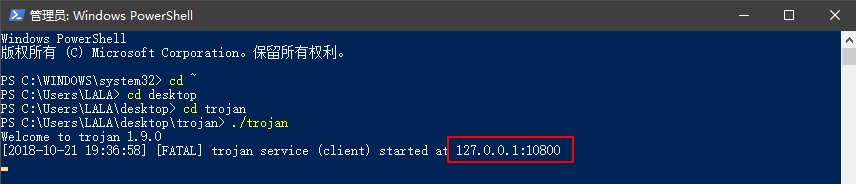
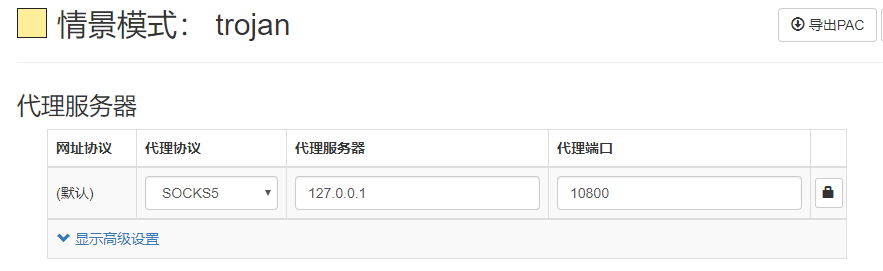
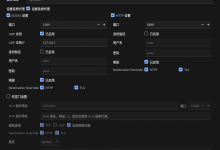
这样trojan就和服务端建立好连接了,现在你只需要把需要爬梯的软件代理设置成本地的地址即可,比如在Chrome的插件内这样设置:
测试了一下油管,感觉这个协议有点飘:

另外这个软件还有一个比较骚气的功能,它默认是监听443端口,并且任何除此软件之外的协议访问443都会跳转到80端口,也就是说你可以利用Nginx在80端口上搭建一个页面或是网站,其他人访问你这个443端口就会跳到你设置的页面。这里就不多介绍了,我个人没什么需求。。。
最后,如果你装不起来就去用Debian或者Ubuntu吧,那里有现成的二进制包。


前几天看到一个评论发现了这玩意,折腾了一下,发现都没成功, ,有时间试试博主的方法
我之前对这个工具有点误解,release里面的二进制版本也可以直接在CentOS上面运行,不用编译。
相比酸酸乳咋样
因为现在没有GUI和移动端支持所以用起来会麻烦一点。
为什么我觉得这个东西有点像免流啊哈哈哈哈

后面那一句话的意思就是可以做油管云呆梨?
socks5,做什么proxy都可以,我只是用油管简单测试了一下速度。
怎么不写一个Debian系统的教程呢?
自行make install (debian9以上
这个工具看起来很不错,对付gfw即将升级完成的2.0应该没问题的吧。希望博主对这个工具写出脚本这样简单些
写一个一键脚本解决一切!
你网址这么长,都直接进垃圾箱了。。还好我给手动放出来了。。
boost按博主教程编译中间有许多failed compile gcc…什么的
cp trojan /usr/local/bin/
cp trojan.service /etc/systemd/system/ 权限呢?
机子是你自己的,要什么权限不会自己给?
伪装成一个新站跑大流量,这个特征其实也很明显。